The ‘Tissue Test’ for Spotting a Drain Pipe Leak Under Your Kitchen Laminate
The ‘Tissue Test’ for Spotting a Drain Pipe Leak Under Your Kitchen Laminate
There is a specific, unsettling feeling that every homeowner in the Lower Mainland dreads: stepping onto your kitchen floor and feeling a slight “squish” or hearing a faint “crunch.” In my 20 years of experience as a specialist in plumbing, boilers, and HVAC, I have seen this scenario play out in hundreds of homes from North Vancouver to Surrey. When your kitchen laminate begins to act up, it is rarely a cosmetic issue; it is usually a distress signal from a hidden water leak.
Kitchens are the high-traffic hubs of our homes, but they are also the most plumbing-dense areas. Between the dishwasher, the refrigerator’s ice maker, the primary sink, and the garburator, there are dozens of connection points where a seal can fail. Because laminate flooring is designed to be tight-fitting, a leak often doesn’t show up as a puddle on top of the floor. Instead, the water travels underneath, saturating the underlayment and the subfloor before you even realize there is a problem. This is where drainage repairs become critical to saving your home from structural damage and mold.
Symptoms of a Hidden Kitchen Drain Leak
Before we dive into the diagnostic tests, you need to know what you are looking for. Laminate flooring is a composite material, and while the top wear layer is often water-resistant, the core is typically made of high-density fiberboard (HDF). When HDF meets moisture, it acts like a sponge.
One of the most common signs of a leak is “peaking.” This occurs when the edges of the laminate planks push against each other and lift upward, creating a V-shape. This happens because the boards are expanding due to moisture absorption, but they have run out of room to move. If you notice this, you should check why your laminate expansion gap needs to be wider in the kitchen, but keep in mind that expansion is often driven by a hidden leak rather than just temperature changes.
Another definitive sign, often discussed in professional plumbing circles and even among homeowners on local forums, is the “seeping joint.” If you step on a plank and a small amount of water bubbles up through the seam, your subfloor is already saturated. This is a clear indicator that you need a plumber Vancouver or plumbing Surrey BC expert immediately. At this stage, the damage is no longer just “potential.” You can also read more about why your kitchen floor is suddenly spongy around the refrigerator to see if your symptoms match a common appliance failure.
What is the ‘Tissue Test’?
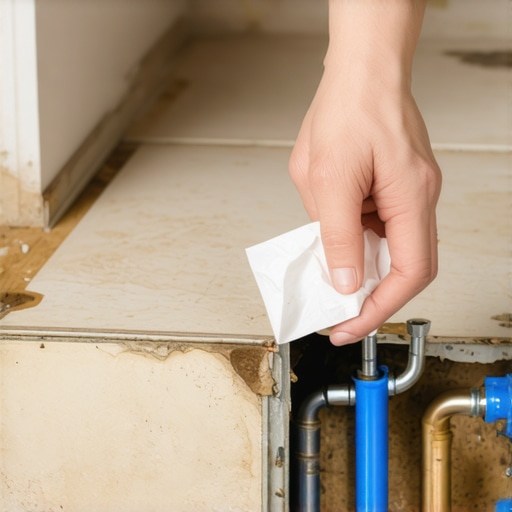
When I am called out for leak detection in a home in Burnaby or Coquitlam, I often use high-end thermal imaging cameras and acoustic moisture meters. However, for a homeowner, the best first line of defense is what I call the “Tissue Test” (sometimes referred to as the Paper Towel Trick).
The Tissue Test is designed to find “ghost leaks” – those tiny, intermittent drips that only happen when a specific volume of water is moving through a pipe or when a certain appliance is running. These leaks are often too small to see with the naked eye because the water evaporates or clings to the underside of the pipe, but they are more than enough to cause long-term damage to your flooring. This method is a variation of the paper towel trick for finding a hidden drain pipe leak under your floor, and it is remarkably effective because of the high absorbency and “blossom” effect of white tissue paper.
Step-by-Step Guide: Performing the Tissue Test
To perform this test correctly and avoid a costly drain pipe repair, follow these technical steps precisely:
1. Prepare the Environment
Empty everything from under your kitchen sink. You need a clear line of sight to every pipe, joint, and the point where the plumbing enters the floor or wall. Use a flashlight to inspect for any obvious standing water or mold. If you find significant mold, you may need a plumber Vancouver BC who understands the health protocols involved in drainage work.
2. Dry the Pipes Thoroughly
This is the most important step. Use a dry microfiber cloth to wipe down every inch of the P-trap, the basket strainer assembly, and the dishwasher discharge hose. The pipes must be bone-dry to the touch before you begin the test.
3. Apply the Tissues
Take standard white facial tissues or single-ply paper towels. Wrap them around every joint and connection point. This includes:
- The connection between the sink drain and the tailpiece.
- The slip joints on the P-trap.
- The connection where the dishwasher hose meets the sink drain or garburator fix.
- The shut-off valves for your hot and cold water lines.
Secure the tissues with a small piece of blue painter’s tape. Do not use duct tape or packing tape, as these can leave a residue that makes future repairs difficult.
4. The Stress Test
Now, run the water. Don’t just turn on the tap; fill the sink to the brim and then pull the plug. This creates “head pressure,” forcing a large volume of water through the drainage system all at once. This is when most drainage repair needs become apparent. While the water is draining, watch the tissues.
5. The “Blossom” Check
A “blossom” is a localized spot of moisture that spreads rapidly across the tissue. Because tissues are designed to wick moisture, even a single drop from a pinhole leak will cause a visible, dark circle to expand. If the tissue remains pristine and white, that specific joint is likely secure. If it blossoms, you’ve found your culprit.
This method differs slightly from the ‘Cardboard Test’ for detecting hidden drain pipe leaks in Vancouver homes, which is better suited for larger leaks in crawlspaces or basements where you can leave the material for 24 hours.
Common Culprits: Beyond the Sink
If the Tissue Test under the sink comes up dry, but your laminate is still buckling, we need to look elsewhere. In my time as a plumber Coquitlam and Vancouver residents trust, I’ve found that the source is often an appliance rather than a pipe.
The Garburator Seal
If you have a waste disposal unit, the mounting ring can loosen over time due to the vibration of the motor. A garburator fix might be as simple as tightening the mounting bolts or replacing the plumber’s putty. However, if the internal seals of the unit have failed, water may be leaking directly through the motor housing and onto your subfloor.
The Refrigerator Water Line
Many modern kitchens in Surrey and Vancouver feature fridges with built-in ice makers and water dispensers. These are fed by thin plastic or copper lines that are prone to kinking or cracking. If you notice damage near the fridge, check why your kitchen laminate is buckling near the fridge. A slow drip here can go unnoticed for months because it is hidden behind the appliance.
Dishwasher Supply and Drain Hoses
The dishwasher is a frequent source of water leaks. The pump seals or the door gaskets can fail, but the most common issue is the drain hose. If the hose isn’t installed with a “high loop,” dirty water can backflow and eventually cause a leak at the connection point. If you suspect this, searching for a drain service near me is the best way to ensure the appliance is re-installed to code.
The Vancouver Context: Why Local Climate Matters
Living in the Lower Mainland presents unique challenges for home maintenance. Our high relative humidity means that once water gets trapped under laminate flooring, it rarely dries out on its own. In cities like North Vancouver or West Vancouver, where rainfall is higher, the ambient moisture levels can accelerate the growth of mold and mildew in the dark, damp space beneath your floorboards.
Furthermore, plumbing in Surrey BC and Vancouver must adhere to the BC Building Code, which has specific requirements for drainage venting and pipe slope. If a previous renovation was done without a permit or by an unlicensed “handyman,” the drainage system might not be handling the load correctly, leading to frequent clogs and pressure-related leaks. This is why hiring a professional plumber Burnaby or plumbers in Coquitlam BC is essential – not just to fix the leak, but to ensure the entire system is compliant and safe.
When DIY Isn’t Enough: Professional Leak Detection
Sometimes, the Tissue Test fails. You see the floor buckling, you smell the musty odor of damp wood, but every tissue you wrap under the sink remains dry. This is a sign of a more serious issue, such as a “slab leak” (a leak in the pipes under your concrete foundation) or a leak inside the wall cavity.
In these cases, you need emergency services plumbing. Professionals like myself use specialized tools, including:
- Acoustic Sensors: To “hear” the sound of pressurized water escaping a pipe through several inches of concrete or drywall.
- Thermal Imaging: To see the temperature differential caused by moisture behind a wall.
- Moisture Meters: To map the exact spread of the water under your laminate without tearing up the whole floor.
If you are in need of a plumbing North Van specialist or a plumber West Vancouver, don’t wait until the floor is completely ruined. Early detection is the difference between a $500 repair and a $15,000 floor replacement.
The Importance of Professional Drainage Repairs
Once a leak is identified, the focus shifts to drainage repairs. It is tempting to try a quick fix with some waterproof tape or sealant, but in the world of plumbing, these are temporary band-aids. A proper drain pipe repair involves cutting out the compromised section of pipe and replacing it with high-quality PVC, ABS, or copper, depending on your home’s existing system.
If you are looking for plumbers Surrey BC or plumbers Vancouver BC, ensure they are bonded and insured. A professional hvac company Vancouver or plumbing firm will also check your boiler repairs near me or furnace needs, as water leaks can sometimes impact nearby mechanical systems if they are located in a basement or utility closet below the kitchen.
Conclusion & Mitigation
Finding a leak is only half the battle. Once the plumbing is fixed, you must address the flooring. If the moisture was caught early, you might be able to save the laminate by using high-powered fans and dehumidifiers. However, if the planks have already begun to peak or bubble, they likely need to be replaced. You can find guidance on how to fix a bubbled laminate plank caused by a spill, but keep in mind that a subfloor leak is much more invasive than a surface spill.
In summary, the Tissue Test is a powerful, cost-effective tool for any homeowner. By being proactive and performing this simple check once or twice a year, you can catch water leaks before they cause catastrophic damage. If your test reveals a problem, or if you are still seeing signs of moisture despite a dry test, contact a professional for drainage repairs and comprehensive plumbing services near me. With 20 years of experience serving the Vancouver and Surrey areas, I can tell you that a little bit of vigilance today goes a long way in protecting your home’s value tomorrow.