The ‘Credit Card’ Trick for Checking Laminate Expansion Gaps
Homeowners always ask why their waterproof vinyl or laminate is buckling. Usually, it is because they locked it under a heavy kitchen island, killing the floor’s ability to breathe. I once walked into a job where the entire kitchen floor had risen three inches off the subfloor because the installer tight-fitted the planks against the drywall. It looked like a mountain range made of plastic wood. I spent three days grinding concrete on a job last month just so the floor would not click like a castanet. If you do not respect the physics of expansion, your floor will punish you. I have spent twenty five years with sawdust under my nails and a moisture meter in my pocket, and if there is one thing I know, it is that a floor is not a decoration, it is a structural system in constant motion.
The hidden physics of laminate expansion gaps
Laminate expansion gaps are essential perimeter spaces between the flooring and walls that allow High Density Fiberboard (HDF) to expand and contract with relative humidity. These gaps, typically measuring between 1/4 inch and 3/8 inch, prevent plank buckling, joint peaking, and locking mechanism failure during seasonal shifts.
Laminate is a composite material. It is made primarily of wood fibers saturated in resin. These fibers are hygroscopic. They drink moisture from the air even if you think your house is dry. When the humidity rises in the summer, those fibers swell. If the floor is tight against a wall or a door frame, it has nowhere to go but up. That is when you get peaking. Peaking is when the edges of the planks push against each other and lift. It ruins the floor and it is a nightmare to fix without tearing everything out. The credit card trick is a simple way to verify you have at least a minimum clearance, though a single card is often thinner than the required gap. You use it to ensure the gap has not been completely choked by debris or poor cutting.
How to use the credit card trick to save your floor
The credit card trick involves sliding a standard plastic card into the expansion gap at the perimeter of the room to ensure clearance. While a single credit card is approximately 0.03 inches thick, stacking three or four cards helps verify the minimum 1/4 inch gap required for floating floor stability.
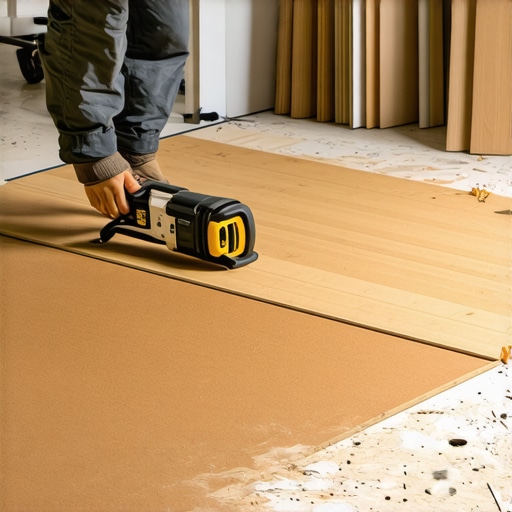
When I am walking a job site to troubleshoot a floor that is making a clicking sound, the first thing I do is pull a piece of baseboard. I take my credit card and try to slide it into the gap. If that card hits the wall and the plank at the same time, I know exactly why the floor is failing. The floor is gasping for air. It is jammed. In a proper install, that card should fall into a void. For a real check, I use a stack of cards or a dedicated spacer. If you are a DIYer, keep a card in your pocket. Check every four feet. If the gap is too tight, you need to get the oscillating saw out and undercut the drywall. It is messy, it smells like burnt resin, and it is the only way to save the locking system from snapping under the pressure of thermal expansion.
“A floor is only as good as the subfloor beneath it; deflection is the enemy of every joint.” – Master Flooring Axiom
The foundation that determines your floors fate
Subfloor leveling is the process of flattening a substrate to a tolerance of 3/16 inch over 10 feet to prevent vertical deflection. Using self-leveling underlayment or grinding high spots on a concrete slab ensures that the laminate locking mechanisms do not experience torsional stress or structural fatigue.
Most guys skip the leveling compound. They think the underlayment will hide the dip. It won’t. I have seen guys throw down two layers of foam underlayment thinking they are being smart. They are actually killing the floor. Too much cushion causes the planks to bounce. When you walk on it, the tongue and groove joints flex. Over six months, that plastic or wood tongue will just snap off. Then you have a floating floor that is actually just a pile of loose boards. You need to be within that 3/16 inch tolerance. I use a ten foot straight edge. If I can see light under it, I am pouring leveler. It is about the chemistry of the bond. If you are over concrete, you need to check for moisture. A slab might look dry, but it is a sponge. If the moisture vapor emission rate is too high, it will rot the HDF core from the bottom up. I don’t care if the box says waterproof. The core is not waterproof. Only the top layer is.
| Floor Property | Standard Specification | Measurement Tool |
|---|---|---|
| Expansion Gap | 1/4 to 3/8 inch | Spacers or Card Stack |
| Subfloor Flatness | 3/16 inch per 10 feet | Straight Edge |
| Wear Layer Thickness | 12 to 20 mil | Micrometer |
| Concrete Moisture | Below 3.0 lbs / 1000 sqft | Calcium Chloride Test |
| Acclimation Time | 48 to 72 hours | Hygrometer |
The chemical reality of laminate layers
Laminate flooring composition consists of a melamine wear layer, a high-definition decorative image, a high-density fiberboard core, and a balancing backing layer. These engineered components are thermally fused under high pressure to create a dense performance surface that resists top-down moisture and abrasion.
The wear layer is the hero of the story. It is usually made of aluminum oxide. It is incredibly hard. It will dull a saw blade in ten cuts. But that hardness is brittle. If your subfloor has a hump, the plank bends. The wear layer cannot bend. It cracks. Then moisture from your mop gets into the decorative paper. Once that happens, the floor starts to delaminate. It looks like a bad sunburn. You also have to worry about the balancing layer on the bottom. It is there to provide counter-tension so the board stays flat. If you buy cheap, builder grade laminate, the balancing layer is weak. The boards will come out of the box already bowed. You cannot install bowed boards and expect them to lay flat. It is a physics battle you will lose every time. Stick to the NWFA standards. Check your Janka ratings if you are looking at hybrids, but for straight laminate, look at the AC rating. AC4 is the sweet spot for homes. AC5 is for airports and malls.
“Floating floors must be allowed to move independently of the structure; any restriction leads to mechanical failure.” – NWFA Technical Manual
Critical installation checklist
- Acclimate the planks in the room for 72 hours with the HVAC running.
- Vacuum the subfloor three times to remove every pebble of grit.
- Install a 6-mil poly moisture barrier over all concrete slabs.
- Use 1/4 inch spacers at every wall, door jamb, and transition.
- Never nail baseboards into the flooring planks themselves.
- Verify the flatness of the subfloor with a 10-foot level.
Thermal movement and regional climate factors
Regional climate conditions like extreme humidity or dry desert heat dictate the necessary expansion gap width for floating floors. In high-humidity areas, a larger 1/2 inch gap may be required, whereas arid climates require strict acclimation to prevent plank shrinkage and gapping.
If you are in a swampy place like Houston, your floor is going to grow. If you are in Phoenix, it is going to shrink. I have seen baseboards in Arizona that show a quarter inch gap of bare subfloor because the installer did not acclimate the wood to the dry heat. The wood gave up all its moisture and pulled away from the walls. You have to understand the equilibrium moisture content of your specific zip code. I always tell people to keep their home between 30 and 50 percent humidity. If you let it swing to 70 percent, that credit card trick will show you a gap that has completely vanished. The floor is now under tension. You will hear it groan at night. That is the sound of the locking tabs screaming. If you have a large room, over 30 feet, you need a transition strip in the middle. I know they look ugly. I know the minimalist curators hate them. But without them, the cumulative expansion of 30 boards will rip the floor apart. It is simple math. Each board expands a fraction of a millimeter. Multiply that by sixty boards and you have a massive force pushing against your framing.
The zero threshold dream vs mechanical reality
Zero-threshold transitions are floor installations that eliminate T-moldings between rooms for a continuous aesthetic. While visually appealing, this installation method often voids warranties because it links separate floor spans, preventing the independent expansion of different temperature zones.
I get it. You want that clean look from the hallway into the bedroom. No strips. No bumps. But the bedroom is a different climate than the hallway. Maybe the sun hits the bedroom floor all afternoon. That floor is getting hot. It is expanding. The hallway is in the shade. It is not moving. When those two areas are joined without a break, the stress concentrates at the doorway. That is where the floor will buckle. If you want a floor to last thirty years, you put the T-molding in the doorway. You give the floor a break. It is the same with kitchen islands. Never, ever install a heavy island on top of a floating floor. You are essentially pinning the floor to the ground. It is like putting a thumb on a piece of paper and then trying to slide the paper. It just wrinkles. If you must have an island, install the floor around it, or drill oversized holes through the planks so the island legs do not touch the wood. Leave room for the floor to dance. If it can’t dance, it breaks.