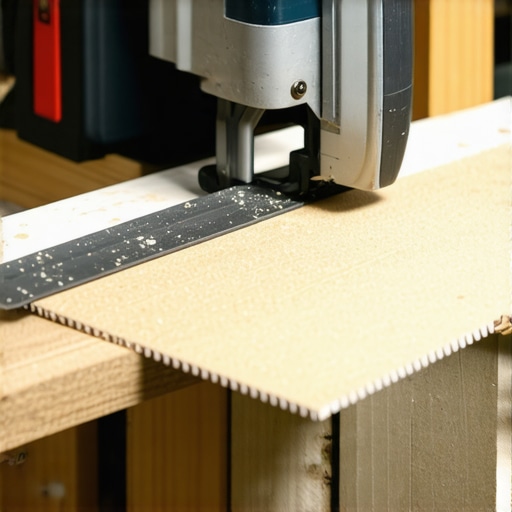
The Secret to Cutting Laminate Without Chipping the Surface
Most guys skip the leveling compound. They think the underlayment will hide the dip. It won’t. I spent three days grinding concrete on a job last month just so the floor wouldn’t click like a castanet. I have spent twenty five years with sawdust under my nails and a level in my hand. If you do not respect the structural reality of your materials, the materials will embarrass you. I have seen fifteen thousand dollar walnut floors cup until they looked like potato chips and I have seen cheap laminate fail in a week because the installer treated it like a piece of plastic instead of a brittle composite. Cutting laminate is not about the saw. It is about the physics of the wear layer and the grain of the high density fiberboard.
The brutal truth about jagged edges
Laminate chipping occurs when the saw blade exits the decorative wear layer too aggressively, causing the melamine resin to shatter. This happens because aluminum oxide, the material that makes laminate durable, is incredibly brittle. To avoid this, use fine-tooth blades and cut with the finished side facing the direction of blade entry.
You have to understand the chemistry here. Laminate is a sandwich. You have a bottom balancing layer, a core of high density fiberboard (HDF), a photographic layer, and a top wear layer infused with aluminum oxide crystals. Those crystals are what keep your dog from scratching the floor, but they are also what ruin your saw blades. When a standard wood blade hits that surface, it does not cut. It fractures. Imagine hitting a sheet of ice with a hammer. That is what a 24-tooth framing blade does to your floor. I see it every day. Someone tries to use their old construction blade and wonders why the edge looks like a serrated steak knife. You need a blade with at least 80 teeth, preferably more. The more teeth you have, the less material each tooth has to remove. This reduces the heat and the impact force on the wear layer.
The physics of the carbide tooth
Carbide tipped blades are mandatory for cutting laminate flooring because the wear layer is harder than standard steel. High tooth-per-inch counts minimize the impact energy per tooth, which prevents the HDF core from splintering. Maintaining a high RPM ensures that the kerf remains clean and the melamine does not vibrate.
A saw blade is a series of tiny chisels moving at thousands of revolutions per minute. If those chisels are dull, they do not slice. They tear. Because laminate is essentially compressed paper and resin, it has no natural grain to guide the cut. It is an isotropic material until you hit the wear layer. That wear layer is a hard, glass-like shell. If the blade is dull, it generates friction. Friction generates heat. Heat causes the resins in the HDF core to soften slightly right at the moment the blade teeth are trying to exit the material. This combination of heat and dullness is the primary cause of the dreaded chipping. Use a blade specifically rated for laminate or non-ferrous metals. These blades often have a Triple Chip Grind (TCG) geometry. The TCG alternates a flat raker tooth with a higher trapezoidal tooth. This configuration is the gold standard for avoiding chips in brittle materials.
“A floor is only as good as the subfloor beneath it; deflection is the enemy of every joint.” – Master Flooring Axiom
The subfloor secret that saves your blade
Floor leveling is the foundation of a clean cut because an unstable subfloor causes vibration during the installation process. If your laminate planks are bouncing while you work, the locking mechanism will flex and the cut edge will lose its structural integrity. Always use a self-leveling compound on concrete slabs before you begin.
I have walked onto jobs where the installer didn’t even check for flatness. They just started laying planks. Then, when they get to the doorway where they need a precise cut, the plank is oscillating because it is sitting over a half inch dip in the subfloor. You cannot get a clean cut on a moving target. If you are working on a concrete slab, you need to grind down the high spots and fill the low spots. If you are on a wood subfloor, you need to screw down the plywood to prevent deflection. Deflection is the silent killer of laminate floors. It leads to joint separation, peaking, and eventually, the failure of the entire system. When you are making your cuts, your work surface must be as solid as a machinist’s bench. Any wobble in your saw table or your sawhorses translates directly into a chip on your plank edge.
Blade direction and the chip factor
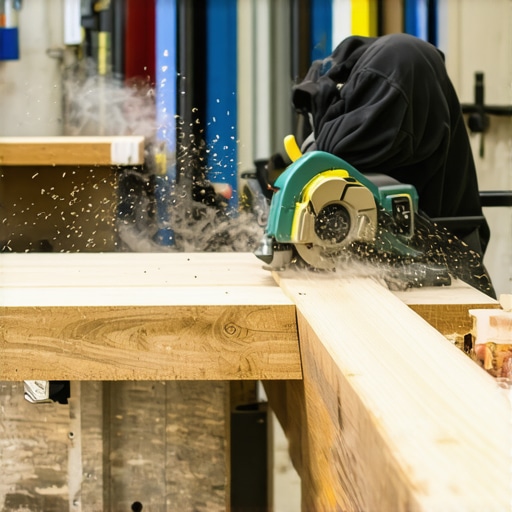
Blade rotation direction determines which side of the laminate plank will chip. On a table saw or circular saw, the teeth enter the material from the bottom or top depending on the saw type. Always ensure the decorative surface is where the teeth enter the material to keep the top edge clean and smooth.
This is a fundamental rule that many amateurs miss. On a circular saw, the blade rotates upward. This means the teeth hit the bottom of the board first and exit through the top. If you have the finished side facing up, you are asking for chips. You must flip the board over. On a miter saw, the blade comes down from the top. So, for a miter saw, you want the finished side facing up. It is all about the entry point. The material is supported by the rest of the board when the tooth enters. When the tooth exits, there is nothing supporting that thin melamine layer, so it blows out. Think about it like a bullet hole. The entry is small and clean. The exit is a mess. You want the mess to be on the back of the board where no one will ever see it. This is why I always mark my boards on the back with a carpenter’s pencil. It keeps my orientation straight and prevents expensive mistakes.
| Blade Type | TPI (Teeth Per Inch) | Material Focus | Result Quality |
|---|---|---|---|
| Standard Wood | 24 | Framing and Decking | Very High Chipping | Fine Finish | 60 | Trim and Cabinetry | Moderate Quality | Laminate Specific | 80-100 | HDF and Melamine | Professional Precision | Jigsaw Clean Cut | 20 | Curves in Laminate | Good for Hidden Cuts |
The blue tape method and its technical limits
Painter’s tape provides surface tension and lateral support to the wear layer during a cut. By applying blue tape over the cut line, you prevent the melamine from vibrating upward as the saw teeth exit. This is especially effective when using jigsaws for complex notching around door jambs.
While the blue tape method is popular, it is not a substitute for a sharp blade. It is a secondary defense. The tape acts as a sacrificial layer that holds the brittle surface together. I use it when I am doing complicated cuts, like when I have to notch a plank to fit around a stone fireplace or a radiator pipe. But do not rely on it for your straight cross-cuts. If you need tape for every cut, your blade is dull. Replace it. Also, be careful with the adhesive. If you leave the tape on too long or use a high-tack tape, you can actually pull the decorative film off some of the cheaper, builder-grade laminate products. I have seen guys ruin a whole row because they used duct tape instead of low-tack painter’s tape. It is a rookie move that costs time and money.
- Use a 100-tooth carbide blade for all cross-cuts.
- Verify subfloor flatness within 1/8 inch over 10 feet.
- Check the moisture content of the concrete slab.
- Acclimate the laminate in the room for 48 hours.
- Mark the cut line on the back of the plank for circular saw cuts.
- Always wear a dust mask to avoid inhaling HDF resins.
Equipment choices for the professional edge
Professional laminate cutters or guillotine shears eliminate chipping and dust by using pressure instead of abrasion. These tools are superior to saws for straight cross-cuts because they do not generate heat or vibration. Investing in a high-quality shear is the best way to achieve factory edges.
I remember when we used to do every single cut with a miter saw. The dust was so thick you could taste the formaldehyde in the HDF. Then the flooring shears came out. These things are basically giant paper cutters. They don’t have teeth. They have a heavy, sharpened steel beam that shears the board in one clean motion. Because there is no rotation, there is no chipping on the top or the bottom. It is a pure compression cut. If you are doing a large install, rent or buy one of these. It will save your lungs and your sanity. However, you still need a saw for rip cuts. You cannot shear a board lengthwise. For those long cuts along the wall, a table saw with a fine-finish blade and a zero-clearance insert is your best friend. A zero-clearance insert is just a piece of wood or plastic that fits around the blade to support the material right up to the edge of the cut. It is a small detail that makes a massive difference in the quality of your finished floor.
“Precision in the first row dictates the integrity of the last plank.” – Flooring Installation Standards
Why moisture destroys your cut quality
Moisture vapor emission from a damp subfloor swells the fiberboard core, making it soft and prone to tearing. Cutting swollen laminate results in fuzzy edges and poor joint fit. Using a moisture barrier is essential to maintain the density of the HDF core during and after the carpet install transition.
If you take a piece of laminate that has been sitting in a damp garage and try to cut it, you will see the difference. The core will look like wet cardboard. Instead of a crisp, clean line, you will get a ragged, hairy edge. This is because the water has broken down the resin bonds holding the wood fibers together. This is why acclimation is not a suggestion. It is a requirement. You need that material to reach equilibrium with the environment of the home. If the house is dry and the board is wet, it will shrink. If the house is humid and the board is dry, it will expand. I once saw a floor buckle so hard it popped the baseboards off the wall. The installer hadn’t left an expansion gap and hadn’t acclimated the wood. He thought he could just tight-fit everything. He was wrong. The expansion gap is the ghost that lives in your floor. You don’t see it, but it needs to be there. Usually, a quarter inch to a half inch is the standard, depending on the run length. Without it, your clean cuts mean nothing because the floor will eventually destroy itself.
The interplay between floor leveling and cut precision
Structural deflection in the subfloor causes the laminate joints to rub and click, which eventually chips the surface from the inside out. A level surface ensures that the tongue and groove system remains static. When cutting laminate, a flat subfloor allows for tighter tolerances at the perimeter walls.
Think about the mechanics of a click-lock joint. It is a tiny, precisely engineered piece of milled fiberboard. It is designed to hold two boards together under tension. If the floor is uneven, every time you walk on it, that joint flexes. That friction eventually wears down the locking mechanism. Once the lock is gone, the boards start to move independently. That is when you see the chipping along the edges of the planks in the middle of the room. People think they dropped something and chipped the floor, but usually, it is just the floor eating itself because the subfloor was not level. I spend more time with my floor grinder and my straightedge than I do with the actual flooring. That is the secret. The work happens before the first box is even opened. If you get the floor leveling right, the rest of the job is just a puzzle. If you get it wrong, the job is a nightmare.
Advanced geometry for transitions and showers
Transitions to wet areas like showers or bathrooms require silicone sealant in the expansion gap to prevent water intrusion. While laminate is often marketed as waterproof, the cut edges remain the most vulnerable point for swelling. Use carbide hole saws for pipe penetrations to maintain a clean radius without fracturing the melamine.
I never recommend laminate for a full bathroom with a shower. I don’t care what the box says. Steam is a gas, and it will find its way into the HDF core. But if you must do it, or if you are transitioning from a carpet install in a bedroom to a laminate hallway, you have to be careful. When you cut around a shower base or a toilet flange, you are exposing the raw core of the board. This is the Achilles heel of the floor. You must pack those gaps with a high-quality 100 percent silicone caulk. Do not use acrylic. Do not use wood filler. You need something that stays flexible. When the floor expands and contracts, that silicone will move with it, keeping the water out. For the cuts themselves, use a jigsaw with a downward-stroke blade. This pulls the teeth into the finish, which is the opposite of a standard jigsaw blade. It is a specific tool for a specific job. If you use a standard upward-cut blade on your jigsaw, you will shred the top of the plank around every curve. It will look unprofessional, and you will hate looking at it every time you step out of the shower.
Structural integrity of the laminate core
The density of the core determines the shear strength of the cut edge and the longevity of the click-lock system. Higher PSI ratings in the manufacturing process lead to a more stable board that is easier to cut without chipping. Cheap laminate with a low-density core will always splinter regardless of the blade quality.
You get what you pay for in this industry. If you buy the 99-cent-per-square-foot special from a big-box retailer, you are buying compressed sawdust and hope. The core density is low, meaning there is more air and less resin. When the saw blade hits it, there isn’t enough structural integrity to hold the fibers together. It just disintegrates. A premium laminate has a core so dense it feels like stone. It is heavy. It is hard to snap. When you cut it with a high-tooth carbide blade, the edge is as smooth as a piece of glass. That is what you want. You want a floor that will stand up to the weight of a kitchen island or the traffic of a busy hallway. If you start with a quality product, use a sharp, high-TPI blade, ensure your subfloor is perfectly level, and respect the expansion gaps, you will have a floor that lasts for decades. If you take shortcuts, you will be calling someone like me to tear it out and start over in three years. Do it right the first time. Respect the material. Watch your blade entry. Keep your subfloor flat. That is the only secret there is.