The ‘Trowel Test’ for Ensuring Proper Thinset Coverage
The Physics of Thinset Coverage and the Truth About Trowel Testing
Most guys skip the leveling compound. They think the underlayment will hide the dip. It won’t. I spent three days grinding concrete on a job last month just so the floor wouldn’t click like a castanet. That job was a reality check for the client. They wanted the aesthetic of a high-end porcelain plank but their slab looked like a topographical map of the Appalachian Mountains. If you do not start with a flat surface, the trowel test is a waste of time. I spent seventy-two hours behind a diamond-cup grinder, eating dust and hearing the scream of the vacuum, all because the original pour was off by three-quarters of an inch. When the floor is not flat, the thinset cannot do its job. It becomes a filler, and mortar is a terrible filler. It shrinks. It cracks. It leaves the tile suspended in air, waiting for a heavy heel to snap the corner. Every floor is a structural engineering challenge, and if you treat it like a cosmetic choice, you are going to fail. This is the reality of the trade that most big-box retailers will never tell you.
The ghost in the expansion gap
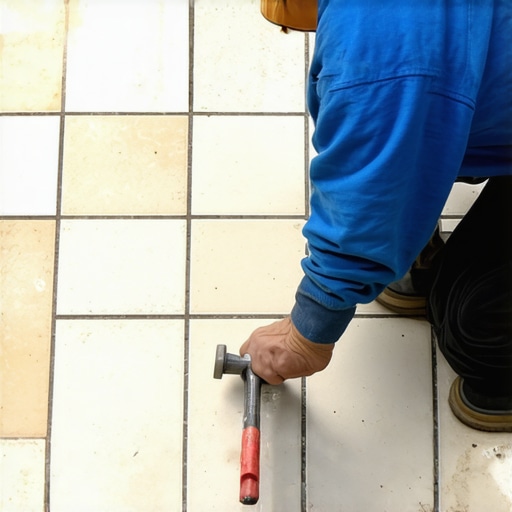
The Trowel Test is a diagnostic procedure where an installer embeds a tile into a fresh mortar bed and then immediately removes it to inspect the coverage. For dry interior floors, you need a minimum of 80 percent coverage, whereas wet areas like showers require 95 percent coverage to prevent water from pooling under the tile. This is not a suggestion. This is a requirement for the longevity of the installation. When you pull that tile up, you are looking for ridge collapse. If the ridges of the thinset are still standing like little mountain ranges, you have failed the test. The mortar should be flattened into a continuous, void-free layer. This ensures that the tile is fully supported and that there are no air pockets where moisture can accumulate or where stress can concentrate.
“A floor is only as good as the subfloor beneath it; deflection is the enemy of every joint.” – Master Flooring Axiom
The chemistry of the polymer bond
Thin-set mortar is not just mud. It is a complex blend of Portland cement, fine sand, and water-retention agents, often modified with liquid latex or powdered polymers. These polymers are what give the mortar its flexibility and its ability to bond to non-porous surfaces like porcelain. When you mix the bag, you are initiating a chemical reaction called hydration. The water molecules interact with the cement particles to grow microscopic crystals. These crystals grow into the pores of the tile and the pores of the subfloor, interlocking like a billion tiny hooks. If your subfloor is dusty, those hooks grab the dust instead of the concrete. This is why I insist on a shop vac and a damp sponge before a single notch of the trowel hits the ground. If the bond is mechanical, it relies on the profile of the surface. If it is chemical, it relies on the purity of the contact points. You need both for a floor to survive twenty years of foot traffic.
Why your subfloor is lying to you
Every concrete slab looks flat until you put a ten-foot straightedge on it. The industry standard is an eighth of an inch of variation over ten feet. Anything more than that and you are asking for trouble, especially with large format tiles. If the floor has a dip, the trowel ridges will not reach the back of the tile. You will have a hollow spot. This is where the ‘click’ comes from. When a homeowner walks across a floor and hears a hollow sound, it means the installer failed the trowel test. They didn’t check for coverage, and now the tile is acting like a drumhead. In shower installations, this is even more dangerous. Those hollow spots become reservoirs for stagnant water. Over time, that water grows mold and begins to rot the thinset from the inside out. It eventually breaks the bond, and you end up with a loose tile and a leaking pan. Floor leveling is not an optional luxury. It is the foundation of the entire system. I have walked away from jobs where the homeowner refused to pay for leveling. I would rather lose the work than put my name on a floor that I know is going to fail in eighteen months.
| Trowel Notch Size | Tile Surface Area | Required Coverage Percent |
|---|---|---|
| 1/4 inch by 1/4 inch | Under 6 inches | 80 Percent |
| 3/8 inch by 3/8 inch | 6 to 12 inches | 85 Percent |
| 1/2 inch by 1/2 inch | Over 12 inches | 95 Percent |
| Euro Notch | Large Format Planks | 95 Percent Plus |
The 1/8 inch that ruins everything
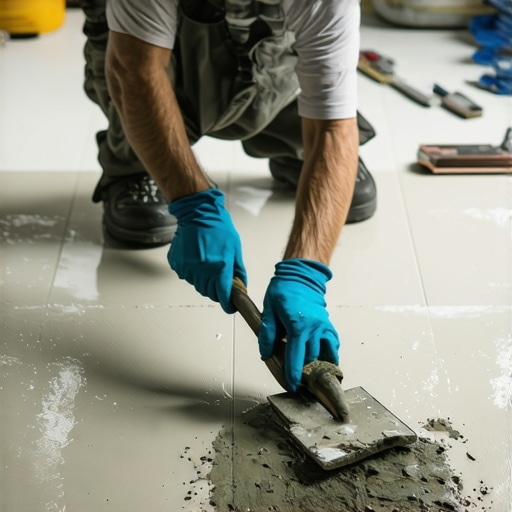
Precision is the difference between a professional and a handyman. When you are combing your mortar, the angle of the trowel matters. If you hold the trowel at a shallow angle, the ridges are too small. If you hold it at a steep ninety-degree angle, you get the full height of the notch. Most guys lazy out and hold it at forty-five degrees, which effectively reduces a half-inch notch to about a quarter-inch of coverage. You have to be consistent. You have to pull the trowel in straight lines, not swirls. Swirls trap air. When you set the tile down, those air pockets have nowhere to go. By pulling straight lines, the air can escape through the valleys as the ridges collapse. This is basic fluid dynamics applied to construction. If you trap air, you lose surface contact. If you lose surface contact, you lose the bond. It is a simple equation that determines the lifespan of the room.
“Mortar coverage must be calculated by the total surface area of the tile back, ensuring no void exceeds the size of a nickel in critical load areas.” – TCNA Handbook Handbook Standard
Wet area engineering and the shower floor
Showers are the ultimate test for any installer. You are dealing with hydrostatic pressure and constant moisture cycles. In a shower, the thinset is not just an adhesive. It is part of a managed water system. If you are using a topical membrane like Kerdi, your thinset coverage must be absolute. Any gap behind the tile is a place where water can sit. This leads to efflorescence, which is that white, crusty salt that grows out of grout lines. It happens when water dissolves the minerals in the mortar and then evaporates, leaving the minerals behind. The only way to stop it is to eliminate the voids. This is why I always back-butter my tiles in a shower. I take the flat side of the trowel and bridge a thin layer of mortar onto the back of the tile before I set it into the combed bed. This ensures 100 percent contact and leaves no room for the ghosts of moisture to haunt the installation.
The myth of the universal trowel
There is no such thing as a one-size-fits-all trowel. A subfloor for a carpet install is different from a floor leveling project for laminate. When you move to tile, the trowel is your most important tool. A common mistake is using a small notch for a large tile. As tiles have grown larger, the notches have had to grow with them. We now have specialized trowels designed to collapse the ridges more easily. The geometry of the notch determines how much mortar is left on the floor. If you use too much, the mortar will squeeze up into the grout joints. This is a mess to clean and can weaken the grout. If you use too little, the tile will not be supported. You have to find the balance. I always keep a dozen different trowels in my truck. Square notch, U-notch, and slanted notch. Each one has a specific purpose based on the substrate and the tile material. For a floor with slight imperfections, a U-notch often provides better coverage because the ridges are rounded and collapse more predictably.
- Substrate Inspection: Check for flatness using a ten-foot straightedge before starting.
- Moisture Testing: Use a calcium chloride test or a pinless meter to check the slab humidity.
- Mixing Protocol: Follow the manufacturer’s water-to-powder ratio and allow the mortar to slake for ten minutes.
- Directional Combing: Pull mortar in straight lines parallel to the short side of the tile.
- Back Buttering: Apply a thin coat of mortar to the back of all tiles larger than 12 inches.
- Periodic Pulling: Remove a tile every few rows to verify that the coverage meets the 80 or 95 percent requirement.
The structural reality of laminate and carpet
While the trowel test is specific to tile, the concept of subfloor integrity carries over to every material. For a laminate install, the floor leveling is just as critical. Laminate is a floating floor. It relies on a tongue and groove locking system. If the subfloor has a dip, the laminate will flex every time someone walks over it. That flex puts immense pressure on the plastic or wood-fiber locking mechanism. Eventually, the lock will snap. Once that happens, the floor is ruined. You will see gaps opening up between the planks. The same applies to carpet install. People think carpet hides everything. It doesn’t. A bump in the plywood will cause a wear spot in the carpet. Within a few years, you will see the physical outline of the subfloor defect through the fibers. Whether you are using a trowel or a power stretcher, the prep work is where the job is won or lost. I have seen guys try to level a floor with extra padding. It never works. The padding eventually compresses and the dip returns. There are no shortcuts in structural flooring.
The final word on bond strength
The success of a floor is measured in decades, not days. When I finish a job, I want to know that the bond is so strong that the only way to remove that tile is with a jackhammer. That confidence comes from the trowel test. It comes from knowing that the chemistry of the thinset and the physics of the notch have worked together perfectly. Don’t let a salesman tell you that a certain mortar is ‘magic’ and doesn’t require proper technique. There is no substitute for ridge collapse and full coverage. You have to get on your knees, check your work, and be honest about what is happening under the tile. If you see a void, fix it. If the coverage is low, use a larger notch. The floor is a performance surface. It is the most used and abused part of any building. Treat it with the respect that structural engineering demands. If you follow these rules, you won’t be the guy getting the phone call three years later about a cracked grout line or a loose plank. You will be the guy whose floors outlast the house itself.