How to Fix a Hollow Sounding Tile in Your New Shower Floor
Most guys skip the leveling compound. They think the underlayment will hide the dip. It won’t. I spent three days grinding concrete on a job last month just so the floor wouldn’t click like a castanet. That is the reality of professional work. When you step into a brand new shower and hear that dreaded clunk of a hollow tile, you are hearing the sound of a shortcut. It is the sound of a bond that never happened. It is the sound of a mechanical failure. I have seen fifteen thousand dollar bathrooms ruined because the installer did not understand the chemistry of thin-set mortar. If you have a hollow sounding tile in your new shower floor, you are standing on a ticking time bomb. It is not just about the noise. It is about the structural integrity of the entire assembly. When a tile is not fully supported, it becomes a lever. Every time you step on it, you are putting stress on the surrounding grout lines and the waterproofing membrane underneath. Eventually, that grout will crack. Water will find its way into the void. Once water gets under the tile, it stays there. It becomes a breeding ground for mold and can eventually rot out the subfloor if the membrane is compromised. Fixing it requires a surgical approach because you cannot just go swinging a hammer in a wet area. You have to respect the layers of the build. You have to understand how the bond broke before you can try to mend it.
The physics of the bond
The physics of the bond requires chemical adhesion and mechanical interlocking. When thin-set mortar fails to wet out both the tile back and the substrate, a delamination void forms. This air pocket creates acoustic resonance that sounds hollow when struck or walked upon. This usually happens because the installer did not back-butter the tile or used the wrong trowel size. In a shower, the TCNA requires ninety-five percent mortar coverage. Anything less and you are asking for trouble. Think about the chemistry of Portland cement. It needs water to hydrate and grow crystals that lock into the microscopic pores of the tile. If the mortar skins over because the installer took too long, those crystals cannot grow into the tile. You get a cold joint. It looks like it is stuck, but it is just sitting there. While a carpet install might hide a bad subfloor, floor leveling is non-negotiable for showers. You cannot expect a laminate mindset to work in a wet environment where floor leveling dictates the life of the drain. The mortar must be compressed. The ridges must be collapsed. If those ridges are standing tall, you have air channels. Air channels are voids. Voids are hollow spots. It is basic geometry and chemistry colliding on your shower floor.
“A floor is only as good as the subfloor beneath it; deflection is the enemy of every joint.” – Master Flooring Axiom
The ghost in the expansion gap
An expansion gap is a perimeter requirement that prevents tile tenting and hollow sounds near the walls. If a shower floor is tiled tight to the wall without a movement joint, the lateral pressure of thermal expansion will cause the tiles to buckle or debond from the thin-set mortar. This creates a hollow sound at the edges of the shower. Most people think tile is static. It is not. It moves with the house. It expands when it gets hot and shrinks when it gets cold. If you don’t give it a place to go, it will lift itself off the floor. I have seen entire floors pop up like a tent because someone forgot a quarter inch gap at the wall. In a shower, that gap needs to be filled with one hundred percent silicone, not hard grout. Grout does not compress. It cracks. When it cracks, it lets water in. When water gets in, it saturates the mortar bed. A saturated mortar bed loses its compressive strength over time. You are looking at a chain reaction of failure that starts with a single missing gap. You have to think like a structural engineer. You have to account for the movement of the wood framing, the expansion of the tile, and the vibration of the plumbing. It is a system, not a surface.
The injection solution
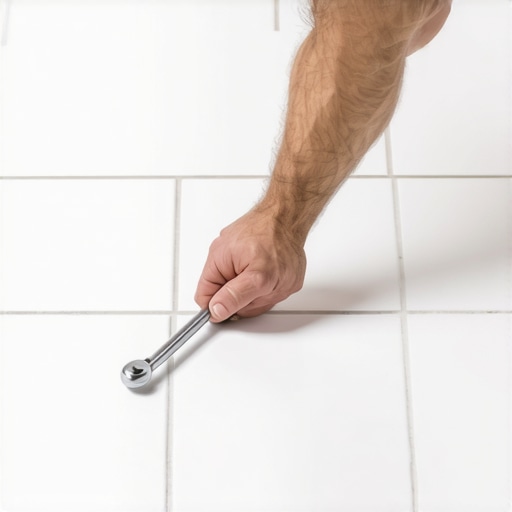
The injection solution for hollow tiles involves drilling small holes into the grout lines and pumping in adhesive. This low-viscosity resin or liquid mortar flows into the voids to re-establish the bond between the tile and substrate. It is a non-invasive repair that avoids a complete tear out of the shower floor. However, you have to be extremely careful. In a shower, you have a waterproofing membrane like Kerdi or a liquid-applied guard right under that tile. If you drill too deep, you have just killed your shower. You have poked a hole in the boat. I use a depth-stop on my drill. I only go as deep as the tile itself. Once you hit the mortar, you stop. Then you use a vacuum to suck out all the dust. If there is dust in the void, the glue won’t stick. You are just gluing dust to dust. I prefer a high-grade epoxy resin for this. It is waterproof and has a higher tensile strength than the original mortar. You pump it in until it starts coming out of the other holes. That tells you the void is full. Then you weight the tile down with buckets of water or thin-set bags. Do not touch it for twenty-four hours. You need that resin to cure and create a solid bridge. It is like surgery. You need a steady hand and the right tools.
- Rotary tool with diamond bit
- Low-viscosity injection resin
- Suction cups for testing
- Moisture meter to ensure dry voids
- Non-sanded grout for patching
- Weighted bags for pressure
The risk of hidden moisture
Hidden moisture in a shower floor can delaminate tiles and create hollow sounds through hydrostatic pressure. If water is trapped beneath the ceramic surface, it weakens the mortar and prevents repairs from bonding correctly. You must test for moisture before attempting an injection fix to avoid trapping rot inside the floor assembly. I never start a repair if the moisture meter is pinning. If that floor is wet, you are just sealing in the problem. You need to let it dry out, sometimes for a week with a fan and a dehumidifier. If you inject resin into a wet void, the resin will emulsify or simply fail to bond. It is like trying to tape a wet cardboard box. It won’t work. This is where the amateurs fail. They want to get in and out. They don’t want to wait for the physics to be right. But I have been on my knees on enough floors to know that you cannot fight mother nature. Water always wins. You have to work with it. If the moisture is coming from a leak in the pan, no amount of glue is going to save you. You have to identify the source. Is it a bad grout joint? Is it a failed curb? Or is it just the natural permeability of the stone? You have to be a detective before you can be a mechanic.
“A floor is only as good as the subfloor beneath it; deflection is the enemy of every joint.” – Master Flooring Axiom
Why your subfloor is lying to you
The subfloor may appear level, but micro-deflection causes hollow tiles when the joists flex under dynamic loads. Even a new shower floor will fail if the plywood or cement board has too much bounce, leading to mortar fatigue and debonding. This is the structural reality that most homeowners ignore. They think if they buy the expensive tile, the floor will be fine. But the tile is just the skin. The subfloor is the bone. If the bones are weak, the skin will sag. I check the L/360 rating on every job. If that joist span is too long, I am adding blocking or another layer of subfloor. You cannot glue a rigid material like tile to a flexible material like thin plywood and expect it to hold. The thin-set will crack at the microscopic level. Over thousands of footsteps, those cracks grow. Eventually, the tile pops loose. It stays in place because of the grout, but it is no longer attached to the floor. That is when you get that click-clack sound. It is a sign of structural inadequacy. If you are fixing a hollow tile, you need to ask yourself if the floor is stiff enough to begin with. If it is not, your repair is just a band-aid on a broken leg.