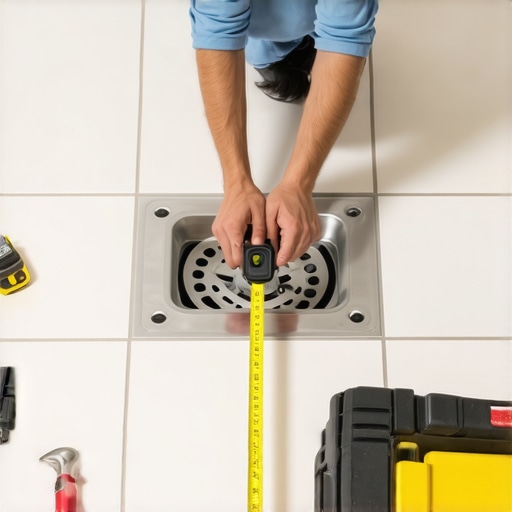
The ‘Tape Measure’ Trick for Centering Your Shower Drain Perfectly
The Tape Measure Trick for Centering Your Shower Drain Perfectly
I spent three days grinding concrete on a job last month just so the floor wouldn’t click like a castanet. Most guys skip the leveling compound. They think the underlayment will hide the dip. It won’t. I have spent 25 years on my knees with a moisture meter and a level, and I can tell you that a floor is a performance surface, not a decoration. When you are looking at a shower, the drain is the heart of the system. If that drain is off by even a quarter inch, your tile layout is ruined, your slope is uneven, and you are looking at a future of standing water and mold. I remember a job in a high-end remodel where the plumber guessed the center. By the time I got there to set the stone, the layout required a tiny sliver of tile on one side and a full piece on the other. It looked amateur. We had to tear out the subfloor and move the stack. That is why the tape measure trick is not just a shortcut; it is a structural necessity.
The geometry of the wet zone
The tape measure trick relies on triangulation from the structural studs to find the geometric center of the shower footprint before any backboard or waterproofing is installed. This method eliminates offset errors caused by uneven wall thickness or plumb variances in the framing members, ensuring the waste pipe aligns with the finished tile grid. You cannot trust the rough-in plumbing to be perfect. You have to verify it against the actual framing. I take my tape and I measure from the face of the stud, not the drywall. You have to account for the thickness of your cement board, your waterproofing membrane, and your thin-set. If you are using half-inch board and a quarter-inch of tile, you are losing three-quarters of an inch on every wall. If you do not calculate this before the pipe is glued, you are already behind.
“A floor is only as good as the subfloor beneath it; deflection is the enemy of every joint.” – Master Flooring Axiom
Why your subfloor is lying to you
A subfloor may appear flat to the eye, but microscopic deviations and structural deflection can cause drainage failure or tile delamination over time. Using a ten-foot straightedge is the only way to confirm that the substrate meets the TCNA requirements for surface flatness, which typically demand no more than 1/4 inch variation in 10 feet. I have seen guys try to use floor leveling compound to fix a structural sag. It does not work. You are just adding weight to a weak system. You need to check the joists. If you have a dip, you need to sister those joists or use a high-compression self-leveling underlayment that can handle the point load of a human standing in a shower. When we talk about floor leveling, we are talking about the physics of load distribution. If the subfloor moves, the grout cracks. If the grout cracks, water gets into the thin-set. Once water hits the plywood, it is game over. You get rot, you get smells, and you get a phone call from an angry homeowner three years later.
The tape measure math that never fails
To execute the centering trick, you must mark the center point on the subfloor by calculating the midpoint between the finished wall dimensions, then use a plumb bob or laser level to ensure the drain flange is perfectly vertical to the waste line. This prevents eccentric loading on the gaskets and ensures the clamping ring sits flush against the waterproofing membrane. I start by drawing a box on the floor that represents the finished inside dimensions. If my shower is 60 inches by 36 inches, I mark 30 inches and 18 inches. But I do not stop there. I check for square. I use the 3-4-5 rule. If the framing is out of square, I have to decide whether to split the difference or pull the wall out. This is the difference between a master and a handyman. A master knows that the tape measure is a tool for truth, not just for estimation. You need to look at the chemistry of the bond too. If you are using a topical membrane like Kerdi, your drain height needs to be set differently than if you are doing a traditional mud bed with a liner. The thickness of the mortar is governed by the physics of compression. You need a minimum of 1.5 inches of deck mud to ensure the pan does not crack under the weight of the user.
| Metric | Standard Value | Installation Impact |
|---|---|---|
| Drain Slope | 1/4 inch per foot | Prevents standing water and bio-film |
| Subfloor Tolerance | 1/8 inch over 10 feet | Essential for large format tile |
| Mortar Bed Mix | 4 to 1 Sand-Cement | Provides structural rigidity |
| Expansion Gap | 1/4 inch at perimeter | Allows for seasonal movement |
The 1/8 inch that ruins everything
Precision in drain centering is measured in single-digit millimeters, as an offset drain forces asymmetric slope angles that complicate tile cutting and water flow. When the drain is off-center, the triangular segments of the shower pan have different pitches, leading to lippage where the planes intersect. This is where the physics of water comes in. Water has surface tension. If your slope is too shallow because the drain is too far to one side, the water will sit. It will not move toward the drain. It will just hang out in the grout lines. I have seen 15,000 dollar walnut floors cupping because of humidity issues, and I have seen 20,000 dollar bathrooms torn out because the drain was two inches to the left. You have to be a stickler. You have to be the guy who checks it three times before the glue dries. While most people want the thickest underlayment, too much cushion actually causes the locking mechanisms on LVP to snap under pressure. In a shower, the equivalent mistake is using too much thin-set to try and level the floor. Thin-set is an adhesive, not a filler. It shrinks as it cures. If you have a thick pile of thin-set, it will pull on the tile and cause it to crack or cup.
- Measure from the studs, not the pre-installed backer board.
- Account for the 1/4 inch thin-set bed behind the board.
- Use a laser to project the center line onto the ceiling and back down.
- Double-check the drain flange height against the tile thickness.
- Verify that the weep holes in the drain assembly are not blocked by mortar.
Floor leveling and the concrete slab reality
Working on concrete slabs requires moisture testing and mechanical profiling to ensure the leveling compound and thin-set create a permanent chemical bond with the substrate. A calcium chloride test or a relative humidity probe will reveal if the slab is emitting too much vapor, which can delaminate the shower pan. I once spent a week on a job where the slab was so wet it was basically a sponge. We had to use a vapor barrier epoxy before we could even think about the drain. If you just pour leveler over a wet slab, it will pop off like a scab. You have to grind the surface. You have to open up the pores of the concrete. I smell like concrete dust for half the year because I know that if I don’t grind, I don’t get a bond. The chemistry of a modified thin-set is amazing, but it cannot stick to dust or laitance. You need a clean, structural surface. This is why I despise builder-grade shortcuts. They skip the prep and go straight to the finish. But the finish is only as good as the prep.
Why laminate and carpet fail near the drain
The transition from a waterproof shower floor to laminate or carpet is a critical failure point where moisture migration can destroy non-waterproof materials. Laminate flooring is essentially compressed sawdust with a plastic picture on top, and it will swell and buckle if exposed to the high humidity or minor splashes common in a bathroom environment. I hate seeing laminate in bathrooms. It is a ticking time bomb. The core will soak up moisture like a wick. If you are doing a carpet install in a bedroom that connects to a master bath, you need a solid transition. You need a marble sill or a high-quality reducer that is sealed to the floor. I have seen carpet tacks rust out and stain the padding because someone did not seal the transition. You need to think about the environment. If you live in a high-humidity area, your flooring choices are even more restricted. Solid wood in a swampy area like Houston is a mistake. You need engineered cores or tile. The tape measure trick helps here too, because it ensures your shower entry is centered with the room, making those transitions look intentional rather than accidental.
The chemical bond of modern thin-set
Modern polymer-modified thin-set uses ethylene vinyl acetate to create a flexible yet tenacious bond that can withstand the thermal expansion and contraction of a shower floor. Understanding the open time and pot life of your setting materials is just as important as the geometry of the drain placement. If you mix your mud too dry, it won’t hydrate. If it’s too wet, it loses strength. I follow the manufacturer instructions like they are the law. The NWFA and TCNA spend millions on testing these standards so guys like us don’t have to guess. I have seen floors fail because the installer thought he knew better than the chemist who designed the bag. Don’t be that guy. Use the right notch trowel. Get 100 percent coverage under your tile. If you leave voids, water will find them. And if water finds a void, it will sit there and grow things you don’t want in your house.
“Cementitious grouts and mortars are not waterproof; they are water-resistant. The system relies on the membrane beneath.” – TCNA Handbook Summary
The ghost in the expansion gap is what I call the noise a floor makes when it hits a wall. If you don’t leave that gap, the floor has nowhere to go. It will hump up in the middle of the room. In a shower, the expansion gap is usually filled with a high-quality 100 percent silicone caulk. Never use grout in the corners or around the drain. Grout is rigid. Houses move. If you use grout in a change of plane, it will crack. Use silicone. It stays flexible and keeps the water where it belongs. This is the structural engineering of a bathroom. It is about managing movement, managing water, and managing expectations. If you use the tape measure trick and you respect the chemistry of your materials, you will have a floor that lasts longer than the house. If you don’t, you’re just another guy with a bucket and a prayer. I choose the tape measure every time.