How to Waterproof a Half-Wall in Your Custom Shower Design
I spent three days grinding concrete on a job last month just so the floor wouldn’t click like a castanet. Most guys skip the leveling compound and think the underlayment will hide the dip. It won’t. I have seen it time and again where a shortcut on the subfloor ruins a fifty thousand dollar bathroom. My knees are shot and my hands smell like thin-set because I know that a shower is not a decoration. It is a structural engineering challenge involving hydrostatic pressure and capillary action. When you build a half-wall, often called a pony wall, you are introducing a potential failure point into your wet room. If that wall moves even a fraction of a millimeter, your grout will crack and water will migrate into your framing. I have been in the trade for twenty-five years and I have seen more rotted studs from poorly waterproofed half-walls than I have from actual pipe leaks. You have to treat the junction between the floor and that wall like a dam. It is not just about the tile. Tile is basically the clothing; the waterproofing is the skin. If the skin has a hole, the body rots.
The structural geometry of a stable pony wall
Pony walls in showers require internal blocking and structural fasteners to prevent lateral movement that causes waterproofing failure. If your wall wobbles when you lean on it, the tile will fail. You cannot rely on a single bottom plate to hold a wall that people will eventually lean against or sit on. I always double up the studs at the end of the run and anchor the bottom plate into the subfloor with heavy-duty lag bolts or concrete anchors. If you are working on a wood subfloor, make sure you are hitting the joists. If you miss the joists, you might as well be building a house on sand. The top of the wall needs to be pitched toward the shower at a quarter-inch per foot. If you leave it flat, water will sit on the grout line and eventually find its way through the microscopic pores. It is simple physics. Gravity always wins.
“A floor is only as good as the subfloor beneath it; deflection is the enemy of every joint.” – Master Flooring Axiom
Why your subfloor is lying to you
Subfloor deflection is the primary cause of cracked grout and membrane tears in custom shower installations. You might think your plywood is solid, but if there is any bounce, your shower is doomed. I have walked onto jobs where the installer was ready to lay tile on a floor that moved like a trampoline. You need to check the L/360 rating for ceramic and L/720 for natural stone. This is not a suggestion. It is a law of physics. Before the half-wall even goes up, the floor leveling process must be completed. This involves using a high-flow self-leveling underlayment that reaches a compressive strength of at least 3,000 psi. We are not just making it flat; we are making it rigid. If the floor under the half-wall moves, the waterproof bond at the base will snap. Think of it like a hinge. If the floor is the stationary part and the wall is the moving part, the waterproofing is the joint that gets stressed until it breaks.
Liquid membranes and the chemistry of the bond
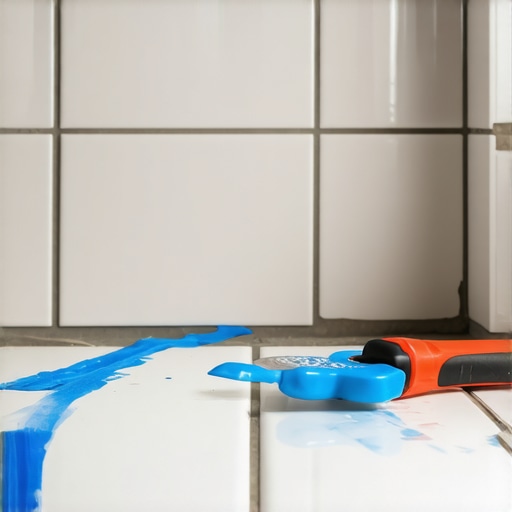
Liquid waterproofing membranes create a monolithic barrier that prevents water from reaching the porous cement board or wood framing. These products are basically liquid rubber. When they cure, they create a continuous skin. But here is the catch. You have to apply them to the correct mil thickness. Most guys just paint it on like they are doing a bedroom wall. That is a recipe for disaster. You need a wet film gauge to ensure you are hitting the manufacturer specifications. Usually, that is about 20 to 30 mils. If it is too thin, it will pinhole. If it is too thick, it might not cure properly. The chemistry of these polymers allows them to remain flexible, but they are not magic. They require a clean, dust-free surface. If there is sawdust on your cement board, the membrane will bond to the dust, not the wall. Then, the first time the shower gets hot, the steam will cause the membrane to delaminate. It is a slow death for your house.
| Attribute | Liquid Membrane | Sheet Membrane |
|---|---|---|
| Application Method | Roller or Brush | Thin-set Mortar |
| Perm Rating | 0.5 to 1.0 | Less than 0.1 |
| Curing Time | 12 to 24 Hours | Immediate |
| Thickness Control | Manual and Variable | Factory Consistent |
The 1/8 inch that ruins everything
Expansion gaps and silicone joints are mandatory at every change of plane to accommodate the natural expansion of the building. Most people think they can just grout the corner where the half-wall meets the floor. They are wrong. Grout is rigid. Buildings move. When the wood studs in that wall absorb a little humidity, they expand. If you have grout in that corner, it will crack. Once it cracks, water gets pulled in by capillary action. It is like a straw sucking up water. You need a 1/8 inch gap filled with 100 percent silicone sealant. Silicone is flexible. It acts like a gasket. I have seen beautiful stone showers destroyed because the installer forgot this simple rule. They spend thousands on the stone and then save five bucks by not buying a tube of high-grade silicone. It makes my head spin. Every change of plane is a moving joint. Treat it as such or watch your work crumble.
“Waterproof membranes must be integrated into the drainage system at the microscopic level to prevent capillary migration.” – TCNA Technical Manual
The myth of the waterproof tile
Ceramic tile and natural stone are not waterproof barriers but are merely the aesthetic surface of the shower assembly. This is a hard truth for many to swallow. People think that because the tile feels hard like glass, it stops water. It doesn’t. Grout is a sponge. Even epoxy grout has a level of permeability. Water goes through the grout and sits on the membrane. If you haven’t pitched your half-wall correctly, that water just sits there, breeding mold and slowly eating away at the adhesive bond. This is why the prep work is more expensive than the tile itself. If you are comparing this to a carpet install or a laminate floor, you are in the wrong mindset. In a living room, you are just laying a product down. In a shower, you are building a vessel. It is more like building a boat than it is like laying a floor. One leak and the ship sinks.
- Frame the half-wall with pressure-treated lumber for the bottom plate.
- Apply a bead of sealant under the bottom plate before anchoring.
- Use alkali-resistant mesh tape on all board joints.
- Apply the first coat of liquid membrane and let it dry until it changes color.
- Apply the second coat in a perpendicular direction to ensure total coverage.
- Perform a flood test for 24 hours to verify the integrity of the basin.
The reality of vapor drive in wet areas
Vapor drive occurs when warm moisture moves through porous materials toward cooler, drier areas behind the wall. This is a microscopic war happening every time you take a shower. The steam is a gas, and gas can go where liquid water cannot. If you don’t have a vapor barrier or a membrane with a low perm rating, that steam will go right through your tile, right through your cement board, and condense on the cold studs. Over time, this leads to dry rot. This is why I am picky about the perm rating of my membranes. A perm rating tells you how much water vapor can pass through. For a steam shower, you need something near zero. For a standard half-wall, you still need to be careful. If that wall is backed by a cold exterior wall, the vapor drive will be even more aggressive. You are basically building a greenhouse. You have to control the climate inside those walls.
Managing the transition to the main floor
Threshold transitions must be mechanically sound to prevent water from wicking into the dry-area flooring like carpet or laminate. This is the danger zone. Where the shower ends and the bathroom floor begins is where I see the most rot. If you are installing laminate outside the shower, you need to be extremely careful. Laminate is basically pressed paper. If a drop of water gets under the transition strip, it will swell up like a sponge. I always recommend a solid stone threshold that is pitched back toward the shower drain. This creates a physical stop for the water. The waterproofing from the shower floor must wrap up and over the curb or the transition point. It has to be a continuous envelope. If you break the envelope at the doorway, you have failed the job. There are no shortcuts here. You either do it right or you do it twice.
The bottom line on shower longevity
Building a custom shower is about managing the invisible forces of nature. You are fighting gravity, humidity, and time. If you focus on the pretty tile and ignore the subfloor and the membrane, you are wasting your money. I have spent my life learning these lessons so my clients don’t have to. You start with a level floor. You build a rock-solid frame. You apply a high-quality membrane to the right thickness. You seal your corners with silicone. If you do those things, that shower will be there long after I am gone. If you don’t, you will be calling me in three years to tear it all out and start over. And I will tell you then what I am telling you now. A floor is a performance surface. Treat it with the respect it deserves.