Why Your Shower Seat is Sloping the Wrong Way and How to Fix It
The physics of the failing shower seat and why your installer failed you
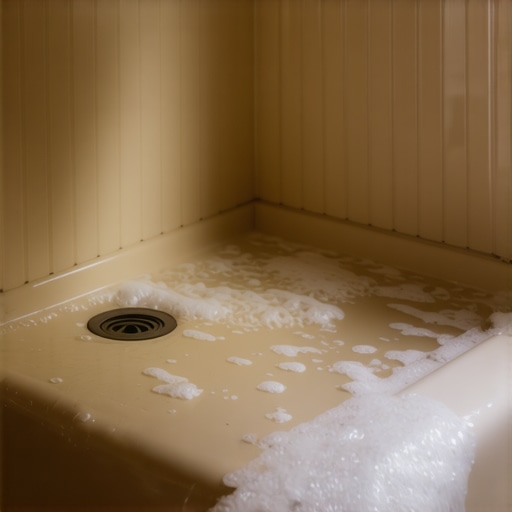
Most guys skip the leveling compound. They think the underlayment will hide the dip. It won’t. I spent three days grinding concrete on a job last month just so the floor wouldn’t click like a castanet. When I walked into the master bathroom of that same house, I saw the shower seat. It was a beautiful piece of marble, perfectly level. That was the problem. A level shower seat is a failing shower seat. If it is perfectly level, the water sits. If it slopes back toward the wall, the water migrates into the grout lines and eventually rots the 2×4 framing behind the tile. I have seen thousand dollar tile jobs destroyed by a 1/8 inch error in pitch. You have to understand that water is a persistent, microscopic invader that follows the path of least resistance. If that path leads to your wall instead of your drain, your house is in trouble.
The law of the quarter inch pitch
A shower seat requires a positive pitch toward the drain of at least 1/4 inch per foot. This specific **slope** ensures that **surface tension** and **gravitational pull** overcome the **capillary action** that draws water into **grout joints**. Without this **directional drainage**, water pools on the surface and saturates the **cementitious grout**, eventually reaching the **waterproofing membrane** and causing **delamination**. Most installers fail here because they use a standard level and aim for center, rather than intentionally creating a fall. They treat the seat like a piece of furniture rather than a functional piece of plumbing infrastructure. When you sit on that bench, you shouldn’t feel like you are sliding off, but the bubble on the level should definitely be past the line. This is the difference between a dry bathroom and a mold factory.
“A floor is only as good as the subfloor beneath it; deflection is the enemy of every joint.” – Master Flooring Axiom
The chemistry of the bond and why it fails
Thin-set is not just mud. It is a complex chemical adhesive. When we talk about the chemistry of a shower seat, we are talking about polymer-modified mortars. These polymers allow the mortar to flex slightly without losing its grip on the tile. However, if water is allowed to sit on the seat due to a lack of slope, the constant moisture creates a condition known as saturation. Even the best modified thin-set can eventually succumb to this. The water breaks down the bond at a molecular level. I have pulled up tiles from flat shower seats where the mortar was the consistency of wet sand. It had completely lost its structural integrity because the installer didn’t understand that thin-set is water-resistant, not waterproof. You need that pitch to move the liquid away so the assembly can dry out between uses. If it never dries, it will fail.
The 1/8 inch that ruins everything
Precision is not a suggestion in flooring. It is the law. When you are dealing with large format tile on a shower seat, that 1/8 inch dip in the middle of your mortar bed becomes a lake. I see it all the time with guys who don’t use a screed. They butter the back of the tile and hope for the best. But when that tile settles, if there is a void, water will find it. This is why I insist on 100 percent coverage. You trowel the mortar in straight lines, not swirls. Swirls trap air. Air pockets trap water. Water grows mold. It is a simple, ugly cycle. You have to be a stickler for the details. You have to be the guy who checks his work three times with a straightedge before the mortar sets.
| Feature | Required Pitch | Standard Requirement | Result of Failure |
|---|---|---|---|
| Shower Seat | 1/4″ per foot | TCNA B415 | Substructural rot and mold |
| Shower Floor | 1/4″ per foot | TCNA B421 | Standing water and slip hazard |
| Subfloor Level | 1/8″ over 10ft | NWFA Standards | Clicking joints and snapping locks |
Why your subfloor is lying to you
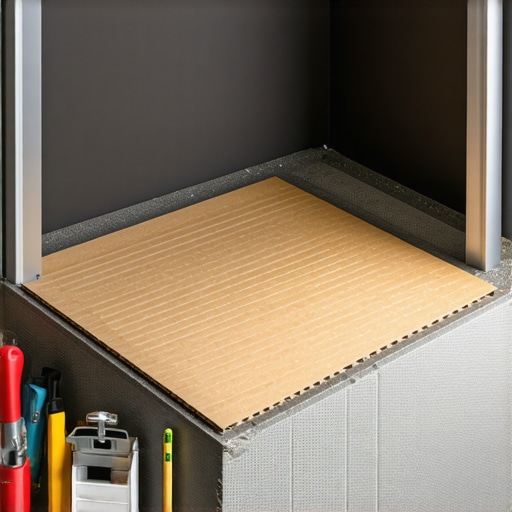
Floor leveling is the most overlooked phase of any installation. Whether you are prepping for a **shower pan** or a **carpet install**, the substrate must be flat. A **subfloor** that has a dip will cause **laminate** to bounce and **LVP** locking mechanisms to snap under the weight of a person walking. Many installers think the **underlayment** will act as a bridge over these gaps. This is a lie. Underlayment is meant for sound dampening and moisture protection, not for structural support. If you have a 3/16 inch dip in your concrete, you must use a high-quality self-leveling underlayment with a primer. If you don’t, your expensive new floor will feel like a trampoline. I have spent more time with a grinder and a vacuum than I have with a hammer lately, and that is because houses are built poorly these days. The joists shrink, the plywood crowns, and the installer is left to fix the mess.
The ghost in the expansion gap
Hardwood and laminate need room to breathe. I see people shove the boards tight against the baseboards all the time. They think it looks cleaner. Then summer hits, the humidity rises, and the floor peaks in the middle of the room like a mountain range. You need a minimum of 3/8 inch or 1/2 inch gap around the entire perimeter. This is not optional. Wood is a living material. It expands and contracts with the atmospheric moisture content. If you lock it in, it will find a way to move, usually by breaking its own joints. This is why acclimation is the most ignored step in the process. You can’t take wood from a climate-controlled warehouse, put it in a humid house, and nail it down the same day. It needs to sit. It needs to reach equilibrium. If you skip this, you are just waiting for a phone call from an angry customer six months later.
- Check the moisture content of the subfloor with a pin-meter.
- Ensure the concrete slab has less than 3 lbs of vapor emission per 1,000 sq ft.
- Use a 6-mil poly film moisture barrier over concrete for all floating floors.
- Verify that the HVAC system has been running for at least 7 days at living conditions.
- Grind down high spots and fill low spots with Portland-based compound.
How to fix a backwards sloping seat
If you have discovered your seat slopes the wrong way, you have two choices. The right way and the easy way. The easy way is to try and skim coat the top with more mortar and tile over it. This rarely works because you end up with a huge lip at the front of the seat that looks like garbage. The right way is to remove the top layer of tile. You have to get back down to the waterproofing. Once you are there, you build up the back of the seat with a mud bed of deck mud, which is a dry-pack mortar. You slope it correctly, 1/4 inch toward the front. Then you re-apply your waterproofing membrane, whether it is a liquid-applied product or a sheet membrane like Kerdi. You have to ensure that this new membrane ties into the existing wall waterproofing. If you don’t get a continuous seal, you are just moving the leak from the seat to the wall. It is tedious work. It is dusty. It is expensive. But it is the only way to save the structure of your home.
“Waterproof does not mean water-tight if the physics of the installation are ignored.” – Tile Council of North America Principle
The transition from wet to dry zones
When you finish that shower, you are likely moving into a master bedroom with carpet or laminate. This transition is where many jobs fail. The height difference between a properly sloped shower floor and a thin laminate floor can be significant. Don’t use those cheap, flimsy plastic T-moldings. They break within a year. I prefer a solid wood or marble transition strip that is custom-notched to handle the height variance. For a carpet install, make sure the tack strip is set back far enough so the transition doesn’t create a sharp edge. The transition should be a physical barrier that prevents any occasional bathroom moisture from reaching the wood or carpet fibers in the next room. This is structural thinking. You are protecting the different zones of the house from each other.