The Real Reason New Carpet Ripples After Three Months
You see those unsightly waves in your living room carpet. Most homeowners assume the carpet is defective or cheap. That is rarely the truth. I have spent twenty five years with sawdust under my nails and a power stretcher in my truck and I can tell you that carpet ripples are the direct result of installer laziness and a failure to respect the physics of tension. When a floor is not installed to industry standards, it fails. It is that simple.
Most guys skip the leveling compound. They think the underlayment will hide the dip. It won’t. I spent three days grinding concrete on a job last month just so the floor wouldn’t click like a castanet. I have seen the same corner cutting with carpet install projects. If the subfloor is not flat and the carpet is not stretched with a mechanical advantage, the material will eventually relax into the low spots and create ripples that make your home look like a stormy sea.
The physics of the power stretcher
A carpet ripples because it was never properly tensioned using a power stretcher. Installers who rely solely on a knee kicker fail to apply the necessary force to lock the secondary backing into the tack strips. This lack of tension causes the carpet to relax and expand over time.
A knee kicker is a tool designed for positioning and small adjustments. It is not a tool for stretching a whole room. To get a permanent carpet install, you must use a power stretcher that braces against one wall and uses a lever arm to pull the carpet toward the opposite wall. We are talking about stretching the carpet roughly one to one and a half percent of its length and width. This creates a drum tight surface. Without this mechanical force, the primary and secondary backings, which are held together by a layer of latex, will begin to delaminate or simply stretch out under foot traffic. Once that tension is lost, the excess material has nowhere to go but up. That is where your ripples come from.
“A floor is only as good as the subfloor beneath it; deflection is the enemy of every joint.” – Master Flooring Axiom
The danger of incorrect padding density
Choosing the wrong padding allows for too much vertical movement, which eventually leads to ripples. A pad that is too thick or too soft will allow the carpet backing to flex excessively under heavy furniture or foot traffic, eventually stretching the fibers beyond their recovery point.
I see people buying half inch thick, low density foam because it feels like walking on a cloud. That is a mistake. For most residential applications, you want a 7/16 inch pad with a density of at least 6 to 8 pounds. If the pad is too soft, the carpet backing is constantly being pushed down into a void. This creates a trampoline effect. Every time you step, you are pulling on the tack strips. Eventually, the carpet pulls off the pins, or the backing itself loses its memory. If you are also dealing with floor leveling issues, the problem is compounded because the carpet is bridging over dips in the concrete or plywood. You need a stable foundation, not a marshmallow.
Temperature and humidity effects on synthetic fibers
Carpet ripples often appear when there is a significant change in indoor humidity or temperature. Synthetic fibers and latex backings expand in humid conditions, and if the carpet was not stretched tightly enough during installation, this expansion manifests as visible waves and buckles across the floor.
Most modern carpets are made of nylon, polyester, or triexta. These are polymers. They react to the environment. If I install a carpet in a house with the HVAC turned off in the middle of a humid summer, and then the owner turns on the air conditioning, the carpet will contract. But the opposite is more dangerous. If it is installed in a cold, dry environment and then the humidity spikes, the material expands. If the installer did not account for this by using a power stretcher to reach maximum tension, the expansion has no room to hide. It will buckle. This is why acclimation is just as important for carpet as it is for hardwood or laminate flooring. You have to let the rolls sit in the house for at least 24 to 48 hours to reach an equilibrium with the local atmosphere.
Floor leveling and subfloor preparation
Subfloor irregularities are a primary cause of premature floor failure. If a subfloor is not flat within one eighth of an inch over a ten foot radius, the carpet will bridge over the low spots. Over time, gravity and weight push the carpet into these gaps, causing ripples.
People think carpet hides everything. It does not. If your subfloor has a dip, the carpet is suspended in mid air like a bridge. When you walk on it, you stretch the backing. This is why floor leveling is a non negotiable step. I always tell my clients that if they do not pay for the prep, they will pay for the replacement. I use a high flow self leveling underlayment to fill those low spots. It is a cementitious product that creates a glass smooth surface. If you are transitioning from carpet to laminate or tile near showers, that level surface is even more vital. A dip under a laminate plank will cause the tongue and groove joint to snap. Under a carpet, it just causes a wave. Both are failures in my book.
Technical comparison of flooring requirements
| Feature | Carpet Requirements | Laminate Requirements | Wet Area Standards |
|---|---|---|---|
| Subfloor Flatness | 1/8 inch per 10 feet | 1/8 inch per 10 feet | 1/16 inch per 3 feet |
| Tension Method | Power Stretcher | Expansion Gaps | Thin-set Bond |
| Moisture Barrier | Optional/Pad Dependent | Mandatory 6-mil poly | Waterproof Membrane |
| Acclimation Time | 24 to 48 Hours | 48 to 72 Hours | N/A |
Transitioning from carpet to wet areas
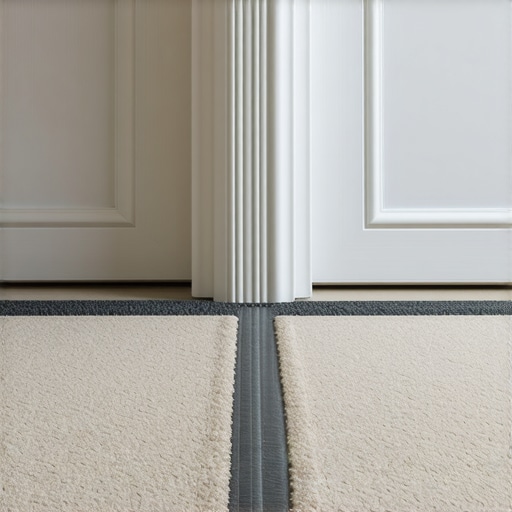
Transitions between carpeted rooms and tile near showers require specific structural support to prevent fraying and moisture damage. The height difference between a padded carpet and a tiled floor must be managed with a proper transition strip to maintain the tension of the carpet.
I hate seeing a carpet just tucked against a tile edge without a Z bar or a proper transition. Near showers, moisture is the enemy. If your bathroom lacks proper ventilation, the steam will migrate into the carpeted hallway. This moisture softens the latex backing of the carpet. If the carpet was already loose because the installer used a knee kicker, the moisture will make it ripple instantly. You need a solid transition that keeps the carpet under tension while providing a moisture break. When I install laminate in a room adjacent to a bathroom, I always use a silicone bead in the expansion gap to ensure no water gets under the floor. Carpet needs similar respect. Keep the dampness away from the tack strips, or they will rust and release the carpet.
“The integrity of a textile floor covering is dependent upon the mechanical bond between the primary backing and the architectural substrate.” – NWFA Technical Guidelines
The installer checklist for a ripple free home
- Verify the subfloor is dry and flat to within 1/8 inch over 10 feet.
- Ensure the carpet has acclimated to the home temperature for 48 hours.
- Use an 8 pound density pad to provide firm support for the backing.
- Insist on the use of a power stretcher for every room, regardless of size.
- Install new tack strips rather than reusing old, flattened ones.
- Seal all seams with a high quality seam sealer to prevent delamination.
The next time you see a ripple, do not blame the store. Blame the guy who did not bring a power stretcher to the job. It is a heavy tool and it takes time to set up, but it is the only way to do the job correctly. If you want a floor that lasts, you have to respect the materials. You have to understand that the floor is a structural component of your living space. Treat it like one. Avoid the shortcuts and you will avoid the ripples.