How to Stop Carpet-to-Tile Transitions from Tripping Your Family
Eliminate The Trip Hazard At Your Carpet And Tile Thresholds
I spent three days grinding concrete on a job last month just so the floor wouldn’t click like a castanet. Most guys skip the leveling compound. They think the underlayment will hide the dip. It won’t. I have spent over twenty five years with my knees on the substrate and my hands covered in thin-set. I have seen families trip over transitions that were half an inch out of whack because an installer was too lazy to use a straightedge. A floor is a structural performance surface. If the transition between your carpet and your tile feels like a speed bump, you have a structural failure in the making. We are going to look at the physics of why these heights vary and how to fix them for good. This is not about aesthetics. This is about engineering a flat surface that respects the laws of gravity and the chemistry of adhesives.
The physics of the transition zone
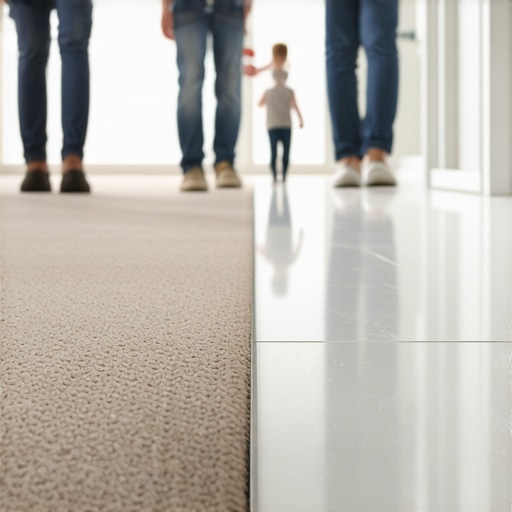
Carpet to tile transitions require precise height matching using specific subfloor preparation and specialized transition strips like Z-bars or reducers. Achieving a flush finish involves calculating the total stack height of the tile, thin-set, and subfloor against the carpet pile, pad, and tack strip height to eliminate vertical offsets. When you walk from a dense ceramic tile to a plush carpet, your foot expects a specific level of resistance. If the tile sits significantly higher than the carpet, you create a blunt edge. This edge catches socks and causes falls. The physics of this problem start at the subfloor level. Ceramic tile is rigid and brittle. Carpet is flexible and compressible. When these two materials meet, the subfloor must be perfectly level to accommodate the different thicknesses. Most installers fail because they do not account for the thin-set mortar bed, which adds roughly one eighth of an inch to the total tile height. If you do not plan for that extra thickness, you are already behind the curve.
Why your subfloor is lying to you
Floor leveling is the most overlooked step in transition management because subfloors often contain dips and peaks that create uneven heights at the threshold. Using a self leveling underlayment or a cementitious patch ensures a flat plane for both materials to reside upon. A subfloor might look flat to the naked eye, but a ten foot straightedge will reveal the truth. In many homes, the transition area is where two different types of subfloor meet, such as plywood and concrete. These materials expand and contract at different rates. If you have a dip where the carpet meets the tile, the carpet will sag, and the tile edge will become a hazardous cliff. I always mix my leveling compound to a specific consistency to ensure it flows into every low spot. This creates a monolithic surface. Without this, the carpet tack strip will not sit flush against the tile edge. This leads to the carpet pulling away over time, exposing the sharp pins of the tack strip. That is a disaster waiting to happen for anyone walking barefoot. No amount of decorative molding can fix a subfloor that is not on a true plane.
“A floor is only as good as the subfloor beneath it; deflection is the enemy of every joint.” – Master Flooring Axiom
The chemistry of thin-set and tack strips
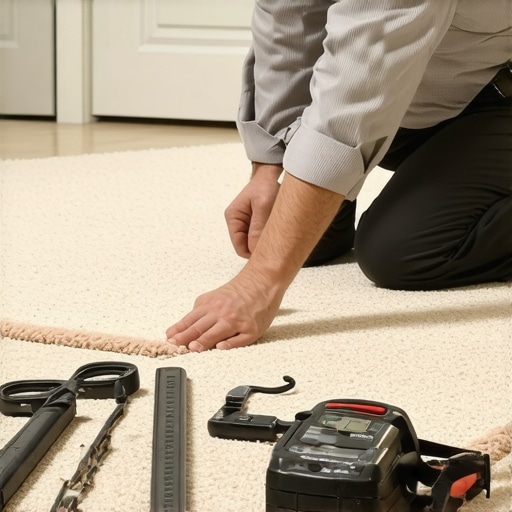
Professional carpet install procedures at tile junctions rely on the chemical bond of modified thin-set for the tile and the mechanical grip of architectural tack strips. Using a high polymer thin-set prevents tile debonding at the high stress transition point while proper carpet stretching ensures the fabric stays taut. When I set tile next to a carpeted area, I use a modified thin-set with high shear strength. This is because the edge of the tile takes the most impact from foot traffic. If the bond fails there, the tile will crack. On the carpet side, the tension is the key. You cannot just lay carpet down and hope it stays. You need a power stretcher. If the carpet is not under the correct amount of tension, it will develop ripples. Those ripples migrate toward the tile transition and create a secondary tripping hazard. I prefer architectural tack strips with three rows of pins for any transition that sees heavy use. The pins must be angled toward the wall to hold the carpet in place. When the carpet is tucked into the gulley between the tack strip and the tile, it creates a clean, professional finish that will not move for a decade.
Comparison of common transition materials
| Transition Type | Best Use Case | Height Tolerance | Longevity |
|---|---|---|---|
| Z-Bar | Carpet to Tile | Up to 1/2 inch | Very High |
| Reducer Strip | Tile to Laminate | 1/4 to 3/8 inch | Medium |
| T-Molding | Laminate to Laminate | Zero offset | High |
| Schluter Reno-U | Professional Tile Edge | Variable | Highest |
The table above shows that not all transitions are created equal. I despise cheap plastic T-moldings. They look like garbage and they snap under the weight of a heavy person. For a carpet to tile junction, the Z-bar is the gold standard. It allows the carpet to be tucked under the metal edge, hiding the raw cut and providing a smooth transition. If you are dealing with laminate or showers, the logic changes slightly. Laminate needs room to breathe because it is a floating floor. If you pin it down with a heavy transition, it will buckle in the middle of the room. You have to understand the expansion coefficient of every material you touch. In wet areas like showers, moisture protection is the priority. You need a transition that is 100 percent waterproof to prevent the carpet pad from acting like a sponge and rotting the subfloor from the inside out.
The one eighth inch that ruins everything
Precision measurement of the vertical offset between floor coverings determines whether a transition is safe or a hazard. A height difference of more than one eighth of an inch requires a ramp or a specialized reducer to ensure a smooth path for foot traffic and wheeled devices. I have spent hours with a planer shaving down subfloors just to get that perfect one eighth of an inch. If the tile sits higher than the carpet, you can use a shim under the carpet pad to bridge the gap. This creates a mini ramp that is invisible to the eye but detectable by the foot. We call this feathering. You use a feathering compound to smooth out the transition over a twelve inch span. This removes the abruptness of the change. If you ignore this, the transition will always feel like a mistake. I have seen people try to hide height differences with thick area rugs, but that just creates two trip hazards instead of one. Do the work on the subfloor and the finish will take care of itself.
“Failure to accommodate for substrate deflection is the primary cause of grout line failure and transition separation in residential installations.” – Tile Council of North America Standard
Checklist for a flush floor installation
- Verify subfloor levelness with a 10 foot straightedge before any material arrives.
- Calculate the total stack height including thin-set, tile, pad, and carpet pile.
- Apply a high quality primer before using any self leveling compound on concrete.
- Install the tile first to establish a hard edge for the carpet to finish against.
- Use a power stretcher to ensure the carpet is under maximum tension at the transition.
- Leave a 1/4 inch gulley between the tack strip and the tile for a proper carpet tuck.
- Seal the grout at the tile edge to prevent moisture from wicking into the carpet pad.
Following this checklist is the difference between a floor that lasts thirty years and one that needs repair in thirty days. I have seen too many homeowners try to save money by skipping the primer or the power stretcher. It always costs more in the long run. When you are working near showers or bathrooms, you must be even more diligent. Moisture is the enemy of the carpet install. If your tile work in the bathroom is not perfectly sealed, water will find its way under the transition. It will soak the carpet pad and start a mold colony before you even know there is a leak. This is why I always use a silicone bead under my transition strips in wet areas. It is a simple step that saves the subfloor from rot. You have to think like an engineer and act like a chemist.
Why carpet install goes wrong at the edge
Carpet edges fail at tile transitions when the installer neglects to use a Z-bar or fails to properly tuck the carpet into the transition gulley. A lack of tension results in fraying and pulling which exposes the subfloor and creates an unsightly and dangerous gap. The edge of the carpet is its weakest point. If the fibers are exposed, they will unravel. This is why we use a tucking tool. You have to jam that carpet into the gap with enough force that it stays put but not so much that you cut the backing. If the tile was installed poorly and has sharp edges, those edges will act like a knife on the carpet. I always rub a stone along the cut edge of my tile to smooth it out before the carpet guy shows up. It is about respect for the next trade and the final product. If the carpet isn’t tucked, the transition looks unfinished. It looks like a DIY job gone wrong. A pro knows that the transition is the signature of the entire room. It is where your craftsmanship is most visible. Do not rush the tuck.
Final thoughts for the job site
The reality of flooring is that it is hard, physical work that requires a mental commitment to precision. You cannot wing it. If you are mixing leveler, follow the water to powder ratio on the bag exactly. If you are setting tile, check your coverage. If you are stretching carpet, use the power stretcher, not just a knee kicker. Your family’s safety depends on the flatness of your floors. A trip hazard is a liability that no one should live with. Spend the extra time on the subfloor. Grasp the chemistry of your adhesives. Respect the physics of the transition. When you walk across that room and your foot doesn’t feel a single bump, you will know you did it right. It is the invisible details that make a floor great. Keep your tools clean and your levels true. That is how you build a floor that lasts a lifetime.