The ‘Painter’s Tape’ Trick for Perfect Silicone Beads
I spent three days grinding concrete on a job last month just so the floor wouldn’t click like a castanet. Most guys skip the leveling compound. They think the underlayment will hide the dip. It won’t. I was in a high-end condo in downtown Chicago, the kind of place where the light hits the floor at just the right angle to reveal every sin of the subfloor. The homeowner bought a high-quality laminate, but the slab was a topographical map of the Rockies. If I had just laid that floor down, the locking mechanisms would have snapped within six months. Instead, I lived with a diamond-blade grinder and a vacuum system for seventy-two hours. My boots were white with dust, and my ears were ringing despite the protection. But that floor is now flat within an eighth of an inch over ten feet. That is the difference between a floor that lasts twenty years and one that fails in two. Flooring is not about what you see. It is about the structural integrity of what you don’t see. Most people care about the color. I care about the moisture vapor emission rate and the compressive strength of the patch.
The hidden physics of floor leveling
Self leveling underlayment and portland cement based patches are the foundations of every successful carpet install or laminate project. You must achieve a flatness tolerance of three-sixteenths of an inch over a ten-foot radius to prevent floor failure and ensure the structural integrity of the locking joints.
A subfloor is a deceptive surface. To the naked eye, a concrete slab looks like a solid, immobile plane. To a floor installer, it is a shifting, porous sponge that breathes moisture and hides structural dips. When you are prepping for a laminate installation, the flatness of that slab determines the lifespan of the locking system. Laminate planks are engineered with tongue-and-groove profiles that are often less than three millimeters thick. If the floor encounters a dip, the plank flexes. If it flexes every time a person walks across it, the friction eventually wears down the tongue. Eventually, it snaps. This is why you hear that clicking sound in cheap apartment floors. It is the sound of a floor dying. I use a ten-foot straightedge to find these dips. Anything deeper than an eighth of an inch gets filled with a high-polymer modified leveling compound. You cannot just throw some liquid on the floor and hope it levels itself. You have to prep the slab. You have to prime the concrete so the leveler doesn’t lose its water to the thirsty slab too quickly. If the water leaves the leveler before it cures, the patch will become brittle and crack. It will turn back into sand under your new floor. I have seen entire houses where the floor felt crunchy because the installer didn’t use a primer. That is the kind of amateur mistake that ruins a reputation.
Why your laminate needs room to breathe
Laminate flooring expansion gaps and perimeter isolation are mandatory for managing the hygroscopic movement of wood-based cores. Without a quarter inch gap at every vertical obstruction, the internal stress of the floor will cause buckling and joint separation during seasonal humidity shifts.
I have seen $10,000 laminate jobs ruined because the installer forgot to leave a gap at the door casings. Wood and wood-composite floors are living things. They respond to the moisture in the air. In the summer, when the humidity in a place like New Orleans hits ninety percent, those planks are going to grow. If they hit a wall, they have nowhere to go but up. This results in a peak in the middle of the room. It feels like walking on a trampoline. People think waterproof laminate is immune to this. It is not. The core might be water-resistant, but the physical laws of thermal expansion still apply. You need a minimum of a quarter-inch gap around the entire perimeter. That includes cabinets, pipes, and transitions. I see guys jam the floor tight against a kitchen island because it looks cleaner. Do not do it. You are essentially pinning the floor to the subfloor. If the floor is pinned at the island and pinned at the wall, it will buckle in the middle. The physics are non-negotiable. You cover that gap with baseboards or shoe molding. The floor should be a floating island, never touching the mainland of the house structure itself.
| Subfloor Material | Max Moisture Content | Flatness Requirement | Recommended Primer |
|---|---|---|---|
| Concrete Slab | 3 lbs per 1000 sq ft | 1/8 inch per 10 feet | Epoxy or Acrylic |
| Plywood Subfloor | 12 percent MC | 3/16 inch per 10 feet | Latex Modified |
| OSB (Oriented Strand Board) | 10 percent MC | 1/8 inch per 6 feet | Sanding Required |
The ‘Painter’s Tape’ masterstroke for silicone beads
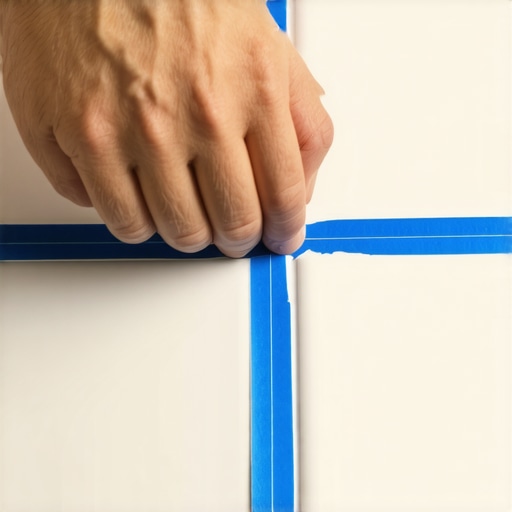
Silicone caulking in showers and flooring transitions requires painter’s tape masking to create a professional aesthetic and a watertight seal. This technique prevents caulk smear on tile surfaces and ensures that the bead thickness remains consistent across the entire expansion joint.
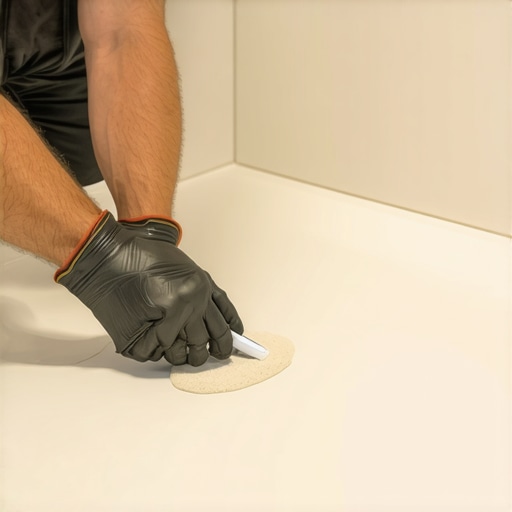
When you are finishing a shower or a transition between a tile floor and a baseboard, the silicone bead is the final signature of your work. Most guys just cut the tip of the tube, squeeze a messy line, and try to smooth it with a wet finger. It looks terrible. The silicone gets into the pores of the tile and creates a hazy mess that is impossible to clean. Here is the secret. You run two lines of blue painter’s tape. One on the floor and one on the wall, leaving exactly the width of the gap you want to fill. You apply the silicone, then you tool it with a smoothing tool or a gloved finger. While the silicone is still wet, you pull the tape. You pull it away from the bead at a forty-five-degree angle. What you are left with is a perfect, razor-sharp line that looks like it was factory-installed. This is vital in showers. In a shower, that silicone bead is the only thing standing between your subfloor and a mold nightmare. If the bead is thin or inconsistent, water will find its way behind the tile. I have seen joists rotted out because of a poor silicone job at the base of a shower pan. Silicone is a structural component of water management. Treat it with the respect it deserves.
“A floor is only as good as the subfloor beneath it; deflection is the enemy of every joint.” – Master Flooring Axiom
The tensile strength of a proper carpet install
Carpet stretching with a power stretcher is the only way to ensure the longitudinal tension required to prevent carpet ripples. A knee kicker is a tool for positioning, but it cannot provide the pounds per square inch of force needed to lock the latex backing into the tack strip.
Carpet is not just a rug you throw down. It is a textile that must be under constant tension. If you walk into a house and see ripples in the carpet, it means the installer was lazy. He used a knee kicker and called it a day. A knee kicker is for the edges. To actually stretch the carpet, you need a power stretcher. This is a long pole that braces against one wall and uses a lever to pull the carpet toward the other wall. You are essentially trying to make the carpet bigger. You want it so tight that you could play a quarter off it. This tension is what keeps the carpet from shifting and delaminating over time. The backing of a carpet is made of layers of polypropylene or jute held together by latex. If the carpet is loose, the layers rub together. This breaks down the latex and turns it into a fine white powder. That is why old carpet feels dusty even after you vacuum it. The floor is literally disintegrating because it wasn’t stretched tight enough. Also, never go too thick on the pad. People think a thick pad feels better. It doesn’t. A pad that is too thick or too soft allows for too much vertical movement. This puts stress on the carpet backing and will cause it to stretch out and ripple within two years. Stick to a high-density seven-sixteenths inch pad for the best balance of comfort and durability.
- Inspect the subfloor for any protrusions or recessed nail heads.
- Measure the moisture content of the slab at five different points.
- Apply the painter’s tape precisely one-eighth inch from the joint.
- Use 100 percent silicone rather than acrylic for all wet area transitions.
- Pull the tape immediately after tooling the bead to prevent skinning.
The 1/8 inch that ruins everything
Vertical deflection in a subfloor causes shearing forces in thin-set mortar and tile grout. Managing the deflection limit of L/360 for ceramic tiles is mandatory to prevent cracked tiles and hollow spots in high traffic showers or kitchens.
I have seen beautiful Italian marble floors ruined because the installer didn’t check the deflection of the joists. If you have a wood subfloor and the joists are spaced too far apart, the floor will bounce. Tile does not bounce. Tile is rigid. If the floor moves and the tile doesn’t, the bond between the two will break. This is why you get hollow-sounding tiles. Every time you step on that tile, you are grinding the thin-set into dust. Eventually, the tile cracks. To fix this, you often have to add a second layer of plywood or use a specialized uncoupling membrane. These membranes are designed to allow the subfloor to move horizontally without transferring that stress to the tile. It is a layer of plastic with a fleece backing that creates a shear plane. It is expensive, but it is cheaper than replacing a cracked marble floor. I never install tile without checking the joist span first. It is part of the job. If the architect missed it, I have to catch it. That is what it means to be a master installer. You are the last line of defense against a building failure.
“Standard wood flooring requires a stable environment between 60 and 80 degrees Fahrenheit to maintain dimensional stability.” – NWFA Installation Guidelines