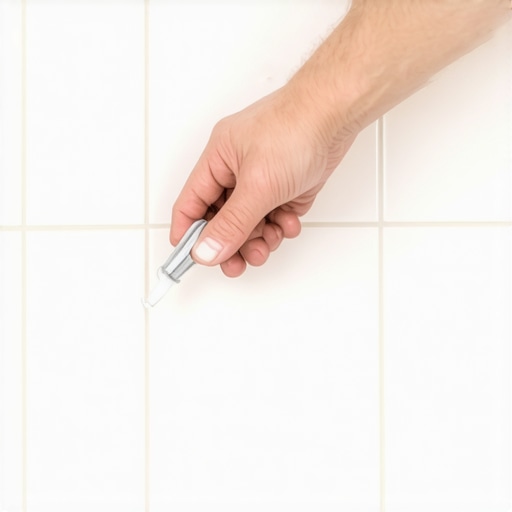
The ‘Bubble Test’ for Finding Leaks in Your Shower Liner
I spent three days grinding concrete on a job last month just so the floor wouldn’t click like a castanet, but that was nothing compared to the shower I saw in a high-end condo downtown last Tuesday. I walked into the bathroom and the smell hit me immediately. It was that sharp, metallic scent of rotting OSB and stagnant water. The homeowner had just spent thirty thousand dollars on a custom tile job, yet the crown molding in the hallway was starting to swell. Most guys skip the leveling compound and pray the underlayment hides the dip, but in a shower, there is nowhere for the physics of failure to hide. I pulled a single tile and found a swamp. The installer had used a cheap PVC liner and nailed it too low through the curb. It took me four hours to explain that his beautiful marble was now a giant, expensive sponge because no one performed a simple five-cent test before the tile went down. A shower is a structural engineering challenge disguised as a spa. If you do not respect the chemistry of the waterproofing, the house will eventually reclaim that space through rot and mold.
The physics of the bubble test
The bubble test for shower liners identifies leaks by using pressurized air or soap-water solutions to find microscopic punctures in the waterproofing layer. This diagnostic procedure is the final gatekeeper before thin-set and tile are applied. If the liner cannot hold a static water level or shows bubbling under slight pressure, the installation will eventually fail. You are looking for structural integrity, not just visual coverage. Every single joint and fold in a shower pan is a potential point of entry for moisture. The bubble test specifically targets the seams where PVC or CPE sheets are chemically welded together. If the chemical bond is not perfect, water will migrate via capillary action through the seam and into the wood subfloor or concrete slab below. Once water reaches the subfloor, it triggers a chain reaction of expansion and decay. In a house with carpet install or laminate flooring in the adjacent rooms, a minor shower leak can travel ten feet along the subfloor, ruining the padding and swelling the MDF cores of the laminate long before you see a spot on the ceiling below.
“A floor is only as good as the subfloor beneath it; deflection is the enemy of every joint.” – Master Flooring Axiom
Why your subfloor is lying to you
Subfloor levelness and structural deflection determine the long-term success of any wet area installation by preventing the cracking of waterproofing membranes. A subfloor might look flat to the naked eye, but if it has a dip of more than one-eighth of an inch over ten feet, the liner will be under constant tension. When you step into a shower, you are applying dynamic load. If the subfloor flexes, the liner stretches. Over thousands of cycles, that stretch becomes a tear. Floor leveling is not an optional aesthetic step. It is the foundation of the entire system. I use a self-leveling underlayment with a high compressive strength, usually around 4,000 PSI, to ensure there is zero movement. If you are working on a wooden subfloor, you need to check the joist spacing. If the joists are too far apart, the subfloor will bounce, and no amount of waterproofing will save you. The bubble test often reveals leaks that only occur when weight is applied to the pan, highlighting the absolute necessity of a rock-solid base before the first drop of water is poured.
The chemistry of the pre-slope and the liner
The pre-slope is a sloped layer of mortar beneath the shower liner that directs moisture toward the weep holes in the drain assembly. Most amateur installers put the liner flat on the subfloor and then build their slope on top of it. This is a catastrophic error. When water inevitably gets through the grout and the mortar bed, it hits the flat liner and sits there. It becomes a stagnant pond under your feet. This leads to the growth of black mold and the eventual breakdown of the adhesive bond between the tile and the substrate. A proper installation requires a pre-slope of at least one-fourth inch per foot. This is where showers live or die. The chemistry of the mortar matters here. You need a dry-pack mortar, often called deck mud, which has a specific ratio of one part Portland cement to four or five parts sand. It should be just damp enough to hold its shape when squeezed. If it is too wet, it will shrink and crack. If it is too dry, it will crumble. This layer creates the primary drainage plane that protects the wood framing from the constant humidity of a bathroom environment.
| Liner Material | Chemical Composition | Durability Rating | Application Method |
|---|---|---|---|
| PVC Liner | Polyvinyl Chloride | Moderate | Solvent Weld |
| CPE Liner | Chlorinated Polyethylene | High | Solvent Weld |
| Liquid Membrane | Polymer-modified | Very High | Roller/Brush |
| Sheet Membrane | Polyethylene Fleece | Extreme | Thin-set Bond |
Gravity always wins the moisture war
Water management in a bathroom relies on gravity to move liquid through the drainage system and prevent saturation of the structural components. Capillary action is the enemy. Water can actually move upward through porous materials like wood or drywall if there is no break in the surface tension. This is why the liner must be integrated into the drain assembly with a clamping ring. The bubble test will show if the clamping ring is tight. If you see bubbles at the drain, the bolts aren’t tight enough or the gasket is misaligned. I have seen laminate floors in bedrooms buckle because water was wicked through the subfloor from a faulty shower drain. The moisture vapor transmission rate of a concrete slab is another factor. If the slab is pushing moisture up while the shower is leaking down, the materials in the middle are caught in a vice of rot. You must use a moisture meter. Do not guess. If the slab is over 4 percent moisture, you have work to do before you even think about laying a liner. This is the difference between a floor that lasts five years and a floor that lasts fifty.
- Ensure the subfloor is clean of all sawdust and oil before starting.
- Apply the pre-slope with a minimum 2 percent grade toward the drain.
- Allow the solvent weld on the liner seams to cure for at least 24 hours.
- Plug the drain with a pneumatic test plug rather than just a rag.
- Fill the pan with water to at least two inches above the highest seam.
- Mark the water level and wait 24 hours to check for any drop.
- Apply soapy water to the exterior of the liner if the water level drops.
The 1/8 inch that ruins everything
Small deviations in the height of the curb or the placement of the liner can cause water to bypass the waterproofing system entirely. The curb is the most common failure point. Installers often use a wooden 2×4 for the curb, which is a mistake because wood moves. When that wood swells, it punctures the liner from the inside. I prefer using solid brick or high-density foam curb forms that are dimensionally stable. The liner must go over the curb and be fastened on the outside face, never on the top or the inside. A single staple in the wrong place is a path for water. When you are doing a carpet install right up against a shower, the transition strip must be sealed. If the shower leaks, the tack strip for the carpet will act like a fuse, carrying the moisture into the rest of the house. You need to understand that a shower is a pressurized environment when the water is running. The kinetic energy of the water hitting the floor pushes it into every crack. If your liner has a pinhole, that pressure will find it. This is why the bubble test is non-negotiable for anyone who calls themselves a professional.
“The slope of the sub-drain shall be a minimum of one-fourth inch per foot toward the drain.” – TCNA Handbook Logic
The myth of waterproof grout
Grout is a porous material that slows down water penetration but does not stop it from reaching the underlying waterproofing layer. Homeowners often think that if they use epoxy grout, they don’t need to worry about the liner. This is a dangerous lie. Epoxy grout is better, but it is not a substitute for a properly tested pan. Even the best grout will eventually develop hairline cracks due to building settlement or thermal expansion. When you have a floor leveling issue, those cracks appear faster. The water goes through the crack, hits the mud bed, and then must be directed to the weep holes. If the weep holes are clogged with thin-set, the water backs up. I always put a handful of pea gravel around the drain before the final mortar bed goes in. This keeps the weep holes open. It is a simple trick that separates the masters from the mooks. If you don’t do it, you are just building a very slow-motion flood. The bubble test ensures that once that water gets past the grout, it stays where it belongs.