The ‘Moisture Meter’ Trick for Restoring Old Hardwood Without Cupping
The ‘Moisture Meter’ Trick for Restoring Old Hardwood Without Cupping
There is a specific kind of heartbreak that only a homeowner with a historic Kansas City home can understand. You’ve spent weeks researching hardwood floor refinishing Kansas City, hired a crew, moved all your furniture into the garage, and watched as your old, water-damaged, cupped floors were sanded down to a beautiful, smooth finish. For seven days, the floors look like a million bucks. But then, slowly, a nightmare begins to unfold. The boards start to bulge in the middle. What was once a flat surface now looks like a series of miniature mountain ranges. This is “reverse cupping,” and it is the single most common disaster in the world of wood floor refinishing Kansas City.
My name is Justin Kelley, and I’ve spent decades in the trenches of the Kansas City flooring industry. I’ve seen beautiful 100-year-old oak floors ruined because a contractor was in too much of a hurry to get to the next job. The secret to avoiding this disaster isn’t a special kind of sandpaper or a high-end finish; it’s a simple piece of technology and a lot of patience. We call it the “Moisture Meter Trick.” If you are looking to refinish hardwood floors Kansas City style – meaning, floors that will last another century – you need to understand the science of moisture before you ever turn on a drum sander.
In this guide, I’m going to pull back the curtain on why floors cup, why “fixing” them too early is a recipe for failure, and how we use professional-grade moisture meters to ensure your hardwood flooring Kansas City project is a permanent success rather than a temporary fix.
Understanding the Anatomy of a Cupped Floor
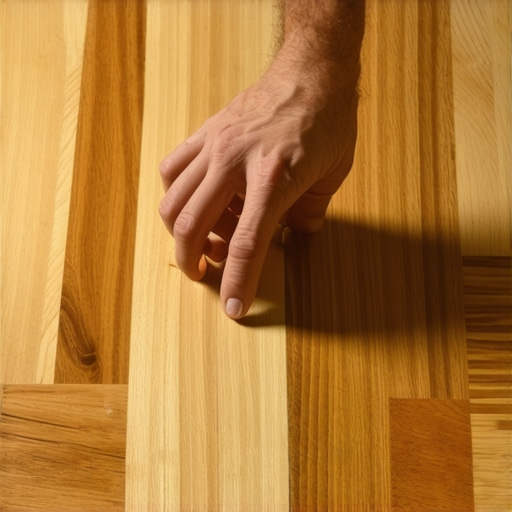
Before we can fix a floor, we have to understand why it’s “cupping” in the first place. In the industry, cupping is defined as a condition where the edges of a wood plank are higher than its center. If you were to lay a straightedge across a single board, you’d see a gap in the middle. This creates a washboard effect across the entire room.
Cupping is almost always caused by a moisture imbalance. Wood is a hygroscopic material, meaning it acts like a sponge. It absorbs and releases moisture based on its environment. When the bottom of a floorboard is wetter than the top, the bottom expands. Because the boards are locked together by tongue-and-groove joints, they have nowhere to go but up at the edges. This is why hardwood floor water damage repair is such a delicate process. It’s not just about the water you can see on the surface; it’s about the invisible vapor trapped in your subfloor.
In Kansas City, we see this constantly. Whether it’s a burst pipe, a leaking refrigerator, or simply the high humidity coming up from a damp crawl space during a Missouri summer, the wood reacts. If you are dealing with old hardwood floor restoration, you might even be seeing the effects of decades of seasonal shifts. The key takeaway is this: the wood is physically distorted because the cells in the bottom of the board are swollen with water while the cells on the top are relatively dry.
The “Reverse Cupping” Trap: Why DIYers (and Bad Contractors) Fail
This is where things go wrong for most people. A homeowner sees a cupped floor and thinks, “I just need to sand those high edges down until the floor is flat again.” Many refinishing hardwood floor contractors will agree with them because they want to finish the job and collect a check. This is the “Reverse Cupping” Trap.
Imagine a cupped board. The edges are high because the bottom is swollen. If you sand that board flat while it is still wet, you are physically removing wood from the edges to match the level of the center. You’ve “flattened” the floor, but you’ve done so by making the edges of the board thinner than the middle. Now, what happens when the floor finally dries out? As the moisture leaves the bottom of the board, the wood shrinks. The edges that were once high now drop down. But because you sanded them off, they drop lower than the center. Your floor now has “crowns” – the middle of every board is higher than the edges.
Crowning is much harder to fix than cupping because you’ve already sacrificed the wear layer of your wood. Before you even think about starting the sanding and refinishing hardwood floors process, you must ensure the wood is structurally sound. I always recommend performing The ‘Tap Test’ for Spotting Delaminated Wood Before You Sand. If the wood has pulled away from the subfloor or the layers of an engineered floor have separated, no amount of drying will save it. You’ll be looking at a hardwood floor patch or a full replacement instead.
The ‘Moisture Meter’ Trick: Step-by-Step
The “trick” isn’t a magic wand; it’s a protocol of measurement. To truly refinish hardwood floors Kansas City homes successfully, you have to work with the wood’s Equilibrium Moisture Content (EMC). This is the point where the wood is neither gaining nor losing moisture because it has reached a balance with the air in the room.
Step 1: Identify and Eliminate the Source
You cannot dry a floor if the source of the moisture is still active. If you have a leaky pipe, fix it. If your crawl space is a swamp, install a vapor barrier. In our region, hardwood floor water damage repair often involves checking if the HVAC system is properly dehumidifying the air. If you’re wondering about the foundation, you might also want to investigate How to Tell if Your Subfloor is Too Porous for Self-Leveler Primers, as subfloor issues often mirror surface wood issues.
Step 2: Get the Right Equipment
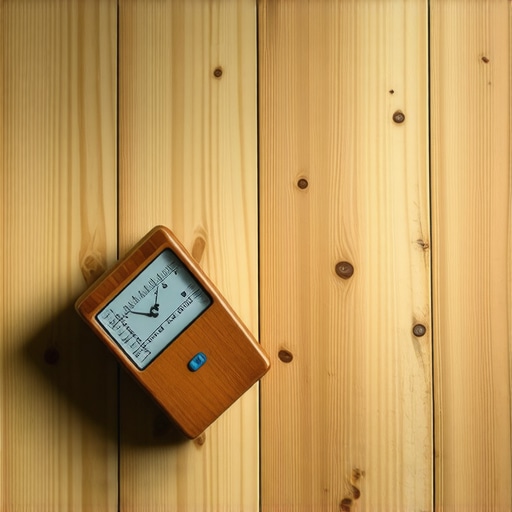
Forget the cheap $20 meters from the big-box stores. For professional wood floor refinishing Kansas City, we use pinless meters like the Wagner Orion series or the L5300 Industrial meter. These use electromagnetic waves to measure moisture deep within the wood without poking holes in your floor. This is vital because we need to know the moisture content at the bottom of the board, not just the surface.
Step 3: Establish a Baseline and Track
Take readings in the damaged area and compare them to a “dry” area of the house (like a closet or a hallway that wasn’t affected). Research shows that any reading above 20.0% is a major red flag – this is the threshold where wood rot begins to set in. If your meter is screaming at 20% or higher, you need industrial fans and dehumidifiers immediately.
Step 4: The Waiting Game
This is the hardest part of hardwood floor restoration. You must wait for the moisture content (MC) of the affected wood to come within 2% to 4% of the dry baseline. This can take weeks, or even months. If a contractor tells you they can sand a wet, cupped floor “flat” tomorrow, show them the door. They are setting you up for reverse cupping. We only begin the sanding and refinishing hardwood floors process when the meter tells us the wood has stabilized.
Hardwood Floor Repair vs. Replacement in Kansas City
Sometimes, despite our best efforts, a floor is too far gone. If the moisture was present for too long, the wood might have developed “heart rot” or become permanently stained black by tannins reacting with water. In these cases, hardwood floor repair involves removing the damaged planks.
If you only have a small area of damage, you don’t necessarily have to sand the entire house. We often use The ‘Randing Trick’ for Blending a Hardwood Floor Patch Without Sanding the Whole Room. This allows us to replace specific boards and blend them seamlessly into the existing floor. However, if the damage is structural or covers more than 30% of the room, you might consider if it’s time to replace carpet with hardwood or even look at modern alternatives.
For basements or areas with chronic moisture issues where even the best hardwood flooring Kansas City can’t survive, we often point clients toward luxury vinyl plank installers. Modern luxury vinyl tile installation offers a waterproof solution that looks remarkably like real wood, providing peace of mind in high-risk zones. But for those historic KC homes, nothing beats the original oak if it can be saved.
Why Kansas City Homeowners Need Professional Refinishing
The Kansas City climate is notoriously hard on wood. We have brutal, humid summers where the air feels like a wet blanket, followed by bone-dry winters where the furnace runs 24/7. This causes wood to expand and contract violently. A floor that was installed or refinished without accounting for this “seasonal swing” will eventually fail.
When you look for refinishing hardwood floor contractors, ask them about their moisture protocol. Do they own a Wagner meter? Do they know the EMC for Kansas City (which typically ranges from 6% in winter to 11% in summer)? If they don’t use a meter, they are just guessing. And guessing with your home’s most valuable asset is a dangerous game.
Professional hardwood floor refinishing Kansas City isn’t just about making the floor look pretty for the photos; it’s about ensuring the wood stays flat and the finish stays bonded. Once the floor is finally dry and sanded, we also look for fine details, like using The ‘Sunlight Test’ for Spotting Scratches in Hardwood Finishes to ensure the final coat is flawless. If we do find a minor blemish, we might employ The ‘Buffer Pad’ Trick for Blending Scratches in Hardwood Floor Refinishing to ensure a smooth, professional result.
The Science of the Finish: Protecting Your Investment
Once the ‘Moisture Meter Trick’ has confirmed your floor is stable, the next step in wood floor refinishing Kansas City is choosing the right protection. In our local climate, a high-quality polyurethane or a hard-wax oil is essential. These finishes don’t just provide scratch repair hardwood floors protection; they act as a barrier that slows down the exchange of moisture between the wood and the air. While no finish is 100% waterproof, a professional-grade seal can prevent minor spills from becoming major hardwood floor water damage repair projects.
Many homeowners ask about luxury vinyl plank installers because they want something “indestructible.” While LVP is great, a properly restored hardwood floor can be refinished multiple times over a century. The key is that wear layer. When we sand a floor that has been properly dried, we remove the absolute minimum amount of wood. This preserves the “meat” of the board, allowing for future generations to enjoy the same hardwood flooring Kansas City charm.
Conclusion: Patience is the Ultimate Tool
Restoring a cupped, water-damaged floor is a test of will. It’s tempting to rush the process, to get your house back in order, and to see that shine again. But the “Moisture Meter Trick” teaches us that the wood is in charge, not the contractor. By waiting for the wood to reach equilibrium and using precision tools to verify its state, you avoid the heartbreak of reverse cupping and crowning.
If you’re struggling with a floor that doesn’t look quite right, or if you’ve suffered a recent leak and don’t know where to turn, don’t reach for the sander yet. Trust the expertise of refinishing hardwood floor contractors who prioritize science over speed. At Floor Craft Store, we specialize in the difficult saves – the floors that others say need to be ripped out. Whether you need a hardwood floor patch, a full old hardwood floor restoration, or are considering luxury vinyl tile installation for a problematic basement, we have the tools and the local Kansas City experience to do it right.
Ready to see if your floors can be saved? Contact us today for a professional moisture assessment. Let’s make sure your hardwood floor refinishing Kansas City project is a success that lasts for decades, not just weeks. Trust Justin Kelley and the team to bring your floors back to life the right way.