The ‘White Vinegar’ Mistake That Is Killing Your Hardwood Shine
The White Vinegar Mistake That Is Killing Your Hardwood Shine
I once walked into a house where a 15,000 dollar wide-plank walnut floor was cupping so bad it looked like a potato chip because the installer didn’t check the crawlspace humidity. The homeowner was frantic. She had spent a fortune on the material, but she was making a second, slower mistake that would have ruined the floor even if the subfloor had been dry. She was mopping with a mixture of white vinegar and water every single day. She thought she was being natural and green. In reality, she was performing a slow-motion chemical peel on her polyurethane finish. I could smell the sharp, acidic tang the moment I stepped through the door, mixing with the scent of damp walnut. It is a smell that every master installer knows. It is the smell of a floor dying before its time. We are going to break down why that acidic solution is a death sentence for your investment and what the physics of a real floor actually requires.
Why your cleaning solution is an acid bath
White vinegar is a diluted form of acetic acid that chemically breaks down the molecular bonds of modern polyurethane floor finishes. Using it regularly will strip the luster, create micro-pitting in the wear layer, and eventually expose the raw wood to moisture damage. People think because it is a household staple, it must be safe. It is not. Modern hardwood is protected by a sophisticated chain of polymers designed to withstand abrasion, not acid. When you apply vinegar, you are essentially etching the surface. This creates a dull, cloudy haze that no amount of buffing can fix once the structural integrity of the finish is compromised. You might see a temporary shine as the liquid is wet, but as it evaporates, it leaves the finish more porous than it was before. This is a mistake I see from homeowners who transition from tile or laminate where the surfaces are much more chemically inert. Hardwood is a living, breathing biological product. It demands respect for its chemistry.
The ghost in the expansion gap
A proper hardwood installation requires a perimeter expansion gap of at least 1/2 inch to account for the seasonal movement of wood fibers. Without this gap, the floor will eventually buckle or crown as the relative humidity in the room changes. I see guys all the time who tight-fit their boards against the baseboards because they think it looks cleaner. Those are the same guys who get a callback in August when the floor starts lifting off the subfloor. Wood is hygroscopic. It absorbs moisture from the air. When the cells of the wood expand, that energy has to go somewhere. If there is no gap at the wall, the floor will arch. This is why floor leveling is not just about aesthetics. It is about physics. If your subfloor has a dip of more than 1/8 inch over a 10-foot radius, your floor is going to flex. That flex puts stress on the tongue and groove joints. Over time, those joints will squeak, then they will crack, and finally, they will fail entirely.
“A floor is only as good as the subfloor beneath it; deflection is the enemy of every joint.” – Master Flooring Axiom
Why your subfloor is lying to you
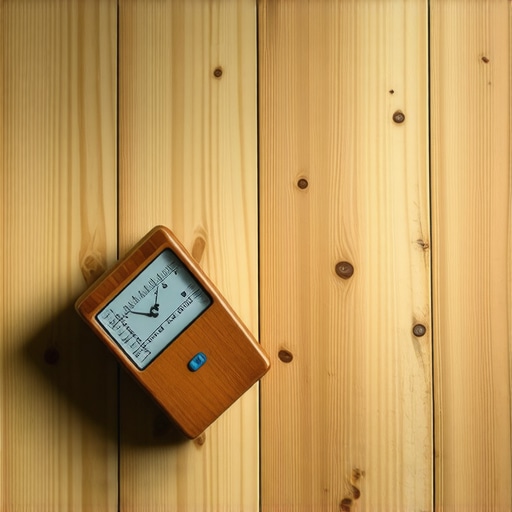
The subfloor must be checked for moisture content using a pin-type meter to ensure it is within 2 to 4 percent of the hardwood planks. Most installers just walk on it and think if it doesn’t creak, it is ready. That is a lie. Concrete slabs are notorious for holding onto water deep within their core. Even if the surface looks bone dry, capillary action can pull moisture up through the slab and into the bottom of your wood. This is why a calcium chloride test or an in-situ RH probe is mandatory for professional jobs. If you are doing a carpet install, you can get away with some dampness because the padding and fibers breathe. Hardwood does not breathe the same way. It traps that moisture. The moisture then saturates the bottom of the board while the top stays dry in the AC. That differential is what causes cupping. It is the same reason you never install wood next to open showers without a massive waterproofing transition. The steam alone can migrate through the walls and attack the floor from the side.
The 1/8 inch that ruins everything
Leveling a floor to a tolerance of 1/8 inch over 10 feet is the difference between a floor that lasts 50 years and one that fails in five. I spent three days grinding concrete on a job last month just so the floor wouldn’t click like a castanet. If you have a high spot, the plank will teeter-totter. If you have a low spot, the plank will bridge the gap. Every time you walk over that bridge, the wood bends. Wood is strong, but the thin tongue of a 3/4 inch board is not designed to be a structural spring. It will eventually snap. Then you get the dreaded clicking sound. It drives homeowners crazy. They think it is the wood. It is not the wood. It is the air underneath the wood. You have to use a high-quality self-leveling compound or a manual floor leveling patch to fill those voids before the first board ever hits the ground.
| Wood Species | Janka Hardness Rating | Acclimation Time Required |
|---|---|---|
| Brazilian Cherry | 2350 | 10-14 Days |
| White Oak | 1360 | 7-10 Days |
| Red Oak | 1290 | 7-10 Days |
| Black Walnut | 1010 | 14 Days |
| Laminate (High End) | N/A | 48 Hours |
The myth of the waterproof laminate
Laminate flooring is essentially a high-density fiberboard core with a photographic layer and a melamine wear layer that can still swell if water reaches the joints. Do not believe the marketing hype that says you can soak these floors. While the top surface is waterproof, the click-lock joints are the Achilles heel. If water sits on those joints, it will eventually seep into the HDF core. Once that core swells, it never goes back down. It is like a sponge. This is why I tell people to avoid using a wet mop even on laminate. A damp microfiber pad is all you need. If you use vinegar on laminate, you are doing less chemical damage than you would to hardwood, but you are still risking the integrity of the resins that hold the board together. Stick to pH-neutral cleaners specifically formulated for the floor type you have. Anything else is a gamble with your bank account.
Humidity is the invisible floor killer
Maintaining a constant relative humidity between 35 and 55 percent is the only way to ensure your hardwood floor stays dimensionally stable. If you live in a place with swampy humidity, you need a whole-house dehumidifier. If you live in a desert, you need a humidifier. I have seen solid oak floors shrink so much in the winter that you could drop a dime between the boards. This is not a product defect. It is a failure of environmental control. When the wood dries out, it loses mass. When it loses mass, it shrinks. When it shrinks, the gaps appear. Then the homeowner tries to fill those gaps with wood putty. That is the worst thing you can do. In the summer, when the humidity returns, the wood will expand again. If those gaps are filled with hard putty, the wood has nowhere to go and will crush its own fibers or pop the boards off the subfloor.
“Wood moves in two directions: across the grain and toward the nearest source of moisture.” – NWFA Technical Manual
The professional maintenance checklist
To keep a floor alive, you have to follow a strict protocol. Forget the old wives’ tales about vinegar and oil soap. Oil soap is even worse. It leaves a fatty residue that makes it impossible to do a screen-and-coat later. You will have to sand the floor down to the bare wood because the new finish won’t stick to the oil. Follow these steps instead:
- Vacuum with a soft brush attachment to remove abrasive grit and sawdust.
- Use a pH-neutral cleaner specifically designed for polyurethane finishes.
- Place breathable rugs at all exterior entry points to catch salt and dirt.
- Trim your pet’s nails regularly to prevent deep scratches in the wear layer.
- Check your HVAC system’s humidity settings every time the season changes.
- Never, under any circumstances, use a steam mop on wood or laminate.
Why steam mops are a professional’s nightmare
Steam mops force pressurized water vapor into the grain of the wood and the seams of the laminate, causing immediate and irreversible structural damage. I see the damage every week. A homeowner buys a steam mop because they want to sanitize their floors. The heat from the steam softens the polyurethane finish. The pressure then forces moisture into the wood fibers. This causes the edges of the boards to turn white or gray. That color change is the finish delaminating from the wood. Once that happens, you are looking at a full sand and refinish job. On a laminate floor, the steam will blow out the joints in a matter of months. If you want a clean floor, use a dry method first and a slightly damp method second. If you see standing water, you are using too much liquid. The floor should be dry within 60 seconds of cleaning. If it takes longer than that, you are killing your floor. Take it from someone who has spent a lifetime fixing these mistakes. Respect the chemistry of the finish and the physics of the subfloor. Your wallet will thank you.