The ‘Sunlight Test’ for Spotting Scratches in Hardwood Finishes
The Professional Sunlight Test for Hardwood Floor Scratch Detection
I once walked into a house where a $15,000 wide-plank walnut floor was cupping so bad it looked like a potato chip because the installer didn’t check the crawlspace humidity. The homeowner was devastated. The floor looked perfect under the dim construction lights, but as soon as the morning sun hit those planks at a glancing angle, every ripple and every sanding mark screamed for attention. That experience taught me that light is the most honest tool in a floor installer’s bag. If you want to know the truth about your hardwood finish, you have to wait for the sun. I have spent twenty five years on my knees with a moisture meter and a level, and I can tell you that a floor is not a decoration, it is a structural engineering challenge. When you see a scratch, you are not just seeing a mark, you are seeing a failure in the polymer chain of the protective coating.
The physics of glancing light on polyurethane
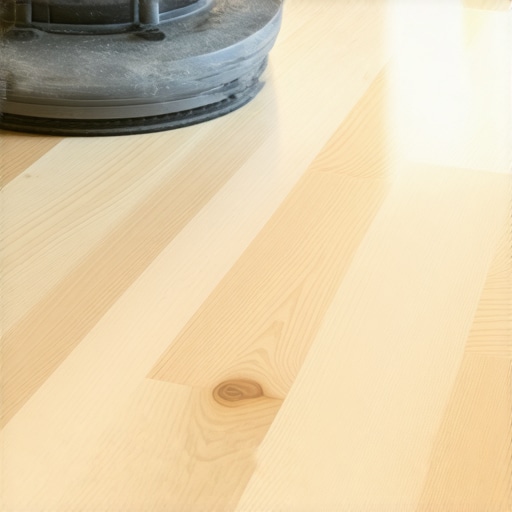
Hardwood finish inspection requires low angle natural light to reveal specular reflection disruptions and surface abrasions in the sacrificial wear layer. When photons hit a smooth surface at a shallow angle, they reflect uniformly. However, even a microscopic scratch in the aluminum oxide or water based polyurethane causes the light to scatter in multiple directions. This scattering is what makes a scratch visible to the human eye. Most people look at their floors from a standing position with overhead lighting. This is the worst way to inspect a floor. To truly see what is happening with the chemistry of your finish, you need to be at floor level when the sun is at a low horizon point. This reveals the microscopic profile of the finish, including chatter marks from a poorly tuned drum sander or the orange peel effect of a finish that was applied too thick in high humidity.
“A floor is only as good as the subfloor beneath it; deflection is the enemy of every joint.” – Master Flooring Axiom
The deceptive nature of overhead lighting
Overhead lighting hides topographical irregularities and mechanical scratches because the direct vertical illumination fills the micro-fissures with light rather than casting a shadow. In my shop, I smell like WD-40 and oak dust most days, and I see homeowners get tricked by high hats and chandeliers. Those lights make a floor look like a mirror from six feet up. But the sunlight test is the ultimate arbiter. It exposes the grit that was trapped in the finish during the final coat. It shows where the installer failed to vacuum the baseboards properly. If you see a series of small, rhythmic scratches, those are often caused by the vibration of a buffer. These are invisible under artificial light but look like a disaster when the sun comes through a west facing window at 4:00 PM. This is why floor leveling is not an optional step, it is the foundation of a flat reflection.
The 1/8 inch that ruins everything
Floor leveling is the structural foundation for finish longevity because subfloor deflection causes micro-cracking in the brittle polyurethane matrix. If your subfloor has a dip of more than one eighth of an inch over a ten foot span, your hardwood or laminate will flex. Every time you walk on it, that flex stresses the finish. Over time, the finish will develop tiny white lines. These are not just scratches, they are fractures in the chemical bond. I have seen guys try to hide these dips with thick carpet install padding or extra underlayment. It never works. The floor eventually clicks like a castanet. When you are looking at your floor in the sunlight, look for those white fracture lines near the joints. That is the floor telling you that the installer skipped the leveling compound to save a few bucks on labor.
| Finish Type | Janka Impact Resistance | Refractive Index | Acclimation Time |
|---|---|---|---|
| Site-Finished Oil Poly | Moderate | 1.48 | 7-14 Days |
| Water-Based Urethane | High | 1.43 | 3-5 Days |
| Aluminum Oxide (LVP/Pre-finished) | Extreme | 1.55 | 48 Hours |
| Hardwax Oil | Low | 1.46 | 24 Hours |
The microscopic profile of a finish failure
Finish failure manifests as delamination or adhesion loss when the chemical bond between finish coats is compromised by improper abrasion. If the installer did not use the right grit of sandpaper between the second and third coat, the top layer has nothing to bite into. This is called a mechanical bond failure. In the sunlight, this looks like a thin film of plastic peeling off the wood. It is often mistaken for a scratch. You can test this by taking a piece of blue painter’s tape and pressing it onto the suspect area. If the finish comes up with the tape, the bond failed. This is why I am a stickler for NWFA standards. There are no shortcuts in the chemistry of a floor. If you are transitioning from a wood floor to showers or tiled areas, the moisture barrier is even more critical. High humidity from a bathroom can migrate under the wood and cause the finish to cloud, a phenomenon known as blushing.
- Inspect the floor when the sun is at a 15 to 30 degree angle to the horizon.
- Turn off all interior overhead lights to prevent glare wash.
- Look for rhythmic patterns which indicate machine sander errors.
- Check for white lines at the edges of planks which suggest movement and deflection.
- Use a moisture meter to ensure the subfloor is within 2 percent of the hardwood moisture content.
The chemistry of the bond and mechanical adhesion
Molecular bonding in modern floor finishes relies on cross-linking technology which creates a three-dimensional lattice resistant to molecular abrasion. When you use the sunlight test and see those fine, hair-like scratches, you are looking at the disruption of this lattice. The hardness of the wood, measured on the Janka scale, also plays a role. A soft wood like pine will allow the finish to compress into the wood fibers, creating a dent. A hard wood like Brazilian Cherry will resist the dent but the finish itself might shatter because it is harder than the wood substrate. This is why I tell people to stop looking for the thickest underlayment. Too much cushion actually causes the locking mechanisms on LVP to snap under pressure. You want a firm, flat base so the finish can do its job without being subjected to mechanical stress from below.
“Moisture is the primary catalyst for finish delamination in site-finished hardwood installations.” – NWFA Technical Publication
The ghost in the expansion gap
Expansion gaps are essential perimeter requirements that allow hygroscopic movement without causing vertical lift or finish stress. If your floor is tight against the wall, it has nowhere to go when the humidity rises. The floor will peak at the seams. In the sunlight, these peaks look like little mountains running across your room. They catch the light and create shadows that make the floor look wavy. This is not a finish problem, it is a physics problem. Wood is a living material. It breathes. It moves. If you don’t give it room to expand, it will destroy the finish you spent thousands of dollars on. I have seen beautiful oak floors ruined because the baseboards were nailed too tight to the floor, pinning it down and causing it to buckle. The sunlight test makes these elevation changes impossible to hide.