The Hair Dryer Trick for Getting Creases Out of New Carpet
The Hair Dryer Trick for Getting Creases Out of New Carpet
Most guys skip the leveling compound. They think the underlayment will hide the dip. It won’t. I spent three days grinding concrete on a job last month just so the floor wouldn’t click like a castanet. That is the reality of this trade. I have spent 25 years on my knees with a moisture meter and a level. I am the guy you call when the cheap installer leaves your house looking like a disaster zone. I smell like WD-40 and oak dust. I do not care about the color of your drapes. I care about the structural integrity of the surface you walk on. When you buy a new roll of carpet, it arrives with a history of pressure. It has been sitting in a warehouse under thousands of pounds of other rolls. This creates creases. These are not just aesthetic flaws. They are structural deformations in the secondary backing. If you do not fix them during the carpet install, they will become permanent trip hazards and wear points. Here is how you use physics and chemistry to save your floor.
The science of carpet creases and fiber memory
The hair dryer trick works by initiating thermal relaxation in the carpet backing. Most modern carpets use a secondary backing made of SBR latex and polypropylene. When heat is applied, the glass transition temperature of the polymers is reached, allowing the fibers to return to their original manufactured state and eliminating the crease. This is not about the fluff on top. It is about the chemistry of the adhesive underneath. Carpet is a multi-layered engineering product. The primary backing holds the face fibers. The secondary backing provides the dimensional stability. Between them is a layer of latex adhesive. When a roll is stored improperly, this latex develops a set. It is similar to how a plastic bottle stays crushed if it is left in a hot car. To fix it, you have to understand the molecular structure of the backing. If you apply too much heat, you delaminate the floor. If you apply too little, the crease remains. It is a game of precise thermal application. I have seen homeowners ruin $5,000 installations because they did not understand the difference between warming the backing and melting the face fibers.
“A floor is only as good as the subfloor beneath it; deflection is the enemy of every joint.” – Master Flooring Axiom
The physics of thermal relaxation in latex backing
To remove carpet creases with a hair dryer, you must apply consistent heat to the underside of the material. By focusing 120 to 140 degrees Fahrenheit on the crease, you allow the synthetic fibers to expand and lose their mechanical memory. This process is called annealing the polymer backing. Do not hold the dryer in one spot for more than ten seconds. You are looking for the backing to become pliable. Once it is warm, you must immediately tension the carpet. I use a power stretcher. A knee kicker is for closets. If you are doing a main living area, you need the mechanical advantage of a long-pole stretcher. You pull the carpet toward the wall until the crease flattens out. As the latex cools, it sets in the new, flat position. This is how you achieve a professional finish. It is the same principle I use when I am dealing with floor leveling issues. You cannot build a house on sand. You cannot lay a floor on a bumpy subfloor. The hair dryer is just one tool in a kit that should include straightedges and moisture barriers.
Why your subfloor is lying to you
A level subfloor is required for a crease-free carpet install because dips in the wood or concrete create shadowing that mimics structural creases. If your subfloor has a deviation of more than 3/16 of an inch over ten feet, the carpet will eventually bridge or ripple regardless of how much heat you apply. Most people think carpet hides sins. It does not. It highlights them. If you have a dip in your plywood, the carpet will eventually sag into it. This creates a pocket of air. When you walk on it, the carpet moves. That movement breaks down the latex backing over time. I spend more time with floor leveling compound than I do with the actual carpet. I look for high spots in the concrete. I grind them down until the dust is everywhere. I look for low spots. I fill them with high-compressive strength underlayment. If you do not do this, your hair dryer trick is just a temporary fix for a permanent structural failure. I have seen $20,000 hardwood jobs fail because the installer did not want to spend two hours checking the slab for moisture. Do not be that guy.
The moisture trap near showers and wet areas
In areas near showers or bathrooms, moisture vapor transmission can cause carpet backings to expand and ripple. If the relative humidity of the subfloor exceeds 75 percent, the latex adhesive in the carpet backing can re-emulsify or lose its grip. This leads to bubbles and creases that reappear after you have fixed them. This is a massive problem in humid climates. If you are in a place like Houston or Miami, the air is thick. That moisture wants to move from the damp slab into the dry house. It goes through the carpet. It hits the latex. It softens it. Suddenly, your perfectly stretched carpet is loose. When I am working near showers, I always check the transition strips. I ensure there is a proper moisture barrier. If you have a crease near a bathroom door, check for a leak first. The hair dryer will not fix a plumbing problem. It will only make the room smell like hot, wet wool.
| Fiber Type | Janka Hardness (Subfloor) | Melting Point (F) | Elastic Recovery |
|---|---|---|---|
| Nylon 6,6 | N/A | 490 | High |
| Polyester (PET) | N/A | 482 | Moderate |
| Polypropylene | N/A | 320 | Low |
| OSB Subfloor | 650 | N/A | Minimal |
| Plywood (Oak) | 1360 | N/A | Minimal |
The 1/8 inch that ruins everything
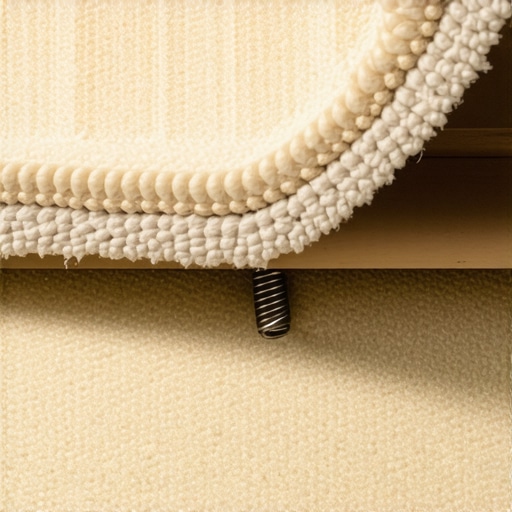
Precision carpet tensioning requires exactly 1 to 1.5 percent stretch across the width and length of the room. If you undershoot this by even 1/8 of an inch, the tension will be insufficient to hold the backing flat against the subfloor. This results in recurrent creasing in high-traffic lanes. I see this all the time with DIY installs. They use the hair dryer. The crease goes away. Two weeks later, it is back. Why? Because they did not lock the tension into the tack strips. You have to engage the pins. The tack strips are your anchors. If they are rotten or loose, the whole system fails. I check every single strip before I start. I replace the ones with rusted nails. I make sure they are spaced exactly half the thickness of the carpet away from the baseboard. This is the structural engineering of flooring. It is not about looking pretty. It is about the load-bearing capacity of the textile assembly. If you do not have the right tension, the carpet will delaminate. The face fibers will pull away from the backing. Then you are looking at a total replacement.
The chemical bond of modern adhesives
Comparing carpet install to laminate flooring reveals that dimensional stability is governed by expansion gaps and adhesive integrity. While laminate requires a 1/4 inch perimeter gap to breathe, carpet requires mechanical tensioning to stay stable under changing humidity. Both systems fail when the subfloor moisture is not controlled. If you are transition from a carpeted hallway to a laminate kitchen, the threshold is the point of failure. I hate bulky T-moldings. I prefer a zero-threshold transition. But you can only get that if your floor leveling is perfect. If the floors are not at the same height, you get a trip hazard. The hair dryer can help relax the carpet at the transition point so it sits flush. It is about making two different materials behave as one. I use a heat bond iron for the seams. The tape has to be melted at the right temperature. Too hot and you smoke the latex. Too cool and the seam pops. It is a delicate balance of heat and pressure. Most people do not have the patience for it. They want it done in an hour. I tell them to go to a big box store if they want a fast, bad job.
- Inspect the carpet roll for any visible delamination before starting.
- Check subfloor moisture levels with a calcium chloride test.
- Ensure all tack strips are securely anchored to the subfloor.
- Use a power stretcher for all areas larger than 10×10 feet.
- Apply heat with the hair dryer to the backing, not the face fibers.
- Roll the crease with a weighted roller while the backing is still warm.
- Allow the carpet to acclimate to the room temperature for 48 hours.
“A floor is a performance surface; treat the installation like an engineering project, not a weekend hobby.” – Master Flooring Axiom
A checklist for flawless carpet tensioning
To guarantee a crease-free carpet installation, you must follow a strict protocol of acclimation and stretching. First, acclimate the carpet to the site environment for at least 24 hours to stabilize the backing. Second, verify the subfloor is flat within 3/16 inch to prevent shadowing. Third, apply localized heat to any shipping creases using the hair dryer method. Fourth, engage the power stretcher to 1 percent elongation. Finally, secure the carpet to the tack strips and trim the excess. This prevents the carpet from moving. Movement is the enemy. Every time you step on a loose carpet, you are stretching the fibers. Eventually, they lose their elasticity. That is when you get the ripples that look like waves in the ocean. No amount of heat will fix a carpet that has been stretched beyond its elastic limit. You have to do it right the first time. I have spent my life fixing other people’s mistakes. It is usually because they skipped the prep. They did not want to spend the money on a leveler. They did not want to wait for the slab to dry. They just wanted the carpet down. And now they have a floor that looks like a topographical map.