The Best Way to Transition Carpet to a Wood Floor Without a Metal Strip
Professional Methods for Transitioning Carpet to Wood Without Metal Strips
I spent three days grinding concrete on a job last month just so the floor wouldn’t click like a castanet. Most guys skip the leveling compound. They think the underlayment will hide the dip. It won’t. You can’t hide a half inch sag with a bit of foam. That job taught the client that a carpet install is only as good as the floor leveling underneath. If the subfloor isn’t flat, your transition will look like a speed bump. I have spent twenty five years on my knees, smelling like oak dust and floor wax, and I can tell you that a metal strip is often the mark of a rushed installer. It is a trip hazard. It is an eyesore. It is a shortcut taken by people who do not understand the physics of a tensioned textile meeting a rigid organic plank.
The physics of the tuck and roll technique
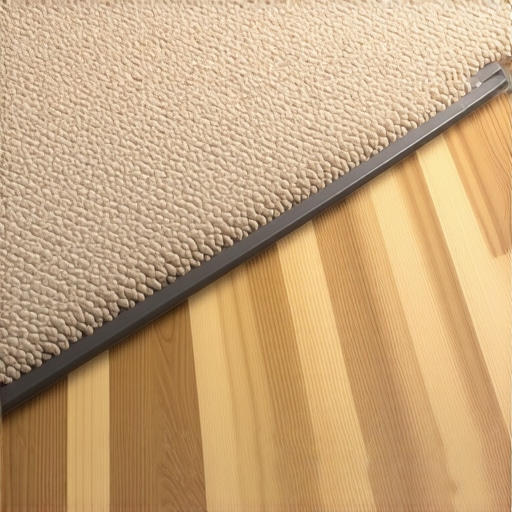
Carpet to wood transitions without metal involve using a tack strip spaced precisely from the hardwood edge, allowing the carpet pile to be tucked into the gap for a flush finish. This requires precision subfloor preparation and the use of tensioning tools like a power stretcher to ensure the carpet does not pull away over time. You have to understand the mechanical bond between the primary backing of the carpet and the grip of the architectural tack strip. This is not just about aesthetics. It is about the resistance of the lateral force applied when someone walks across the threshold. The wood edge must be perfectly straight. Any deviation in the cut of the wood will be amplified once the carpet is tucked against it. I prefer using a track saw to get that edge crisp. A hand saw or a standard circular saw leaves too much room for human error. We are looking for a tolerance of less than one thirty second of an inch.
Why your subfloor is lying to you
Subfloor flatness is the most frequently ignored variable in any flooring project, specifically when transitioning between materials like laminate or carpet. If the subfloor deflection exceeds L/360 standards, the transition will eventually fail because the two materials will move at different rates under load. I have seen guys try to transition to wood near showers without a moisture barrier. The wood expands. The carpet stays put. The gap opens up like a canyon. You need to verify that your plywood or concrete is within three sixteenths of an inch over a ten foot radius. If it is not, you get out the grinder or the self leveling underlayment. There is no middle ground. If you try to bridge a dip with carpet, you create a soft spot that will eventually pull the staples out of the tack strip. The chemistry of the subfloor matters too. If you are over concrete, you need to check the calcium chloride levels. High moisture will rot the tack strip nails from the bottom up.
“A floor is only as good as the subfloor beneath it; deflection is the enemy of every joint.” – Master Flooring Axiom
The tool kit for a zero threshold finish
Professional flooring tools required for a metal free transition include a power stretcher, a stair tool, and a carpet tucker to ensure the material is locked into the gully. Without a power stretcher, you are just guessing at the tension. A knee kicker is fine for small closets, but for a main transition, you need the mechanical advantage of a long pole stretcher. You also need a specialized wood transition piece if the heights do not match perfectly. This is often called a ‘reducer’ but we are talking about a flush finish here. To get that, you might need to shim the subfloor under the carpet with an eighth inch of luan. It is about matching the height of the compressed carpet to the height of the finished wood. This is where the math gets messy. You have to account for the thickness of the pad, the height of the carpet pile, and the thickness of the wood plank itself.
Required Tools Checklist
- Power stretcher with tail block
- Crain 126 or 130 Carpet Tucker
- Architectural tack strips (tri-nail)
- Track saw for precision wood edging
- Non-staining wood glue for the edge plank
- Electric stapler with 9/16 inch staples
The chemical bond and edge stability
Wood adhesive chemistry plays a vital role in stabilizing the edge of the hardwood floor where it meets the carpet tuck. Since this edge will be under constant pressure from the carpet being pushed into the gully, the last row of wood must be glued and nailed to prevent lateral shifting. Most people just nail it. That is a mistake. The nails can loosen. A bead of high quality urethane adhesive under that final plank ensures it stays put for decades. This is especially true with laminate floors that are floating. You cannot easily do a metal free transition with a floating floor because the laminate needs to move. If you tuck carpet against a floating floor, you are essentially pinning it. This leads to buckling in the summer. If you are working with laminate, you must use a specialized transition or a fixed wood header that is anchored to the subfloor.
Comparison of Transition Methods
| Method | Visual Profile | Durability | Complexity |
|---|---|---|---|
| Metal T-Bar | High/Bulky | Medium | Low |
| Z-Bar Tuck | Flush/Clean | High | High |
| Turn and Tack | Minimalist | High | Medium |
| Overlapping Reducer | Visible Lip | High | Low |
The 1/8 inch that ruins everything
Precision gully spacing is the difference between a professional transition and a DIY failure that frays at the edges within six months. The gully is the space between the tack strip and the wood floor. It should be exactly two thirds of the thickness of the carpet. If the carpet is half an inch thick, your gully should be about one third of an inch. If you make it too big, the carpet will pop out. If you make it too small, you will never get the stair tool to shove the backing down. This is why I carry a set of spacers. I don’t trust my eyes after ten hours on a job site. I want the same gap at the start of the door as I have at the end. Consistency is the hallmark of a master. When you tuck the carpet, you should hear a satisfying ‘thud’ as the backing seats against the subfloor. That sound tells you the tension is correct. Anything else is just a prayer.
“Wood moves. Carpet stretches. The installer’s job is to negotiate the peace between them.” – Master Flooring Axiom
Environmental factors in the transition zone
Acclimation and humidity are the silent killers of clean flooring transitions, especially in regions with high seasonal swings. If you install wood at 10 percent moisture and it drops to 6 percent in the winter, that gap is going to grow. Suddenly your perfect tuck is looking loose. I always use a moisture meter on both the subfloor and the hardwood. If they aren’t within 2 percent of each other, I don’t start the job. I don’t care if the homeowner is in a hurry. I’ve seen $15,000 floors ruined because someone didn’t wait for the wood to breathe. For the carpet side, humidity affects the stretch. A humid day makes the latex backing more pliable. If you stretch it tight when it is wet and it dries out, it can actually pull the tack strip right off the floor. You have to account for the atmospheric conditions of the room. This is the part of the job that separates the mechanics from the architects. It is not just about the saw and the hammer. It is about understanding the environment.
{“@context”:”https://schema.org”,”@type”:”HowTo”,”name”:”How to Transition Carpet to Wood Without Metal Strips”,”description”:”A professional guide to creating a flush carpet-to-wood transition using the tuck and roll method.”,”step”:[{“@type”:”HowToStep”,”name”:”Prepare the Subfloor”,”text”:”Ensure the subfloor is level within 3/16 inch over 10 feet using a grinder or leveling compound.”},{“@type”:”HowToStep”,”name”:”Install the Wood Edge”,”text”:”Glue and nail the final row of hardwood to ensure it remains stationary under carpet tension.”},{“@type”:”HowToStep”,”name”:”Set the Tack Strip”,”text”:”Install architectural tack strips approximately 1/4 inch away from the wood edge to create a gully.”},{“@type”:”HowToStep”,”name”:”Stretch the Carpet”,”text”:”Use a power stretcher to pull the carpet over the tack strips, ensuring high tension.”},{“@type”:”HowToStep”,”name”:”Tuck the Edge”,”text”:”Use a stair tool or carpet tucker to drive the carpet backing into the gully for a flush finish.”}]}