The ‘Bucket Weight’ Trick for Keeping Large Format Tiles from Sliding
Gravity is not your friend on a vertical plane
The bucket weight trick prevents large format tiles from sliding by utilizing gravitational resistance through a calculated counterweight system during the initial set of the mortar. This technique involves hanging weighted buckets from the top of the tile to provide a constant downward force that offsets the slump of heavy porcelain. Most guys skip the leveling compound. They think the underlayment will hide the dip. It won’t. I spent three days grinding concrete on a job last month just so the floor wouldn’t click like a castanet. That job was supposed to be a simple laminate install over an old slab, but the client decided halfway through to switch to large format porcelain. If I hadn’t spent those three days with the diamond cup wheel, every single tile would have snapped under the weight of a refrigerator. When you are dealing with tiles that weigh thirty pounds a piece, you are no longer just a tiler. You are a structural engineer working with wet mud. Large format tile, or LFT, is defined as any tile with at least one side longer than fifteen inches. These slabs of stone or ceramic have a low surface area to weight ratio compared to a subway tile. This means gravity is constantly trying to pull the tile down the wall or shift it across a floor that is not perfectly level. If your floor leveling is off by even an eighth of an inch, that heavy tile will follow the slope. You cannot fight physics with hope. You fight it with weight and chemistry.
The physics of the bucket weight maneuver
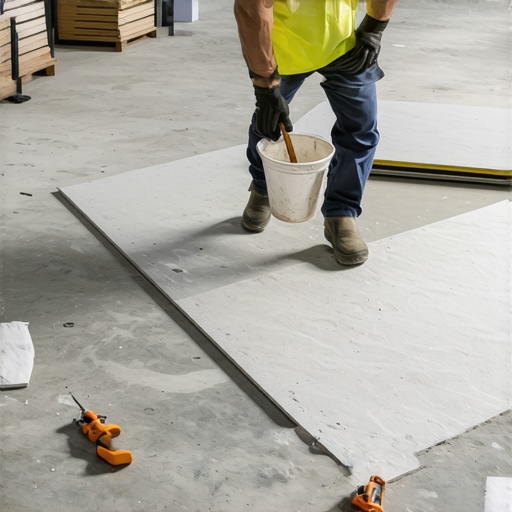
Applying a bucket weight trick requires a five gallon plastic pail partially filled with water or sand to create a stabilizing anchor for vertical installations. By hanging the bucket from a hook or a temporary spacer at the top edge of the tile, you create a tension point that holds the tile against the substrate. The physics here involves the coefficient of friction between the back of the tile and the mortar bed. When a tile is heavy, it wants to slide. This is called slump. The bucket acts as a stabilizer. It is a crude but effective way to ensure the tile stays exactly where you beat it into the mortar. I have seen guys try to use blue painter tape. Tape stretches. Tape fails. A bucket of water does not stretch. It provides a constant, unyielding downward pressure. This is especially useful in showers where you are installing heavy stone on the back wall. You are fighting wet conditions and gravity simultaneously. If that first row shifts, the entire wall is ruined. You will spend your Sunday chipping out cured thin-set if you do not get this right the first time. The bucket trick is a veteran move. It is about control. You must control the material, or the material will control your profit margin. I prefer using half full buckets because they are easier to move, but if the tile is a massive thirty six inch slab, you might need a full five gallons. It sounds like overkill until you see a thousand dollar slab of marble slide off the wall and shatter on the pan.
“A floor is only as good as the subfloor beneath it; deflection is the enemy of every joint.” – Master Flooring Axiom
Why your subfloor is lying to you
Subfloor deflection and irregularities are often hidden by old floor coverings like carpet or vinyl but will manifest as cracked grout in tile. You might pull up an old carpet install and think the plywood looks fine. It isn’t fine. Plywood has a memory. It bows over time. If you do not check the joist spacing and the thickness of the subfloor, your tile installation is doomed before you open the first bag of thin-set. For large format tiles, you need a substrate that is twice as stiff as what you need for a standard twelve by twelve tile. We talk about L over three sixty for standard jobs, but for stone, we want L over seven hundred and twenty. That is a measurement of deflection. It means the floor cannot bend. If the floor bends, the tile breaks. It is a binary reality. I have seen homeowners try to save money by skipping the floor leveling phase. They think the mortar will act as a filler. Mortar is not a filler. Mortar is an adhesive. It shrinks as it cures. If you have a half inch of mortar in one spot and an eighth of an inch in another, the tile will pull unevenly as it dries. This creates lippage. Lippage is the technical term for when one edge of a tile is higher than its neighbor. In a world of large format porcelain, lippage is a trip hazard and an eyesore. You must grind the high spots and fill the low spots. There is no shortcut that doesn’t end in a lawsuit or a tear-out.
The chemistry of the bond
Polymer modified thin-set creates a chemical and mechanical bond that is essential for the weight of large format tiles. Modern mortars are not just sand and cement. They are packed with polymers that allow the mortar to flex slightly without losing its grip. When you are using the bucket weight trick, you are relying on the initial tack of the mortar to hold the tile while the weight stabilizes it. You need a mortar with high thixotropic properties. This means it is thick enough to hold the tile’s weight but fluid enough to be spread with a notched trowel. The notch size is vital. For LFT, I never use anything smaller than a half inch by half inch square notch. You need to back-butter every single tile. This means you spread a thin layer of mortar on the back of the tile itself before setting it into the notched bed on the floor or wall. This ensures one hundred percent coverage. If you have air pockets, the tile will crack. It is like a drum head. If you step on a hollow spot, it will snap. This is why I hate cheap thin-set. It lacks the body to hold the ridges. Cheap mud slumps. If the mud slumps, the bucket trick won’t even save you. You will just have a heavy tile sliding down a wall with a heavy bucket attached to it. That is a recipe for a trip to the emergency room.
| Material Type | Janka Hardness / Density | Recommended Mortar Type | Max Allowable Variation |
|---|---|---|---|
| Porcelain Tile | High Density | Large Format Polymer Modified | 1/8 inch in 10 feet |
| Natural Stone | Variable | High-Bond Non-Sag | 1/16 inch in 10 feet |
| Laminate Wood | 700 to 1200 | N/A (Floating) | 3/16 inch in 10 feet |
| Engineered Oak | 1360 | Urethane Adhesive | 1/8 inch in 6 feet |
The 1/8 inch that ruins everything
Precision in spacing and leveling is the difference between a professional finish and a DIY disaster in large format tile. You cannot eyeball a thirty inch tile. You need a mechanical leveling system. These are the clips and wedges that pull the tiles to the same height. Even with these clips, the bucket weight trick is used to keep the bottom row from compressed under the weight of the rows above it. If your first row moves an eighth of an inch, by the time you reach the ceiling, you are off by an inch. You will have to cut slivers of tile that look like garbage. It is about the geometry of the room. Most houses are not square. Walls lean. Floors dip. Your job is to create the illusion of perfection. I start by laser leveling the entire room. I find the high point of the floor. That is my benchmark. Everything else is built from there. In showers, this is even more critical because you have to account for the slope to the drain. You are trying to put a flat, rigid square on a sloped surface. It is like trying to wrap a gift box with a piece of plywood. You have to know where to make your cuts and where to use your weights. If you miss the mark, the water won’t drain. You will have standing water, mold, and a very angry customer.
“Large format tile requires a substrate plan, not just a layout plan; if the slab moves, the stone fails.” – Tile Council of North America Guidelines
The master installer checklist
- Verify substrate deflection limits for specific tile weight.
- Grind all concrete high spots using a diamond cup wheel.
- Apply a high quality primer to the subfloor for better mortar adhesion.
- Check the moisture content of the slab with a calcium chloride test.
- Select a non-sag mortar specifically rated for large format installations.
- Back-butter every tile to achieve 95 percent coverage in wet areas.
- Use a mechanical leveling clip system to prevent lippage.
- Deploy bucket weights on vertical starts to anchor the first course.
Transitioning from tile to laminate or carpet
Managing transitions between different floor heights requires a deep understanding of the total assembly thickness. When you finish a massive tile job and move to a carpet install or laminate in the next room, you are often dealing with a height mismatch. Tile is thick. Carpet is thin. You cannot just leave a cliff in the doorway. I use transition strips, but I prefer to shim the subfloor of the lower room to create a zero threshold look. This is where that minimalist curator persona comes in. They want that clean line. To do that, you have to plan ahead. You might need to add a layer of quarter inch birch plywood under the laminate to bring it up to the level of the tile. In showers, the transition is even more vital for waterproofing. The curb must be sloped inward. The tile on the curb must be solid. If you use small tiles on a curb, you have more grout lines. More grout lines mean more chances for a leak. This is why we use large format slabs for curbs and niches. It is fewer failure points. It looks better. It lasts longer. But it is harder to install. It requires the bucket trick or some other form of bracing while the mortar sets. You are building a tank that looks like a spa. Never forget that the pretty stuff on top is only there to hide the engineering underneath.
The ghost in the expansion gap
Every large floor requires expansion gaps at the perimeter to allow for the natural movement of the building structure. Wood moves. Concrete moves. If you butt your tile or laminate tight against a wall, it will buckle. It will happen. I have seen floors tent up six inches in the middle of a room because the installer didn’t leave a gap under the baseboard. For large format tile, you need movement joints every twenty to twenty five feet in each direction. This is often ignored because people think it is ugly. You use a color matched caulk instead of grout at these joints. This allows the floor to breathe. Think of it like a bridge. Bridges have joints so they don’t collapse when the temperature changes. Your floor is the same. In a shower, every change of plane—where the wall meets the floor or where two walls meet—must be a movement joint. If you grout those corners, the grout will crack within six months. It is guaranteed. Use silicone. It is flexible. It is waterproof. It is the professional way to do it. If you are doing a carpet install next to tile, the tack strip should be about a quarter inch away from the tile edge so the carpet can be tucked neatly into the gap. It is these small details that separate the mechanics from the hacks. You spend the extra hour on the details so you don’t spend a week on the callback.
Refining the final surface
The final stage of any installation involves cleaning and sealing the materials to protect the integrity of the bond and the aesthetic. Once the bucket weights are removed and the mortar is cured, you have to deal with the grout. For large format, I recommend high performance cement grout or epoxy. Epoxy is a nightmare to work with but it is indestructible. It doesn’t stain. It doesn’t leak. If you are doing a shower, epoxy is the gold standard. For the laminate sections of the house, make sure the expansion gaps are covered by the baseboards or a quarter round molding. Do not nail the molding into the floor. Nail it into the wall. The floor must be able to slide underneath the molding. If you pin the floor down, it will buckle. It is a floating system for a reason. Let it float. Every decision you make from the moisture meter reading to the final bead of caulk determines the life of the floor. You are not just laying tile. You are building a surface that will be walked on for thirty years. Treat it with the respect that engineering deserves. A flat floor is a happy floor. A weighted tile is a stable tile. Do the work. Don’t take shortcuts. The sawdust under my nails is there for a reason. It is the sign of a job done right.