The ‘Tape and Drill’ Hack for Tiling Shower Walls Without Cracking Tiles
Most guys skip the leveling compound. They think the underlayment will hide the dip. It won’t. I spent three days grinding concrete on a job last month just so the floor wouldn’t click like a castanet. That same obsession with the substrate applies to every hole you drill in a shower wall. If you treat a porcelain tile like a piece of pine, you will hear that sickening crack. It is the sound of money leaving your pocket. I have spent twenty five years fixing the mistakes of installers who rushed the prep. Tiling a shower is a structural engineering task, not a craft project. You are managing moisture, thermal expansion, and the physical limits of vitrified clay. When you need to hang a grab bar or a shelf, the drill bit becomes your greatest enemy. One slip and the glaze is ruined. One overheat and the tile shatters. This is where the tape and drill method becomes your best friend on the job site.
The secret to drilling through porcelain without tears
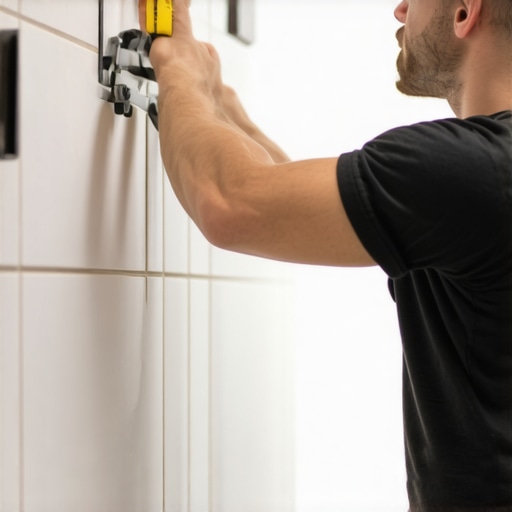
The tape and drill method uses masking tape to create surface friction and prevent the drill bit from wandering across the polished tile face. By applying a simple piece of painters tape, you provide a textured grip for the diamond or carbide tip. This eliminates the initial skate that causes deep scratches or edge chipping. It also allows you to mark your measurements precisely with a pencil without the lead sliding off the non porous surface. Most people think they can just dive in with a hammer drill, but that is a recipe for disaster. Porcelain is essentially glass. It does not compress, it only fractures. You need to understand the molecular density of the material before you even pick up your power tools. If the tile was not back buttered properly during the shower install, a hollow spot behind the tile will cause an instant crack the moment you apply pressure. This is why floor leveling and proper thin set coverage are the foundations of a successful tile job.
Why surface tension destroys your expensive finish
Surface tension on a high fired porcelain tile is incredibly high. These tiles are fired at temperatures exceeding 2200 degrees Fahrenheit, which creates a dense, nearly waterproof surface. When you attempt to penetrate this surface, the bit wants to follow the path of least resistance. Without the tape hack, the bit will skate. This mechanical failure is often blamed on the tool, but the fault lies with the installer. I have seen guys ruin a custom shower because they did not take ten seconds to apply a piece of blue tape. The tape acts as a stabilizer. It absorbs the micro vibrations of the motor and allows the cutting edge to bite into the glaze. Once you are through the top three millimeters of the tile, the physics change. You move from the brittle glaze into the softer, yet still dense, body of the ceramic. If you do not have a steady hand, the torque will catch the edges of the hole and snap the tile in half. This is especially true near the corners of the shower where tension is highest.
“A floor is only as good as the subfloor beneath it; deflection is the enemy of every joint.” – Master Flooring Axiom
The physics of the diamond tipped bit
Diamond tipped bits are required for porcelain tile while carbide bits are sufficient for softer ceramic walls. You must use a water cooling method to prevent the diamond grit from burning up. A dry bit will reach temperatures that cause the tile to expand locally. Because the rest of the tile is cold, the internal stress causes a thermal shock crack. I always keep a wet sponge or a small spray bottle handy. You can even build a little dam out of plumber’s putty to hold a pool of water around your drill site. This keeps the dust down and the bit cool. Never use the hammer setting on your drill. The percussive force is meant for masonry and concrete, not for delicate tile work. You want high torque and low to medium speed. If you see smoke, you have already failed. The smell of burning diamonds is the smell of a fifty dollar bit going into the trash. Patience is the only way to win this fight.
| Bit Type | Ideal Material | Recommended RPM | Cooling Required |
|---|---|---|---|
| Carbide Spear Point | Ceramic Only | 400 to 600 | No |
| Diamond Hole Saw | Porcelain and Stone | 200 to 400 | Yes |
| Standard Masonry | Concrete Subfloor | 800 plus | No |
From subfloor leveling to the vertical plane
Floor leveling is the most overlooked step in any bathroom renovation involving tile or laminate. If the floor is not flat, the walls will not be square. If the walls are not square, your tile layout will be crooked. I always tell my apprentices that the shower pan is the heart of the room. If the subfloor has a dip, the tile will eventually pop. The same logic applies to your wall substrate. You need a solid cement backer board or a waterproof membrane system. If you are drilling into tile that is adhered to simple greenboard, the vibration will loosen the bond. This leads to moisture intrusion and mold growth. I have ripped out showers where the tile looked fine but the wall behind it was mush because the installer did not use a proper moisture barrier. You must think about the entire assembly, from the floor leveling compound to the final bead of silicone. Every layer matters.
Why your shower transition determines the life of your laminate
Transitions between tile showers and laminate or carpet install zones require specific expansion gaps to prevent buckling. Laminate flooring is a floating system. It moves with the humidity of the house. If you butt the laminate tight against the shower threshold, it will peak and warp the first time the steam from the shower hits the air. You need a T molding or a reducer that allows the laminate to breathe. The same goes for a carpet install. You want a clean transition strip that protects the edge of the tile from chipping. If the subfloor was not leveled between the two rooms, you will have a trip hazard that no amount of molding can hide. I spend a lot of time making sure the heights match. If they do not, I use a self leveling underlayment to bring the bathroom floor up to the level of the hallway. It is about the details that no one sees until they fail.
- Apply two layers of blue painters tape to the drill site
- Mark the center point with a fine tip marker
- Start the drill at a forty five degree angle to create a pilot notch
- Slowly bring the drill to ninety degrees once the bit catches
- Keep a constant flow of water on the bit to prevent overheating
- Ease off the pressure as you reach the back of the tile
The structural reality of the wet area
A shower is a high stress environment. The constant cycle of heating and cooling causes materials to expand and contract at different rates. If you have a rigid tile wall and a subfloor that flexes, something has to give. Usually, it is the grout joints or the tile itself. When you drill holes for fixtures, you are creating potential weak points. This is why your hole should be slightly larger than the screw you are using. If the screw is tight against the tile, the expansion of the wall stud will push against the tile and crack it from the inside out. Use a plastic anchor that can absorb some of that movement. I always fill the hole with a bit of 100 percent silicone before inserting the anchor. This prevents water from getting behind the tile and rotting out the studs. It is a simple step that separates the pros from the hacks. You are building a system that should last fifty years, not five.
“Standard installation practices for tile on vertical surfaces require a minimum of 95 percent mortar coverage in wet areas to prevent moisture pockets.” – TCNA Handbook Summary
The mechanics of a great floor or a perfect shower are found in the preparation. Whether you are dealing with a carpet install or a complex porcelain layout, the physics remain the same. You must respect the material. The tape and drill hack is just one tool in the kit, but it represents the mindset of a master installer. It shows you care about the finished product enough to slow down. If you rush, you fail. If you ignore the subfloor, you fail. If you think you can skip the leveling compound, you will be back in two years to fix a crumbling mess. Take the time to do it right the first time. Your knees and your reputation will thank you. Keep your bits cool, your tape tight, and your subfloor flat. That is the only way to build a bathroom that stands the test of time.