Why Your New Shower is Leaking into the Hallway Closest
I spent three days grinding concrete on a job last month just so the floor wouldn’t click like a castanet. Most guys skip the leveling compound because they think the underlayment will hide the dip. It won’t. I have spent twenty-five years on my knees with a moisture meter and a level. I have seen the same story a thousand times. A homeowner spends ten grand on beautiful marble tile. Two months later, the carpet in the hallway closet is damp. They think it is a plumbing leak. It is usually a failure of physics. It is a failure of the subfloor. It is a failure of the waterproofing chemistry that happens at the molecular level. You cannot hide a bad foundation with a pretty surface. If you do not respect the subfloor, the subfloor will humiliate you.
The hidden path of moisture migration
Water migration in a residential bathroom occurs when the hydrostatic pressure within the shower assembly exceeds the resistance of the waterproofing membrane or the capillary break at the curb. This often manifests as dampness in adjacent rooms because water follows the path of least resistance along the subfloor. Most people assume water travels down. It does. But it also travels sideways through a process called capillary action. If your installer did not use a topical waterproofing system that is properly integrated with the drain assembly, water saturates the mud bed. Once that bed is full, the moisture looks for an exit. It finds the edge of the shower pan. It jumps the curb. It begins to rot the plywood or seep into the concrete slab toward your hallway closet. You see a wet spot on the floor. I see a failure of the ANSI A118.10 standards. I see a subfloor that was never leveled and a membrane that was never tested. A floor is a performance surface. If the surface fails, the structure is at risk.
“A floor is only as good as the subfloor beneath it; deflection is the enemy of every joint.” – Master Flooring Axiom
The gravity of poor floor leveling
Floor leveling is the most neglected step in modern shower installations and results in over sixty percent of structural water damage cases in residential renovations. If the subfloor has a dip of more than one-eighth of an inch over ten feet, the shower pan will flex. This flex is called deflection. When the subfloor moves, the waterproofing membrane stretches. Most membranes have an elongation limit. If the subfloor is not flat, the thin-set under the tile will have voids. These voids are pockets where water can collect. I have seen guys try to fix a dip by just adding more thin-set. That is a crime. Thin-set is an adhesive, not a filler. It shrinks as it cures. If you have a half-inch of thin-set, it will pull away from the tile or the membrane. Now you have a gap. Water enters that gap. It travels through the grout lines because grout is a sponge. It reaches the subfloor. If you are lucky, it stays there. If you are unlucky, it travels five feet into the next room and ruins your carpet install or your new laminate planks. You cannot skip the self-leveling compound. You must grind the high spots. You must fill the low spots. You must make it perfect before the first drop of water ever hits the drain.
Why your subfloor is lying to you
Subfloors often appear flat to the naked eye but possess microscopic variations and moisture levels that can sabotage a shower installation within weeks. I always use a pinless moisture meter. If the subfloor is wood, it should be within two to four percent of the finished flooring’s moisture content. If it is concrete, it needs a calcium chloride test. I have walked into jobs where the installer put a shower over a green slab. The concrete was still off-gassing. That gas creates bubbles under the waterproofing membrane. The membrane delaminates. The water finds the gap. It is a chain reaction of failure. The subfloor is the foundation of the shower machine. If the machine is broken at the base, the output will be a leak. Many homeowners ask about putting a shower over existing laminate or old tile. I tell them no. You strip it to the bone. You check the joist spacing. If the joists are sixteen inches on center, you need at least one and one-eighth inch of subfloor thickness to meet the L/360 deflection rating for ceramic tile. For natural stone, you need L/720. If the floor bounces, the grout cracks. If the grout cracks, the water wins. It is as simple as that.
The physics of the curb transition
The shower curb represents the most common point of failure because it is where the vertical waterproofing of the shower meets the horizontal plane of the bathroom floor. Most leaks that reach the hallway closet originate here. The curb must be sloped toward the drain. If the curb is level or sloped toward the bathroom, water sits under the tile. It wicks through the thin-set. It travels under the door jam. This is why a carpet install in an adjacent room starts to smell like mildew. The water is being pulled out of the shower by the dry materials around it. This is capillary suction. I use a solid piece of stone for the curb cap whenever possible. Fewer grout lines mean fewer points of entry. I also ensure the waterproofing membrane wraps over the curb and extends at least six inches onto the main bathroom floor. This creates a bathtub effect. Even if water gets past the tile, it is trapped in the waterproof zone. If your installer just nailed a piece of wood down and tiled over it, you are in trouble. Wood expands. Tile does not. That movement will snap the seal. You will be calling me in six months to rip it all out.
Waterproofing performance comparison
| Method | Drying Time | Crack Isolation | Vapor Permeability |
|---|---|---|---|
| Liquid Membrane | 12-24 Hours | High | Moderate |
| Sheet Membrane | Immediate | Excellent | Low (Vapor Barrier) |
| CPE Liner | Immediate | Low | High |
Laminate and carpet are not the solution for wet areas
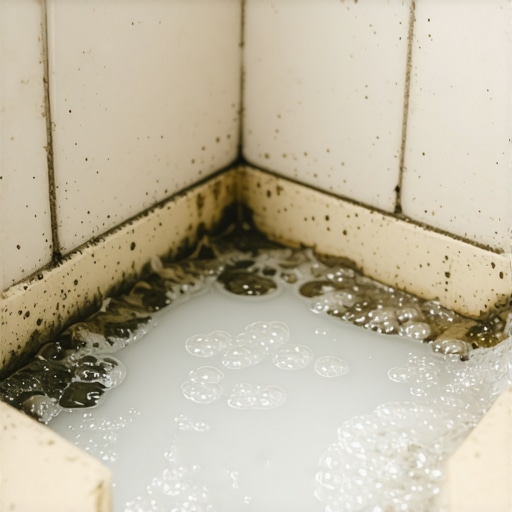
Installing laminate or carpet near a leaking shower only hides the symptoms while accelerating the growth of mold and structural rot. I see people try to cover up water spots. They think a new carpet install will soak it up. They think waterproof laminate is actually waterproof. It is not. The surface of the laminate might be plastic, but the core is usually wood fiber. Once water gets into the click-lock joint, the core swells. The floor peaks. It looks like a mountain range. If you have a leak in your closet, you need to pull up the flooring. You need to see the subfloor. If the subfloor is black, you have mold. If it is soft, you have rot. You cannot level a floor that is rotting. You have to replace the plywood. You have to treat the joists. Then you can talk about floor leveling and new finishes. Don’t be the person who puts a band-aid on a gunshot wound. Fix the shower. Fix the subfloor. Then put down the floor.
“Water is the ultimate solvent; it will find every mistake you made and highlight it with a stain.” – Tile Council of North America Logic
The 1/8 inch that ruins everything
Small gaps in the perimeter of the shower or tiny cracks in the grout can allow gallons of water to penetrate the subfloor over time. I always tell my clients that a shower is a vessel. If you had a bucket with a pinhole, it would eventually empty. Your shower is the same. I look at the transition where the wall tile meets the floor tile. That should always be a soft joint. That means caulk, not grout. Houses move. They breathe. If that corner is grout, it will crack. Water will go behind the tile. It will run down the wall. It will hit the subfloor. From there, it follows the grain of the wood or the slope of the slab. It might travel ten feet before it pools in your hallway closet. You spend your life looking at the walls, but the story is happening under your feet. I use high-grade silicone that matches the grout color. It stays flexible. It keeps the water in the vessel. It is a small detail. It is the detail that keeps me from having to come back and fix a disaster.
Shower Waterproofing Checklist
- Verify subfloor deflection meets L/360 or L/720 standards before installation.
- Perform a 24-hour flood test on the shower pan before tiling.
- Ensure the shower curb is sloped at least 1/8 inch toward the drain.
- Use a moisture barrier between the subfloor and any adjacent laminate or carpet.
- Apply a topical waterproofing membrane to all wet area walls and floors.
- Confirm that all transitions and corners are sealed with flexible silicone caulk.
The chemistry of a dry home
Modern adhesives and waterproofing agents rely on precise chemical reactions that are easily disrupted by improper temperature or humidity during installation. When I mix thin-set, I follow the bag instructions to the gram. If you add too much water, you weaken the polymer chains. The bond fails. The tile pops. The water gets in. In humid climates, the curing process slows down. If you tile too soon, you trap moisture in the mud bed. That moisture has to go somewhere. It will push through the subfloor. I have seen slabs in Florida that sweat for weeks after a shower is built. It ruins the carpet install in the next room because the vapor pressure is too high. You have to respect the chemistry. You have to respect the clock. You cannot rush a shower. If you rush it, you will be doing it twice. I don’t like doing things twice. I like doing them once and then going home to clean the sawdust out from under my nails. It is about pride. It is about the structure. It is about the floor.