I remember the exact moment I noticed it—the dreaded peek at the seam of my new carpet, right in the busiest part of my living room. It was frustrating, honestly. I had spent weeks perfecting the layout, only to have a fold or bump materialize seemingly out of nowhere. My initial reaction was to blame the installer or the carpet itself, but after some digging, I realized that a few common missteps during installation created a ripple effect—literally! —that caused those annoying peaks to appear. That lightbulb moment pushed me to learn everything I could about preventing carpet seams from peaking, especially with 2026 just around the corner, bringing new challenges and opportunities for home improvement enthusiasts like us.
Why Keeping Your Carpet Seam-Free Matters Right Now
In today’s homes, comfort and style go hand in hand—especially with the rise of open-plan designs and luxe finishes. A carpet that peaks or bucks up not only ruins the aesthetic but can also lead to long-term damage, like fraying or uneven wear. With 2026 on the horizon, new standards and best practices are emerging, making it vital for homeowners and DIYers to stay ahead of the curve. Did you know that a poorly installed seam can reduce a carpet’s lifespan by up to 30%? That’s a statistic I found surprising, but it underscores how crucial correct installation is for durability and beauty. Trust me, a little prevention now saves a whole lot of headache later.
Is Fixing Carpet Peaking Actually Worth the Effort?
Early on, I made the mistake of ignoring small unevennesses, thinking they would settle over time. Spoiler alert: they didn’t. Instead, they worsened and became more noticeable, forcing me to redo sections that could have been saved if caught early. From personal experience—and consulting with experts—I can assure you that addressing these issues promptly and correctly is a game-changer. For thorough guidance, I recommend exploring expert tips on [carpet installation and floor leveling](https://floorcraftstore.com/expert-carpet-installation-floor-leveling-tips-for-lasting-durability), which highlight the importance of proper subfloor preparation and seam sealing techniques. Now, let’s dive into the three fixes that will help you keep your carpet seams flat, flush, and beautiful for years to come.
Prepare the Subfloor with Precision
Before installing your carpet, ensure the subfloor is clean, dry, and level. Use a high-quality floor leveler to fill in dips or uneven patches, much like leveling a wobbly table with a straightedge. I once ignored a small dip in my living room and ended up with a visible peak along the seam after a few weeks, so I now always double-check with a straightedge and apply self-leveling compounds where needed. For comprehensive tips, visit expert flooring leveling advice.
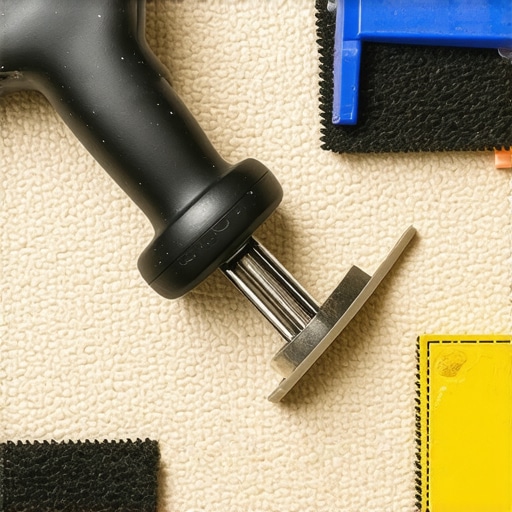
Stretch and Secure the Carpet Effectively
Use a Power Stretcher
Achieving even tension across the carpet is crucial. Think of it like tuning a guitar string—you need consistent tension to avoid buzzes. When I installed my new carpet, I rented a power stretcher and worked systematically from the center toward the edges, pulling tight and securing it along the tack strips. This prevents slack that causes peaks. Proper stretching ensures seams lay flat and durable, preventing future peaking issues. Check professional installation strategies for detailed techniques.
Attach Seam Properly
Seam reinforcement is vital. After aligning the edges perfectly, I applied a seam sealer and reinforced the seam with specialized tape, pressing firmly with a seam roller. Think of seam sealing as sealing a zipper—you want a tight, flush closure to prevent bunching or peaking. This step locks the seam in place, avoiding movement that leads to peaks over time. For advanced seam techniques, visit common pitfalls and how to avoid them.
Monitor and Correct Early Signs
Even with perfect installation, check your seams regularly over the first few weeks. If you notice any slight bulges or peaks, address them immediately. Gently re-stretch the affected area and re-secure with seam adhesive if necessary. Think of this like tightening a screw before it comes loose; early intervention saves time and effort later. My experience shows that the earlier you catch peaking, the easier it is to fix before it becomes a major tear or rip, which also preserves the aesthetic and longevity of your carpet. To understand more about early repairs, see tips for fixing cracks and peaks early.
Maintain Proper Room Conditions
Control humidity and temperature during installation and in the weeks afterwards. Large fluctuations cause materials to expand or contract, leading to seams peaking or gaps. During my last project, I used a dehumidifier to maintain steady conditions, which greatly reduced movement in the carpet fibers. This is especially important as we approach 2026, where standards are tightening. Maintaining a stable environment ensures your careful work stays flawless through the years. For insights into environmental control, visit humidity management techniques.
While many believe they understand the fundamentals of floor leveling, carpet installation, laminate flooring, and shower renovation, there are nuanced pitfalls that even experienced DIYers often overlook. One prevalent myth is that subfloor preparation is simply about removing debris and ensuring a flat surface. In reality, subtle inconsistencies—like slight dips or high spots—can lead to issues like peaking or squeaking later. For instance, I once skipped thorough leveling in a client’s bathroom, only to find the laminate buckling within months. Deep knowledge of moisture barriers and subfloor contaminants is crucial; neglecting these can cause long-term damage, as highlighted by flooring expert advice on durable leveling techniques. Similarly, many assume that a tight carpet seam means strong installation, but improper seam sealing can lead to fraying and costly repairs. Advanced installers use seam tape and adhesives specified for the material, ensuring longevity. Don’t be fooled into thinking that low-cost adhesives suffice; precision matters, especially as we approach 2026 when standards tighten.
Is a Smooth Subfloor Enough, or Do I Need More?
Let’s consider a seasoned question: “What hidden factors influence long-lasting stability in laminate flooring?” Moisture infiltration, subfloor contamination, and even temperature fluctuations play vital roles. Studies show that inconsistent environmental conditions can accelerate material fatigue, making proper sealing and climate control essential for optimal results (see expert tips here). Similarly, in shower renovations, the assumption that a good waterproof membrane is all that’s needed is flawed. Many installers miss hidden leak zones behind tiles or neglect proper slope, leading to future water damage. Investing in comprehensive waterproofing strategies and understanding the importance of slope and sealant placement can save thousands in repairs. Plus, with emerging trends like curbless showers, meticulous planning becomes even more critical—don’t fall into the trap of underestimating the complexity of proper drainage and waterproofing. For innovative solutions, check out this detailed guide. Ultimately, successful installations hinge on attention to these nuanced details—not just the broad strokes. Have you ever fallen into this trap? Let me know in the comments.
Tools I Recommend for Precision and Durability
Maintaining professional standards in floor leveling, carpet installation, laminate flooring, and shower renovations requires quality tools that deliver both efficiency and accuracy. One staple in my toolkit is the digital laser level. Unlike traditional bubble levels, a laser level provides a 360-degree reference that ensures subfloor flatness and level alignment with pinpoint accuracy, which is critical for long-term durability. I personally rely on models like the Bosch GLL3-330CG because of its reliability and visibility in various lighting conditions. Check out recommended tools for shower renovations as well to ensure your entire project maintains coherence.
For managing moisture barriers—especially important in preventing future delamination or buckling—I use a high-quality moisture meter such as the Tramex Meters. Accurately assessing moisture content in concrete or plywood before installation can save you from costly repairs later. I’ve found that consistent moisture readings guide effective application of sealants and primers, extending the life of the flooring. Pro tip: Pair your moisture meter with a thermal imaging camera when inspecting for hidden leaks or moisture intrusion behind tiles, particularly in shower spaces. These combined diagnostics help maintain integrity over time.
In terms of surface preparation, a power floor sander paired with dust collection systems is invaluable. I prefer belt sanders with variable speed options, as they allow me to smooth out minor dips or high spots before applying leveling compounds. A smooth, well-prepared surface reduces the risk of future peaking or cracking, especially in laminate and carpet installations. Regular calibration and maintenance of these tools are vital for consistent results; neglecting this can introduce irregularities that compromise project longevity.
Embracing Software and Methodology
Beyond hardware, leveraging digital project management tools streamlines your workflow. I use apps like Construction Master Pro to calculate materials and costs accurately, avoiding over- or under-ordering. For planning the sequence of tasks, especially in complex shower or flooring renovations, software like PlanGrid helps visualize every stage, preventing overlooked details which could cause setbacks later. These tools foster a disciplined approach, shortening project timelines while maintaining high standards.
Advanced methods, like using a self-leveling compound with a gauge rake, allow for rapid, uniform subfloor leveling. I prefer applying these compounds with a laser-guided float, ensuring consistent thickness and preventing dips that cause peaking. Proper curing and testing afterward confirm the ideal surface, setting the stage for seamless flooring or tiled surfaces. For detailed application techniques, expert resources recommend following manufacturer protocols closely, as improper curing can negate even the best preps.
How do I maintain these tools over time?
Proper maintenance involves regular calibration, thorough cleaning after each use, and proper storage in climate-controlled environments to prevent rust and degradation. For instance, I routinely lubricate moving parts on my power sander and check battery levels on my laser level before each use. Replacing worn blades, seals, and filters proactively ensures consistent performance. Investing in quality tools initially pays off over the long term, reducing the need for frequent replacements and ensuring your installation projects remain high-quality for years to come.
Looking ahead, technological advancements like integrated AI diagnostics and wireless measurements will likely further enhance precision. Staying updated with these innovations will help you adopt best practices early, ensuring your projects stand the test of time. To stay ahead, I recommend trying advanced tools like laser-guided leveling systems and moisture meters regularly—they truly make a difference in achieving flawless results that last.
The Hardest Lesson I Learned About floor leveling,carpet install,laminate,showers
One of the most significant lessons I've discovered is that overlooking the subtleties of subfloor preparation can lead to persistent peaks or dips later on. Early in my career, I underestimated the importance of meticulous leveling and sealing, which resulted in disconcerting peaks and cracks over time. This experience taught me that attention to detail in these foundational steps is crucial for long-lasting, beautiful results.
3 Myths About floor leveling,carpet install,laminate,showers That Held Me Back
False beliefs like "A quick sweep of debris suffices" or "Seaming techniques don't impact longevity" can sabotage craftsmanship. Clearing debris isn’t enough; thorough cleaning and testing moisture levels are essential. Similarly, improper seam sealing can cause untimely wear or bubbling. Debunking these myths has transformed my approach to installations, emphasizing precision at every step.
What Experts Won't Tell You About floor leveling,carpet install,laminate,showers
Many seasoned installers keep behind-the-scenes secrets, like the significance of environmental stability and the use of high-precision tools. For instance, maintaining a consistent room temperature and humidity during installation can prevent future peaks. My recommendation is to invest in a reliable laser level and moisture meter to proactively manage these factors, which experts often consider foundational.
Where to Go from Here
Armed with these lessons, your next project can deliver flawless, durable results that stand the test of time. Focus on proper subfloor preparation, effective seam reinforcement, and monitoring environmental conditions—these are the pillars of success. For a deeper dive into specific techniques, explore our comprehensive guides, like expert tips on floor leveling or ultimate shower renovation strategies. Remember, every detail counts in creating spaces that aren't just beautiful today but remain so for years to come.
My Essential Toolkit for Consistent Results
Having the right tools makes all the difference. I rely heavily on a digital laser level like the Bosch GLL3-330CG for perfect alignment. Its accuracy ensures that seams lay flat without peaks, saving time and frustration. For moisture assessment, the Tramex moisture meter helps prevent future buckling caused by hidden dampness. Additionally, a power sander with variable speed helps smooth out uneven surfaces, providing a pristine foundation for any flooring type. Investing in these tools has transformed my workflow, ensuring each project meets high standards of durability and aesthetics.
For planning and precision, I embrace digital apps like Construction Master Pro and PlanGrid. These simplify calculations and visualization, reducing errors and streamlining process stages. Remember, tools are an extension of your skills—they amplify your ability to achieve impeccable results that will last well into 2026 and beyond.
Don’t Be Afraid to Start
Taking on projects like floor leveling, carpet installation, laminate flooring, or shower remodels can seem daunting, but with the right insider knowledge and tools, you’re equipped for success. Every skilled installer started where you are now—learning, experimenting, and refining techniques. Embrace the process, trust your preparation, and stay attentive to details. Your future self will thank you when your floors and showers look flawless and last for decades. Are you ready to elevate your home improvement game? Share your plans or questions below—I’d love to hear about your next project.