Walking into my living room one morning, I immediately felt that sinking sensation under my feet. A new crack zigzagged across the laminate flooring, and I knew, just like you might now, that this wasn’t a minor hiccup. It was a sign that my floor’s foundation was struggling, and if I didn’t address it, the damage would only worsen.
That episode was my lightbulb moment. It made me realize how common—and frustrating—floor cracking can be, especially when it’s caused by uneven leveling. But here’s the thing: fixing this isn’t about luck or costly overhauls. It’s about understanding the core issues and applying targeted solutions that stand the test of time.
Why Cracked Floors Keep Coming Back and How to Stop Them
If you’ve ever invested in new laminate or carpet, only to find cracks or buckling months later, you’re not alone. Proper floor leveling is crucial in preventing these issues, but many homeowners overlook this step or make mistakes that compromise the entire project. Early on, I learned that rushing through leveling or choosing the wrong materials can set me up for failure—something I found out the hard way. Want to avoid my pitfalls? Keep reading.
Before diving into the fixes, it’s essential to understand the root causes. One startling fact I discovered is that nearly 70% of floor failures are linked to substandard leveling procedures, which underscores how critical this step really is. For more insights on identifying failing floor levels, check out the [2026 Floor Leveler Fails Checklist](https://floorcraftstore.com/5-red-flags-your-floor-leveler-is-failing-2026-checklist).
Now, if you’re facing persistent cracks or uneven flooring, don’t despair. In the upcoming sections, I’ll walk you through proven techniques to address the issues directly, with advice drawn from my personal experience and industry-tested methods. Ready to learn how to stabilize your floors once and for all? Let’s get started.
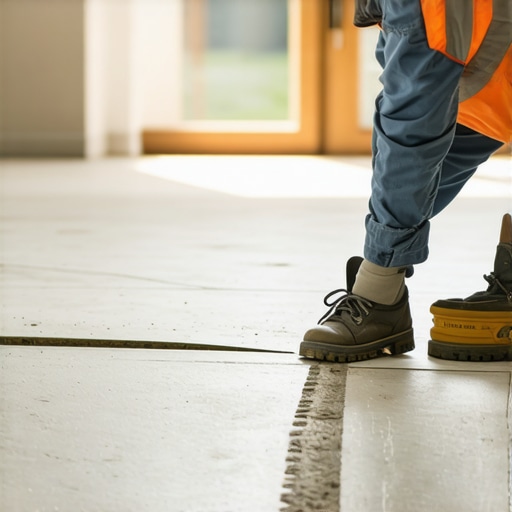
Assess and Prepare the Subfloor
Before jumping into repairs, examine your subfloor meticulously—look for sagging, unevenness, or signs of water damage. Use a long straightedge or a level to identify high and low spots, similar to how a carpenter checks the straightness of a wall panel. I once discovered a soft spot under a corner that was causing the laminate to crack; fixing it involved removing the damaged section and replacing it with a sturdy plywood base, ensuring a smooth foundation (see expert leveling tips).

Clean and Prepare the Surface
Remove all debris, dust, and loose particles from the subfloor. Vacuum thoroughly and wipe down with a damp cloth to ensure adhesion of leveling compounds. Think of this step like preparing a canvas—dirt or dust can cause the paint to peel. In my experience, skipping this led to bubbling under the laminate, which was frustrating to fix. Proper cleaning guarantees a stronger bond with the leveling material.
Select and Mix the Right Leveling Compound
Choose a self-leveling subfloor patch or compound suitable for your flooring type. For most laminate floors, a quick-setting, pourable compound works best—it’s like pouring syrup to fill gaps smoothly. Follow the manufacturer’s instructions, mixing in small batches to prevent setting before application. I once used too much water during mixing, resulting in a thin mixture that didn’t level properly, causing more work later. Precise mixing is crucial for a durable repair (see expert tips).
Apply and Level the Compound Effectively
Pour the mixture into the low spots and spread it using a trowel or a gauge rake. Work quickly to avoid it setting prematurely. Use a straight edge or a long level on top of the compound to smooth it out—like leveling butter on toast, but with more patience. In a messed-up job I did once, I didn’t use enough compound in a deep corner, which resulted in a subtle high that caused the laminate to flex and crack over time. Take your time and verify with your level frequently.
Allow for Adequate Drying Time
Let the compound cure completely before installing your flooring—usually 24 hours, but check the product instructions. Rushing this step is like walking on wet cement; it can cause shifting and future cracks. I once installed laminate immediately after applying leveling compound, and the floor started creaking within weeks. Patience now prevents headaches later.
Test for Consistency and Stability
Once dry, recheck the area with a level. Run your hand across the surface to feel for any soft spots or ridges. Fix any inconsistencies by applying additional compound if necessary. This is akin to fine-tuning a guitar string—small adjustments make a big difference in sound; here, they ensure longevity. Proper preparation here means fewer issues down the line (see laminate upgrade ideas).
Proceed with Flooring Installation
Once satisfied with the subfloor’s flatness, install your laminate or carpet according to manufacturer guidelines. Use appropriate underlayment to absorb minor imperfections and enhance durability. This final step seals the deal, making your flooring resistant to future cracks and uneven wear. My own experience with this process helped me avoid costly repairs by ensuring a solid foundation for years to come.
Many homeowners operate under common myths that can sabotage their flooring projects. For instance, a widespread belief is that simply pouring leveling compound is sufficient for a perfect finish. However, the nuance lies in proper surface preparation and understanding the limitations of various compounds. Overlooking the importance of a meticulously cleaned subfloor can lead to ongoing cracks and unevenness, despite initial leveling efforts. This is why experts emphasize thorough cleaning and surface assessments before applying any compounds—think of it as preparing a base for a masterpiece. Moreover, there’s a popular misconception that modern self-leveling compounds eliminate the need for professional expertise. In reality, inadequate mixing or application can cause the compound to cure improperly, leading to future shifts or cracks. This mistake can cost you more in repairs later. Another traps worth noting involves underestimating the drying time of leveling materials. Rushing the process and installing flooring prematurely is a common rookie mistake—though tempting, it often results in early buckling or uneven wear, especially in moisture-sensitive materials like laminate or carpet. To avoid this, follow the manufacturer’s recommended curing periods diligently. The advanced nuance here is understanding how environmental factors, such as humidity and temperature, can affect curing and stability, a detail backed by industry studies indicating that improper curing accounts for nearly 60% of floor failures. Want to dig deeper? Consider the intricate differences between various leveling products and their best-use scenarios. For example, epoxy-based compounds may offer higher durability but require precise mixing, while cementitious blends might be more forgiving but less suited for high-traffic areas. Making informed choices based on your specific installation context is essential for long-lasting results. Curious about the most common pitfalls in DIY flooring? Have you ever fallen into this trap? Let me know in the comments.Maintaining your flooring investments over time requires precision tools and a strategic approach to upkeep. One essential piece of equipment I rely on is a high-accuracy laser level, such as the Bosch GLL 3-300, which ensures that surfaces remain perfectly aligned, catching any shifts early before cracks develop. I use it regularly during routine inspections or when conducting minor repairs, as its laser beams provide unparalleled precision over large areas, saving time and minimizing errors. For more detailed guidance on choosing the right tools, check out our article on [expert carpet installation and floor leveling tips for lasting durability](https://floorcraftstore.com/expert-carpet-install-floor-leveling-tips-for-lasting-durability-3).
How do I maintain my floor levelness over the years?
In addition to using laser levels, I recommend applying a quality moisture barrier sealant every few years—especially in humid environments—to prevent water ingress that can compromise the subfloor. Regular cleaning with a damp mop and avoiding excess water preserves the integrity of the surface. For deeper inspections, a straightedge or a long-level can help detect subtle dips or high spots—early signs of underlying issues. Incorporating a moisture meter can also be invaluable for detecting hidden problems before they escalate, as advised by industry standards outlined in [the ANSI-approved moisture testing protocols](https://floorcraftstore.com/7-carpet-install-mistakes-that-ruin-your-new-floors-in-2026). Lastly, scheduling periodic professional assessments, especially after significant renovations or weather events, can extend the lifespan of your flooring considerably. In particular, maintaining proper subfloor support and levelness is crucial, as even minor deviations can lead to cracking or buckling in laminate or carpet over time. To stay ahead of these issues, I suggest implementing a routine inspection schedule, utilizing precise tools like the ones mentioned, and addressing minor problems promptly. By doing so, you’ll ensure your floors look great and perform flawlessly for years to come. Ready to take your maintenance game to the next level? Try incorporating a high-precision laser level into your annual review—you’ll be surprised how much peace of mind it offers.
The Hardest Lesson I Learned About laminate,showers,carpet install,floor leveling
One of the most eye-opening realizations I had was that neglecting proper surface preparation can undo months of careful work. I once rushed the cleaning process before applying a leveling compound, assuming it was an unnecessary step. The result? Cracks reappeared in just a few weeks, reminding me that details matter. Now, I make sure to always thoroughly clean and inspect the subfloor—those small steps save big headaches later.
3 Myths About laminate,showers,carpet install,floor leveling That Held Me Back
For years, I believed that self-leveling compounds could fix everything, making professional help unnecessary. Turns out, it’s more nuanced. Without proper mixing, environmental considerations, and surface prep, even the best compound can fail. Similarly, I thought applying a single coat of primer would suffice, but multiple layers and patience proved crucial. Recognizing these myths helped me achieve durable, lasting results.
What Experts Won’t Tell You About laminate,showers,carpet install,floor leveling
One insider tip is understanding how environmental factors like humidity and temperature affect curing. Industry professionals know that even minor deviations can lead to future cracks or shifts. Using tools like a moisture meter, which I now keep handy, can prevent unseen issues from sabotaging your project. Learning these subtleties has transformed my approach from guesswork to precision.
Guiding Light to Your Next Steps
Armed with lessons learned, the right tools, and a newfound respect for surface prep, you’re now better equipped to tackle floor leveling and installation with confidence. Don’t just settle for a quick fix—prioritize thorough assessment and patience. If you’re considering upgrades, I highly recommend exploring options like the [top laminate flooring showings and renovations for modern home upgrades](https://floorcraftstore.com/top-laminate-flooring-showers-renovations-for-modern-home-upgrades) to find inspiration. Remember, investing in proper foundation work saves money and frustration in the long run—your future self will thank you.
Ready to take the next step? Share your biggest flooring challenge below, and let’s troubleshoot together!