It was a typical Saturday morning when I stepped into my living room and immediately felt the horror of uneven floors beneath my feet. That wobble, that creak—every step was a jarring reminder that my project to refresh my home was quickly turning into a maintenance nightmare. Like many homeowners, I underestimated just how much proper installation and planning mattered. Whether you’re tackling a new carpet install or giving your bathroom a much-needed shower upgrade, the stakes are higher than they seem. These aren’t just cosmetic updates—they impact your daily comfort and the long-term value of your home.
Why Improving Your Floors and Showers Should Be a Top Priority
The truth is, slipping on a poorly installed carpet or dealing with a leaky shower isn’t just about aesthetic appeal. It’s about practicality, safety, and savings. A good carpet installation ensures durability, preventing costly replacements down the line, while a well-executed shower renovation offers peace of mind with waterproofing and longevity. I learned this firsthand after a frustrating experience where my first attempt at a DIY project led to uneven flooring and water damage. That mistake cost me more time and money than I could have imagined. Luckily, I found a way to do it right, and I want to share that journey with you.
Are Your Home Upgrades Actually Worth the Hype?
Many homeowners, including myself early on, fall prey to quick fixes that promise ease but end up costing more. I once thought that simply laying down new carpet without proper floor leveling would suffice. Boy, was I wrong. The results were uneven and uncomfortable, and it didn’t last. Trust me, investing in expert advice and techniques—like those outlined in our detailed [floor leveling tips](https://floorcraftstore.com/top-floor-leveling-carpet-installation-tips-for-lasting-comfort)—can save you headaches later. Moreover, understanding the importance of waterproofing in shower upgrades makes all the difference, as emphasized by industry leaders. Did you know that poor waterproofing is the leading cause of bathroom renovations failures?
This realization pushed me to learn the nuances of installation and choose solutions that are both durable and affordable. Now, I can confidently say that your home upgrades will be worth every penny if done right from the start. So, in the next sections, I’ll walk you through the practical steps and insider tips to ensure your carpet and shower projects stand the test of time. Ready to transform your space without making costly mistakes? Let’s get started.
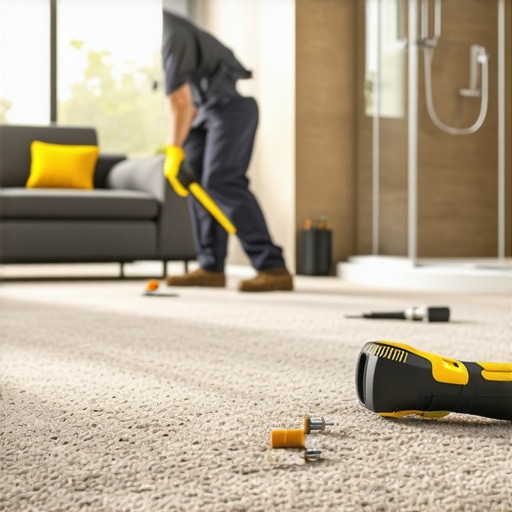
Prepare Your Space Meticulously
Start by clearing the area completely, removing furniture and debris to ensure a clean workspace. Examine the existing floor for uneven spots or damage—these need to be addressed first. Use a moisture meter to check humidity levels, especially if installing laminate or carpet over concrete, since excess moisture can lead to mold or warping. Address any moisture issues before proceeding, as waterproofing and proper curing are essential for durability. Personally, I once overlooked this step and ended up with bubbling laminate after just six months. To avoid this, incorporate a vapor barrier or underlayment designed for moisture protection.
Level the Subfloor Precisely
Uneven floors are like riding a roller coaster—uncomfortable and damaging over time. To level, apply a self-leveling compound, spreading it evenly with a trowel or a long-handled squeegee, mimicking the way you’d smooth frosting over a cake. I once used a basic trowel for my first attempt, but the finish was patchy; switching to a self-leveling mixture made the next project flawless. For detailed guidance, consult these floor leveling tips. Proper leveling ensures your carpet or laminate will sit perfectly, preventing future buckling or creasing.
Install the Flooring Material with Precision
For carpets, lay the padding first, then stretch and secure the carpet tightly using a power stretcher, avoiding wrinkles—you want a smooth surface. Think of it like tautening a drumhead; the tighter, the better for sound and durability. When installing laminate or engineered wood, snap the planks together ensuring tight seams. I encountered gaps during my first laminate install because I didn’t align the tongue and groove properly. To prevent this, follow these laminate installation strategies. Proper technique minimizes movement, extends lifespan, and maintains aesthetics.
Focus on Waterproofing Critical Areas
In showers and bathrooms, waterproofing is your best defense against water damage. Apply a high-quality waterproof membrane beneath tiles or shower panels—think of it as a raincoat for your walls. I once neglected this step and faced mold within a year; after resealing with proper waterproofing, the problem was gone. Use products like liquid membranes or sheet membranes, ensuring overlaps and sealed joints. For expert advice, see top waterproofing solutions. This step saves you thousands in damage repair and maintains the integrity of your upgrade.
Finish with Secure Transitions and Edges
Transitions between different flooring types or room entry points must be secured with appropriate threshold strips or reducers to prevent tripping hazards and protect edges. Think of these as the finishing zippers on a jacket—small but crucial for overall durability. During my project, I overlooked these details and ended up with bits peeling away over time. To avoid this, follow installation guides that emphasize proper edge finishing, such as laminate and carpet transition tips. Proper finishing guarantees your project looks professional and lasts for years.While many homeowners assume that DIY projects like carpet installation or shower upgrades are straightforward, there are critical nuances that often go unnoticed. A prevalent myth is that choosing the cheapest materials guarantees savings, but in reality, inferior components lead to early failures and costly repairs. For example, skimping on waterproof membranes in shower renovations may seem economical initially but can result in mold and water damage within a year, negating any upfront savings. To avoid this, opt for high-quality products such as those recommended in top waterproofing solutions, and always prioritize durability over initial cost.
How Can Advanced Techniques Prevent Hidden Damage Over Time?
Many seasoned professionals emphasize the importance of meticulous subfloor assessment and preparation, yet this step is often overlooked by DIYers. Invisible moisture beneath the surface can cause laminate or carpet to buckle prematurely, leading to uneven wear and tearing. An insightful study published in the Journal of Building Engineering highlights that proper moisture testing and subfloor leveling significantly extend the lifespan of flooring installations. Integrating these advanced practices—such as using a moisture meter before installation—ensures your upgrades last. Remember, rushing through foundational steps in your project may seem faster but will cost you more in repairs later. For expert tips on perfecting your floor leveling, check out these leveling strategies. Have you ever fallen into this trap? Let me know in the comments.Maintaining your home upgrades isn’t a set-and-forget task; it requires the right tools and consistent attention. First, I swear by a digital moisture meter—specifically, the Wagner Meters Orion 940—which provides precise readings to prevent moisture-related issues like mold or warping, especially when working with laminate or carpet installations over concrete. Regularly measuring moisture levels helps catch problems early and ensures your investments last. Additionally, a high-quality push broom and vacuum are essential for routine cleaning, preventing dirt buildup that can compromise seals and edges over time. For more detailed maintenance, especially in high-moisture zones such as showers, using a microfiber cleaning cloth combined with a recommended waterproofing sealant keeps surfaces pristine and water-resistant. Over time, I’ve found that sealing grout lines annually reduces water ingress, preserving the waterproof integrity of my showers. Advanced tools such as a handheld sander can assist in minor repairs or refinishing, keeping surfaces smooth and safe. Looking ahead, automated cleaning systems, like smart vacuum-mops, are evolving to offer maintenance solutions that integrate with your home’s Wi-Fi, making upkeep almost effortless. Investing in the right tools now saves both time and money by extending the lifespan of your flooring and shower components.
How do I maintain my flooring and showers to ensure they stay in top shape for years?
To maintain durability and appearance, regularly inspect for signs of wear or water damage. Clean surfaces with gentle, non-abrasive solutions recommended by manufacturers; avoid harsh chemicals that can degrade sealants and finishes. Prioritize resealing grout lines and edges annually, especially in bathrooms, to prevent water infiltration. Preventative maintenance also involves addressing minor issues promptly—such as tightening loose threshold strips or repairing small cracks before they worsen. Incorporating these practices with the proper tools can dramatically extend the lifespan of your upgrades. For specific techniques and product recommendations, explore these maintenance tips. Remember, consistency is key—set a recurring schedule to check and maintain your surfaces.
Finally, don’t overlook the importance of professional advice for complex repairs. For example, consulting industry standards outlined in the ASTM International documentation can guide you in choosing the right waterproofing materials or floor leveling compounds. Invest in a quality oscillating multi-tool; it’s perfect for detail work, such as removing old sealant or smoothing uneven edges during repairs. Try adopting one of these advanced tips today—regularly measure moisture levels before reapplying sealant to catch early signs of water intrusion. The key to keeping your home looking and functioning flawlessly is proactive maintenance combined with the right equipment.
Three Surprising Truths I Wish I Knew When Starting My Home Upgrades
- Making the mistake of skimping on waterproofing in my shower led to mold buildup within the first year, teaching me that quality materials and proper sealing are non-negotiable for longevity.
- I underestimated the significance of thorough moisture testing beneath the floor before installing new carpet, which caused bubbling and unevenness. Now, I always use a moisture meter, as recommended in these expert tips.
- Trying to level the subfloor with just a trowel resulted in patchy spots and frustration; switching to a self-leveling compound transformed my results. Learning this lesson saved me time and prevented future headaches.
My Go-To Resources That Keep My Renovations on Track
- Wagner Meters Orion 940 Moisture Meter: This device provides precise moisture readings, helping me avoid hidden water issues that could compromise my flooring, a necessity I learned the hard way.
- Expert Articles on FloorcraftStore: Their guides, like floor leveling tips, are invaluable for achieving professional results, especially for complex tasks such as subfloor preparation.
- High-Quality Waterproofing Products: Brands like RedGard and Schluter-KERDI have saved me from water damage, and I trust their durability, ensuring peace of mind in my bathroom renovations.
Don’t Wait—Transform Your Space with Confidence
Revamping your home floors and showers isn’t just about aesthetics; it’s about creating a safe, comfortable, and long-lasting environment. Remember, the difference between a good renovation and a costly mistake often lies in attention to detail and the right tools. Embrace the learning curve, lean on trusted resources, and take deliberate steps—your future self will thank you for the effort today. Ready to start your own home improvement adventure? Dive in with confidence, knowing you’re better prepared than I ever was. What home upgrade are you most excited to tackle first? Share your plans below and let’s inspire each other to create spaces we love.