I remember the moment vividly: after hours of shopping, planning, and dreaming about my perfect new carpet, I finally welcomed the installer into my home. Within minutes, I saw it—the unsightly wrinkles and uneven edges that made me question if I had made a huge mistake. That sinking feeling of regret hit hard. It wasn’t just about aesthetics; it was about the money I’d invested and the peace of mind I couldn’t get back.
If you’re considering a carpet upgrade or renovation in 2026, chances are you’ve been there too. The truth is, many homeowners don’t realize how a few critical missteps during installation can ruin their entire investment. It’s frustrating to spend so much time and resources only to end up with wrinkled, uneven, or poorly finished floors. But here’s the good news: these mistakes are entirely preventable.
In today’s post, I’ll share the seven most common carpet installation errors that could compromise the durability and beauty of your floors. More importantly, I’ll provide practical tips on how to avoid them—saving you time, money, and future headaches. Whether you’re hiring a professional or planning to do it yourself, knowing what to watch out for is the key to a flawless finish.
Before we dive into the details, ask yourself: Have I ever faced issues like uneven surfaces, wrinkles, or seams that won’t stay flat? If so, you’re not alone. Many homeowners discover these problems too late, after the carpet has already been laid. Recognizing the early signs and understanding the root causes can make all the difference. A study by flooring experts emphasizes that proper preparation and technique are vital for long-lasting results (source: [floorcraftstore.com](https://floorcraftstore.com/carpet-install-floor-leveling-tips-for-long-lasting-comfort)).
So, if you’re ready to learn from common pitfalls and ensure your new carpet stands the test of time, let’s explore the top mistakes—and how to avoid them. Trust me, with a little knowledge and the right approach, you can transform your home with confidence and style.
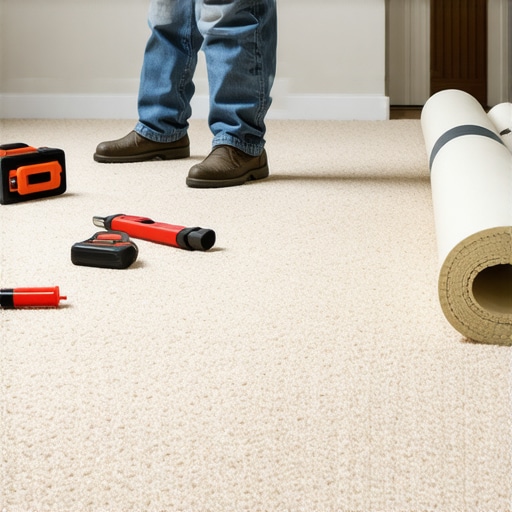
Prepare the Subfloor Properly
Start by thoroughly cleaning and inspecting the subfloor. Remove debris, dust, and any loose material to ensure a flat and stable surface. Use a level to identify uneven spots, because installing on an uneven foundation is like laying a foundation for a house—if it’s shaky, everything else suffers. For significant dips or bumps, apply a floor leveling compound, which helps create a smooth base, reducing wrinkles and bunching later. Remember, proper preparation here is critical; a poorly prepped subfloor will cause issues down the line. For detailed guidance, visit this resource on floor leveling.
Achieve a Consistent, Accurate Measurement
Measure your space carefully, accounting for doorways, closets, and transitions. Use a sturdy measuring tape, and double-check each dimension—accuracy prevents surprises during installation. When cutting the carpet, add an extra 2-3 inches around the perimeter to accommodate trimming and seam overlap. Think of it like tailoring a suit—precise measurements lead to a perfect fit. I once mismeasured and ended up with excess material bunching at the corners, making the wrinkles even more obvious. Learning from that, I now double-check my measurements and take my time. For advanced techniques, consult expert tips on accurate measurement.
Choose the Right Underlay
Invest in quality padding, which acts as the shock absorber and helps keep wrinkles at bay. Thicker isn’t always better—look for a model suited to your carpet and foot traffic. Imagine laying a canvas over uneven terrain; an appropriate underlay smooths out imperfections, much like how a mattress topper makes a bed more comfortable. During my last install, switching to a denser padding significantly reduced seam separation and wave formation, extending my carpet’s lifespan. For suggestions on the best underlay options, see this expert advice.
Lay the Carpet with Tension and Precision
Unroll the carpet carefully and stretch it gradually as you lay it down. Use a knee kicker or a power stretcher to ensure the carpet is taut; loose areas will develop wrinkles over time. Think of this step like painting a wall—you want the surface to be smooth and free of bubbles. When I installed my first carpet, I lacked proper tools, and it showed—waves appeared after just a few months. Investing in the right equipment and applying consistent tension made a noticeable difference. For detailed techniques, refer to professional stretching tips.
Focus on Seam Placement and Finishing
Place seams in less visible spots, such as along doorways or where furniture will cover them. Use high-quality seam tape and a seaming iron for a strong bond. Overlap seams by 2-3 inches and press firmly to prevent shifting or visible bumps. Think of seams as stitches in a garment—proper placement and secure bonding ensure durability and appearance. Once, a seam came apart in my DIY project because I rushed the process. Now, I dedicate adequate time and ensure the adhesive is hot enough for good adhesion. Learn more about seam techniques at this detailed guide.
Trim and Secure Edges Meticulously
Use a sharp knife or carpet trimmer to remove excess material around the edges. Staple or tack down the edges with precision—loose edges can cause curling or fraying. Picture wrapping a gift: clean, tight edges look better and last longer. During my installation, rushing the trimming caused untidy edges that lifted over time, increasing safety hazards. Now, I take my time with sharp tools and double-check each edge. Proper finishing boosts both aesthetics and safety. For comprehensive finishing techniques, check this expert resource.
While many homeowners focus on the major steps of installation, such as measuring or choosing materials, there are subtle nuances that can make or break the longevity and appearance of your renovation. One common misconception is that once the visible surface looks good, the job is complete. However, overlooking intricate details like subfloor prep, seam placement, or moisture management can lead to problems down the line. For instance, a misjudgment in floor leveling might seem minor but can cause uneven wear or wrinkles in carpets and laminate flooring over time. Experts emphasize that precise subfloor assessment and correction are crucial—using techniques outlined here—and often, hidden issues like high moisture levels in the subfloor can silently undermine your efforts.
Another myth is that all shower waterproofing methods are equal. The truth is, many underestimate the importance of proper membrane installation and sealing. Skipping a professional-grade waterproofing process or neglecting detailed inspections is a common trap, leading to costly water damage. For advanced homeowners, understanding the nuances of shower waterproofing, as discussed here, can prevent future headaches.
Inline with flooring, many believe that laminate is a temporary solution, but with proper installation—like meticulous floor leveling and use of quality underlay—it can last for decades. The secret lies in mastering the subtle aspects, such as expansion gaps and acclimation procedures, that are often overlooked. Expert tips reveal that these small steps are vital for avoiding gaps or buckling.
How do advanced installation techniques influence long-term results?
For experienced DIYers and pros alike, integrating precision in seam placement, moisture barriers, and subfloor assessment can significantly extend the lifespan of your investment. A study from the National Association of Home Builders supports this, highlighting that attention to hidden details reduces repair costs and enhances durability. So, next time you’re planning a project, ask yourself—am I considering these nuanced factors? If not, you might want to revisit your approach before it’s too late.
Have you ever fallen into this trap? Let me know in the comments! Remember, the devil is in the details when it comes to flawless home improvements.When it comes to preserving your investment in flooring, showers, and flooring leveling, having the right tools and maintenance routines makes all the difference. Personally, I rely heavily on high-quality equipment because it ensures consistent results and extends the lifespan of your upgrades. For example, a professional-grade floor level sensor, such as the Wagner MMC110, allows me to detect subtle unevenness in subfloors—something that’s crucial before flooring installation. This precise measurement helps me apply leveling compounds accurately, preventing future wrinkles or gaps, as emphasized in this guide on floor level correction.
The Hardest Lesson I Learned About carpet install,showers,floor leveling,laminate
One of my most valuable lessons came from overlooking detailed subfloor preparation. I underestimated how crucial a perfectly leveled surface is, leading to wrinkles and seams that plagued my project for years. Now, I know that meticulous prep saves time and money in the long run, as emphasized in this expert guide on floor leveling. Always prioritize a flat foundation—it’s the secret to lasting beauty and durability.
3 Myths About carpet install,showers,floor leveling,laminate That Held Me Back
Initially, I believed that seamless seams were inevitable and that underlay didn’t matter much beyond comfort. These myths nearly led to costly repairs. The truth is, strategic seam placement and quality underlays are game-changers, as explained here. Dispelling these misconceptions empowered me to achieve a professional finish that lasts.
What Experts Won’t Tell You About carpet install,showers,floor leveling,laminate
Many professionals keep quiet about the importance of moisture barriers during installation. Ignoring this step can result in mold, swelling, and premature failure. I learned this the hard way, but now I rely on advanced waterproofing techniques outlined here. Protect your investment by understanding what truly makes your renovation stand the test of time.
My Essential Toolkit for carpet install,showers,floor leveling,laminate
Having the right tools made all the difference in my projects. A high-quality floor level sensor like the Wagner MMC110 helped me detect subtle unevenness, preventing future issues. For precise measurement and leveling, I trust equipment recommended at this resource. Equipping yourself properly is the first step toward professional results at home.
Where to Go from Here
If you’re eager to elevate your home with flawless flooring or shower upgrades, start by assessing your tools and knowledge. Deep diving into reliable resources like this expert guidance can transform your approach. Remember, every detail matters—from subfloor prep to finishing touches. Take charge today, and watch your home become a sanctuary of style and durability.
Your Turn to Try
Are you ready to implement these tips on your next carpet, shower, or floor leveling project? What challenge do you anticipate, and how will you overcome it? Share your plans or questions below—I’d love to hear about your journey to a beautifully renovated home.
,
http://Samantha%20Turner
Reading this post really resonated with my own experience during a recent carpet upgrade. I underestimated how crucial proper subfloor preparation is, leading to some wrinkles that took months to fully resolve. Since then, I’ve learned that investing in quality tools, like a good level sensor, makes all the difference for long-lasting results. I especially appreciated the tips on seam placement and stretching—these small details can really impact the final look and durability. It makes me wonder, what’s the most overlooked step homeowners tend to skip that can cause such issues? For those planning their own installations, ensuring proper moisture barriers is something I’d emphasize based on my own mistakes. In your opinion, what’s the one step that could save most DIYers from future headaches, especially when working alone? I’d love to hear everyone’s insights!