Caught a loud *thud* every time someone walks across your laminate flooring? That sinking feeling when your beautiful floor starts to bounce or feel uneven is frustrating enough to make you want to rip it out entirely. I had that moment a few months back—standing in my living room, watching a family member take a step, and hearing that dreaded creak echo through the space. It hit me then: my laminate wasn’t just bouncing; it was signaling deeper issues with my subfloor that I’d ignored.
Why Stop 2026 Laminate Bounce Can’t Be Ignored
This isn’t just an annoyance. Laminate bounce can lead to bigger problems, including cracked planks, moisture damage, or even costly replacement down the line. If your floors are bouncing or uneven, it might seem like a minor issue, but ignoring it could mean more extensive repairs later. Trust me, I learned that the hard way—and I want to help you avoid the same mistake.
The good news? A few simple, targeted fixes can make a world of difference. I’ve experimented with multiple solutions, and I want to share three straightforward floor leveling hacks that will stabilize your laminate, improve safety, and restore that sleek look. Whether you’re dealing with minor dips or more noticeable sags, these tricks will have you walking comfortably in no time.
Before we jump into the fixes, I want to be upfront about one thing: Not every bounce stems from the same cause. Sometimes it’s moisture, other times subfloor sagging. So, understanding your specific problem is key. For comprehensive advice, I recommend checking out detailed guides such as this expert tip on laminate floor leveling for lasting durability. Now, let’s get into how to identify your issues and tackle them head-on.
Identify the Root Cause of Your Floor Bounce
Start by carefully inspecting your floor. Walk across the bouncing areas and listen for creaks or feel for unevenness. Use a level to check for dips or sags—place it on the floor and note any gaps. Moisture issues often cause subfloor swelling, so look for signs of dampness or discoloration. Recognizing whether your problem stems from moisture, subfloor sagging, or inadequate underlayment will guide your fixing strategy. In my case, I noticed a consistent dip near the living room entrance, which turned out to be a sagging subfloor—prompting me to double-check subfloor stability techniques.
Preparing Your Workspace for Effective Repairs
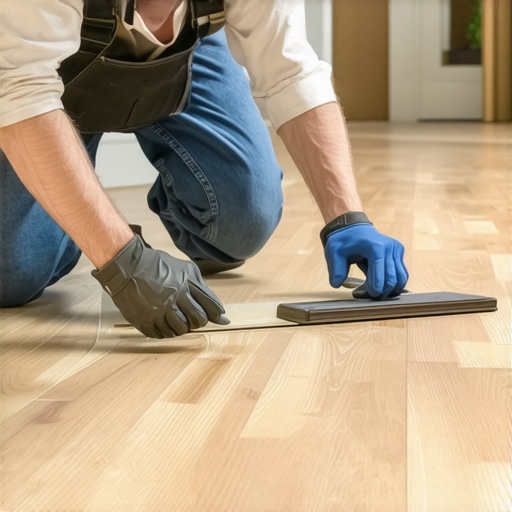
Clear the bouncing areas thoroughly. Remove any furniture, rugs, or decorations to access the subfloor. Protect your belongings with drop cloths or plastic sheeting. Ensure good ventilation, especially if you plan on using adhesives or leveling compounds. Wearing safety gear like gloves and eye protection is essential, especially when working with chemicals. This prep work, although simple, can prevent accidents and make the process smoother—just like preparing a shower area before tile installation ensures a quality finish, see floor leveling tips.
Applying Self-Leveling Compound for Quick Fixes
This method is suitable for minor dips and uneven spots. Pour a self-leveling compound directly into the low area, starting at the highest point and working your way outward. Use a trowel or spreader to help it settle evenly, mimicking the way you spread grout for even coverage on shower tiles—smooth and consistent. I did this in my hallway, carefully pouring and spreading the compound in sections. Within a few hours, the floor was noticeably flat, and the bounce reduced significantly. For detailed instructions tailored to laminate floors, visit laminate floor leveling guides.
Reinforcing the Subfloor with Additional Support
If the bounce results from a sagging or weak subfloor, adding extra support can be effective. Install shims or sister joists—long pieces of lumber glued or nailed alongside existing joists—to stabilize them. Think of this as strengthening a wobbly table leg by attaching a brace; it provides additional stability. My own experience involved installing plywood panels over sagging joists to distribute weight and prevent future dips. Be sure to use appropriate fasteners, like long screws or nails, to secure added support. For detailed strategies, see subfloor support techniques.
Addressing Moisture and Ensuring Long-Term Stability
Moisture is a common culprit behind floor bounce, especially in basements or bathrooms. To combat this, install a vapor barrier or moisture-resistant underlayment beneath your laminate. This prevents swelling and future sagging. Additionally, fixing any leaks or drainage issues upstream reduces ongoing moisture problems. I applied a waterproof membrane beneath the laminate, which significantly improved the floor’s stability over time. For detailed moisture control tips, check waterproofing methods.
Final Checks and Ongoing Maintenance
Once repairs are complete, walk across your floor to confirm stability. Use a level to check that the surface is even. Keep an eye out for new dips or creaks, especially after heavy furniture movement or major changes in humidity. Regular inspections can prevent small problems from escalating into major repairs—like catching cracks early in a shower sealant. Routine maintenance extends the life of your laminate flooring and ensures your efforts don’t go to waste. For more maintenance tips, visit floor durability advice.
Many homeowners assume that leveling floors, installing carpet, or renovating showers is straightforward—just follow basic instructions and you’ll get perfect results. However, in my experience, there are nuanced pitfalls and common myths that, if ignored, can undermine long-term durability and aesthetics. One prevalent misconception is thinking that a level floor guarantees a flawless finish. While achieving a flat surface is crucial, overlooking subfloor preparation—like moisture barriers or proper support—can lead to issues years down the line, such as cracking or uneven wear. For example, I once skipped reinforcing my subfloor before laying new laminate, which resulted in squeaks and dips that required costly rework, highlighting why understanding the nuances is vital.
Can You Save Long-Term by Skipping Certain Prep Steps?
Absolutely not. Skimping on foundation work, such as addressing moisture issues or ensuring solid substructure support, might seem like time-saving shortcuts. Yet, studies indicate that neglecting these critical steps significantly shortens the lifespan of your upgrades. For instance, failed shower waterproofing can cause leaks that rot subflooring, a problem some overlook until water damage becomes visible. To avoid these costly mistakes, consult expert resources like professional shower renovation advice. Similarly, underestimating the importance of proper leveling compounds when dealing with uneven concrete floors can lead to cracks or gaps, which are early signs of long-term failure. Instead, investing in quality materials and understanding the detailed nuances of installation improves the durability of your home improvements.
Another nuance often missed is the role of moisture management in laminate flooring. Many assume that once the floor looks flat, all issues are resolved. However, unaddressed moisture seepage can cause swelling, warping, or mold over time. It’s not just about the initial appearance but about maintaining a stable environment. For example, implementing proper vapor barriers isn’t just an optional step—it’s essential for longevity, especially in basements or high-humidity areas.
Throughout my projects, I’ve learned that advanced homeowners benefit from understanding the pitfalls caused by common misconceptions. For example, believing that DIY fixes always match professional standards can be misleading. Proper subfloor support, precise leveling, and moisture control are intricate steps that sometimes require expert intervention to ensure lasting results. Skipping these intricacies may save time initially but can cost much more in repairs later. For a more in-depth guide on preparing concrete floors for laminate installation, you can explore this detailed advice.
Finally, avoid common pitfalls like rushing through the drywall or paint finish after flooring, which might seem minor but can expose flaws or create uneven surfaces. Attention to these subtleties — understanding the hidden nuances behind each step — is what distinguishes a durable, professional-quality renovation from a quick, temporary fix. Have you ever fallen into this trap? Let me know in the comments.Maintaining your home upgrades like flooring and showers requires the right tools and consistent care. Personally, I rely on a few key pieces of equipment that make ongoing maintenance straightforward and effective. One must-have is a high-precision laser level, such as the Dewalt DW0825, which ensures your floors remain perfectly flat over time, catching any dips before they turn into larger problems. For moisture monitoring, I favor the Protimeter surfura, a reliable moisture meter that quickly detects hidden water issues behind walls or under floors, helping me address problems early and avoid costly repairs. When sealing showers, I use a high-quality silicone caulk applicator—like the Ableware Pro Caulk Gun—which provides clean, even strokes, preventing leaks that could rot subfloors or cause mold. Regular inspections with these tools have enabled me to catch trouble spots early, preserving the integrity of my installations.
Looking ahead, I predict that smart home maintenance devices—like connected moisture sensors and automatic leveling systems—will become standard, making home upkeep more proactive and less reliant on manual checks. This evolution promises to extend the lifespan of renovations and reduce unexpected repair costs.
How do I maintain my flooring and showers over time?
Consistent cleaning with gentle, non-abrasive cleaners and periodic inspections are foundational. Applying protective sealers on grout lines and using door mats to limit dirt from scraping against your laminate or carpet can significantly extend their lifespan. For instance, sealing grout with a penetrating silicone-based sealant prevents moisture intrusion, which is a common cause of floor bounce and damage. Additionally, scheduling a bi-annual check for moisture levels and structural stability—using your moisture meter and level—can catch early signs of wear or issues. I also keep a small toolkit with a spare caulk tube, shims, and a mini electric sander to address minor imperfections swiftly. This regular upkeep ensures your upgrades look great and perform reliably.
To optimize long-term results, always follow manufacturers’ maintenance guidelines and record every inspection or repair. Staying on top of these small tasks minimizes downtime and preserves your investment.
When it comes to tackling complex issues like persistent dips in concrete or soggy shower substrates, having the right tools makes all the difference. For example, applying a professional-grade self-leveling compound correctly—using a balcony squeegee for smooth application—can save hours and ensure an even surface that lasts years. I recommend trying out advanced tools and techniques like these, which are proven to deliver durable results over time. For detailed guidance on long-term upkeep, consider consulting resources such as this expert advice on floor leveling and maintenance. Remember, investing in the right tools and routine checks today will save you significant effort and expense tomorrow.
The Hardest Lesson I Learned About Floor Leveling and Renovations
One pivotal realization I had was that quick fixes rarely stand the test of time—underestimating the importance of proper subfloor support and moisture control set me back months later. That aha moment taught me to prioritize foundation work over superficial appearances, ultimately saving me money and stress.
3 Myths About Repairing and Upgrading Floors That Held Me Back
Believing that leveling alone guarantees a flawless finish was a trap. I also thought that DIY solutions could replace professional assessments, which sometimes led to costly mistakes. Recognizing these myths helped me approach home upgrades with patience and the right expertise.
What Experts Won’t Say About Long-Term Home Improvement
Most overlook the subtle nuances—like the vital role of moisture barriers in laminate longevity or the importance of using quality tools for precision. These overlooked details can make or break your renovation’s durability, a lesson I learned through trial and error.
My Essential Toolkit for Floor and Shower Success
Trusted items like a laser level for perfect flatness, a reliable moisture meter to detect hidden issues, and high-quality caulk for waterproofing, have been game-changers. Investing in these tools transformed my ability to catch problems early and ensure lasting results.
Your Turn to Shape a Lasting Home
Remember, the most durable upgrades come from understanding the nuanced steps—not just the surface fixes. By focusing on foundation, moisture control, and quality materials, you set yourself up for success. Don’t be afraid to dive deeper—your future self will thank you.
http://Michael%20Johnson
I completely relate to this situation—I faced a similar issue with my laminate floors where each step felt like a mini earthquake. The insightful tips on identifying whether the problem is caused by moisture, sagging, or insufficient support are crucial. I learned the hard way that rushing into repairs without diagnosing the root cause can lead to recurring problems. In my case, I overlooked moisture barrier installation, which caused the subfloor to swell over time. Since then, I’ve become a strong advocate for thorough moisture control and proper subfloor reinforcement before laying any laminate. I’m curious, has anyone here used smart moisture sensors to monitor moisture levels over time? I think integrating such technology could really help in proactive maintenance—reducing the need for extensive future repairs. What’s your approach for ensuring your subfloor stays dry and stable long-term?