I vividly remember the moment I stepped onto my newly installed laminate floor — a loud creak echoed beneath my feet, and suddenly, I felt a sinking feeling. After pouring hours into choosing the perfect planks and meticulously installing them, I had overlooked one crucial detail: proper floor leveling. That oversight led to uneven wear and a series of costly repairs. If you’re like me, you might have faced similar frustrations or quietly wondered why your once-beautiful floors aren’t holding up as they should.
Why Floor Leveling Can Make or Break Your Laminate’s Longevity
Determining the durability of your laminate flooring isn’t just about selecting high-quality materials. It heavily hinges on the foundation beneath — the subfloor. An uneven or improperly prepared surface sets the stage for problems like buckling, gaps, and even early replacement. Moisture, temperature fluctuations, and everyday wear all exploit weak spots, making proper leveling essential. I learned this the hard way, realizing that what’s below the surface often dictates how well your floors perform over time. Curious if your installation might be undermined by poor leveling? Take a look here for expert strategies to ensure lasting results.
According to industry research, uneven floors can reduce the lifespan of laminate by up to 30% (source: Home Flooring Pros). That’s a staggering number, and it motivates homeowners to focus on what’s beneath their feet. But how do you know if your floor needs leveling, and what steps should you take? That’s exactly where my experience can guide you, showing you the practical solutions that make all the difference.
Let’s dive into how proper leveling can turn your laminate floor into a durable masterpiece. We’ll walk through the common pitfalls, methods to fix uneven surfaces, and tips that ensure your investment lasts for years to come.
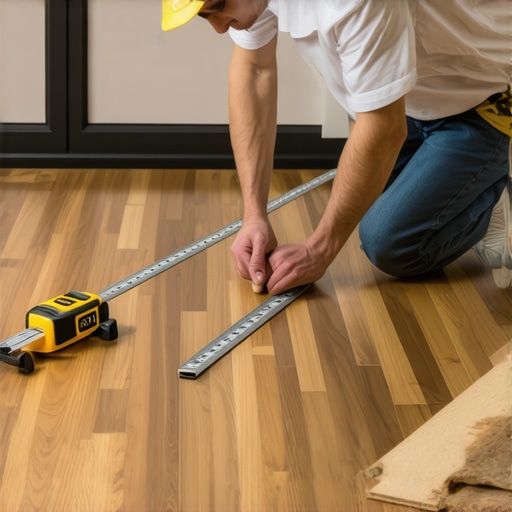
Start with a Thorough Inspection
Before diving into leveling, assess the entire subfloor. Use a long straightedge or a level tool across multiple points to identify high spots and depressions. My initial attempt was a mess—skipping this step led to uneven surfaces that required costly corrections later. Mark obvious trouble spots with chalk for easy reference.
Clean and Prepare the Surface
Remove all debris, dust, and loose paint. A clean surface ensures leveling compounds or patches adhere properly. I learned this the hard way when dust caused a patch to crack, leading to unevenness that persisted after installation. Vacuum thoroughly, then wipe with a damp cloth to remove residual dust.
Apply a Self-Leveling Compound
Mix Carefully
Follow the manufacturer’s instructions to mix the compound. Use a clean bucket and a slow-speed drill with a paddle attachment to achieve a smooth, pourable consistency. Think of it like pancake batter—lumpy or thick mixtures won’t settle evenly. My first try was too thick, creating air pockets and uneven surfaces.
Pour and Spread
Start at the low points and pour the compound, letting gravity do the work. Use a notched trowel or a gauge rake to spread the material evenly across the surface, working towards the high spots. Work quickly, as self-leveling compounds set fast. I had a back-and-forth battle trying to spread the mixture before it set, so prep and timing are essential.
< >
>
This process is akin to smoothing out a rippling pond—pour, then gently guide the material to fill dips and create a flat surface. Once poured, use a gauge rake or float to help level any remaining high spots, ensuring the surface is as smooth as glass.
Allow Proper Curing Time
Patience is key. Let the compound cure fully—often 24 hours—before walking on or installing flooring. Rushing can cause cracks or shifts, defeating the purpose. During curing, avoid any vibrations or heavy loads that might disturb the setting.
Double-Check with a Level
After curing, re-inspect the surface with a long level or straightedge. If necessary, fill in any remaining low spots with additional compound. This step ensures consistency and prevents future problems like buckling or gaps. I always found that a second pass guarantees the best results for a flawless finish.
Install Your Laminate Carefully
Once the surface is level and smooth, proceed with laying your laminate flooring following the manufacturer’s instructions. Properly prepared subfloor translates to durable, gap-free floors that last. For detailed tips on flooring installation, see this guide.
Many homeowners assume that straightforward tasks like carpet installation or leveling a floor are simple, but in reality, there’s often a lot more nuance involved than most realize. Common myths persist, such as the belief that you can cut corners with subpar materials or skip detailed prep work, but these shortcuts often lead to costly errors down the line. For instance, some think that uneven subfloors are negligible; however, insufficient attention to leveling can cause premature wear and gapping in laminate flooring, undermining your investment.
One trap I’ve seen repeatedly is the misconception that self-leveling compounds are foolproof. While these products are powerful, they require precise mixing and timing. Incorrect application or rushing the curing process can result in cracks, uneven surfaces, or even damage to the surrounding structure. From my experience, understanding the *nuances* of these materials—and respecting their limitations—makes all the difference. For example, some believe that moisture barriers are unnecessary for shower renovations; this oversight can lead to mold, water damage, and moldy odors, even in well-designed showers.
What advanced mistakes do even seasoned DIYers often overlook?
Many advanced errors stem from neglecting detailed measurements and environment conditions. For example, humidity and temperature fluctuations during installation of laminate flooring can cause expansion or contraction, leading to gaps or buckling over time. Recognizing these subtle factors is crucial for ensuring long-term durability. Industry studies indicate that improper acclimation can reduce laminate lifespan by up to 25%, emphasizing the importance of thorough preparation before installation (see: https://floorcraftstore.com/expert-floor-leveling-carpet-install-strategies-for-durability-in-2024).
Additionally, overly relying on adhesives instead of floating installation when dealing with uneven surfaces can trap moisture and cause de-bonding or warping. It’s a common misconception that glue guarantees a seamless finish, but in reality, it can exacerbate underlying problems if the subfloor isn’t properly prepared. Similarly, many underestimate the importance of detailed edge sealing in showers—failing to properly waterproof these joints increases vulnerability to water ingress, leading to costly repairs.
To avoid these pitfalls, meticulous measurement, understanding material properties, and environment control are essential. If you’re tackling a project, don’t skip the critical steps of surface prep, environment assessment, and proper material choice. For example, I recommend reading about **laminate and shower upgrade tips** to ensure your renovation lasts. The devil is in the details, and recognizing these overlooked nuances can save you from avoidable expenses.
So, have you ever fallen into this trap of ignoring the finer points? Let me know in the comments!Maintaining your flooring and bathroom fixtures over time requires the right tools and consistent effort. I personally rely on a few key items that make routine maintenance and long-term durability much easier. A high-quality moisture meter is essential, especially when it comes to laminate and shower installations—knowing the moisture levels helps prevent issues like warping or mold growth. I prefer digital models with quick readings and data logging capabilities; they allow me to monitor conditions regularly, ensuring that humidity stays within optimal ranges for your specific materials. Check out models like the Protimeter Surveymaster, which I’ve used successfully for years.
How do I maintain flooring and showers over time?
Regular cleaning with gentle, non-abrasive products prevents dirt buildup, which can accelerate wear. For laminate floors, I recommend using microfiber mops and avoiding excessive water—mopping too wet can compromise the integrity of the planks. For showers, sealing grout lines with a high-quality silicone sealant every couple of years keeps water out of the underlying layers, prolonging the fixture’s lifespan. I also suggest inspecting for cracks or gaps periodically; catching these early can save you money in repairs.
In my experience, applying a protective topcoat or sealant periodically enhances the surface’s resistance to spills, stains, and moisture. For instance, in laminate flooring, a layer of a polyurethane-based floor sealer can help preserve the surface and prevent scratches, especially in high-traffic areas. When it comes to showery upgrades, I recommend adding waterproofing membranes beneath tiles and sealing all joints—these small steps cumulatively ensure that your installation remains durable for years. Moreover, investing in a good vacuum designed for hardwood or tile floors helps pick up abrasive dirt particles that can scratch surfaces over time.
Future of maintenance tools in flooring and shower upgrades
Technological advancements are shaping the way we care for our homes. Smart sensors capable of detecting moisture levels, temperature fluctuations, and even early signs of mold are becoming more affordable and widespread. The integration of these devices with home automation platforms will enable real-time monitoring and alerts, making maintenance less of a chore and more of a proactive system. For example, some moisture meters now sync directly to smartphones, so you can keep tabs on humidity even when you’re away. This trend points toward a future where long-term upkeep is streamlined, reducing costs and extending the lifespan of your renovations. If you’re interested in trying out advanced maintenance strategies, I highly recommend investing in a digital moisture meter and integrating it into your routine checkups.
In the end, staying proactive with proper tools and regular inspections can significantly prolong the life of your floors and showers. Remember that even small preventive steps, like resealing grout or monitoring humidity levels, can prevent costly repairs down the line. For more advanced tips on ensuring long-lasting durability, consider exploring industry research, such as the comprehensive guidelines offered by flooring experts. With the right approach, your home improvements will stand strong for years to come.
What the Toughest Lessons About Floor-Leveling Taught Me
One eye-opening lesson was that rushing the leveling process can lead to cracks and future repairs. I underestimated the importance of patience and precision, which cost me time and money later. Another insight was that not all self-leveling compounds are created equal; choosing the right product for your subfloor makes a huge difference. Lastly, I learned that consistency in measurement — double-checking before moving on — prevents uneven surfaces that compromise the entire project. These hard-won lessons now guide my approach to every renovation, saving me from costly mistakes.
Tools and Resources That Elevate My Renovations
My go-to tool is a high-quality digital moisture meter; it helps me monitor moisture levels critical for laminate and shower installations, preventing water damage. I also rely on a reliable straightedge and long level to ensure perfectly flat surfaces, which is essential for durability. For expert guidance, I trust industry-leading blogs and detailed guides like this comprehensive resource that demystifies complex leveling techniques. Additionally, I consult specific product reviews to select the right compounds, ensuring my projects stand the test of time.
Embrace Your Power to Transform Your Living Spaces
Remember, every successful home upgrade begins with the confidence to act. By honing your skills in proper leveling and choosing quality materials, you can create stunning, durable floors and showers that elevate your space for years to come. Don’t let fear hold you back—each project is a step toward a more beautiful and functional home. Trust your process, stay patient, and celebrate the progress you make along the way. Your effort today paves the way for a more comfortable, stylish tomorrow.