I’ll never forget the morning I stepped into my living room and saw a tiny crack snaking across my new laminate flooring. It was a lightbulb moment—one I wish I had before rushing into installation. That moment made me realize just how crucial proper floor leveling is, especially with the looming concern of cracks in 2026. We often overlook the underlying foundation, thinking the finished surface is all that matters. But if your subfloor isn’t properly prepared, those cracks will find a way to show up, no matter how perfect your top layer looks.
The Hidden Nightmare of Uneven Floors
Why does this happen? Well, uneven subfloors cause stress points beneath the laminate, leading to cracks over time. It’s like trying to walk on a bumpy road—your car’s suspension absorbs some shock, but eventually, the strain shows up in the form of damage. Starting with a properly leveled subfloor isn’t just about aesthetics; it’s about longevity and saving yourself money and frustration down the line. According to industry experts, failing to address subfloor irregularities is among the top causes of laminate failure within the first few years of installation.
Have You Ever Faced This Problem?
If you’ve ever installed laminate flooring only to find creaks, gaps, or cracks emerging, you’re not alone. I’ve been there, and I learned the hard way—skipping or rushing the leveling process sets up your floors for disaster. But fear not! Today, I’ll walk you through the five proven steps to level your concrete effectively, stopping cracks before they start. Mastering these techniques will help you create a sturdy, durable foundation that keeps your floors flawless for years to come.
Ready to dive into the secrets of professional-level floor leveling? Let’s get started!
Start with a Thorough Inspection
Before you begin, examine your subfloor for bumps, dips, and cracks. Use a long level or straightedge to identify uneven spots. I once blindly installed laminate over a subfloor with a hidden 1-inch dip, causing cracked planks later. Detecting these irregularities early saves time and money.
Prepare the Surface Properly
Clean the subfloor meticulously, removing debris, dust, and adhesive residues. Sweep and vacuum thoroughly. For concrete slabs, ensure there’s no loose concrete or laitance. Proper cleaning guarantees the leveling compound adheres evenly, preventing future cracks.
Apply a High-Quality Self-Leveling Compound
Mix the self-leveling compound according to manufacturer instructions, ensuring a smooth, pourable consistency. Pour gradually into the low areas, letting gravity do its work. Use a gauge rake to spread it evenly across the surface. I recall pouring the mix a bit too thick, resulting in an uneven surface—a lesson learned in patience and precision.
Control the Flow and Curing
Work calmly to avoid introducing air bubbles or creating uneven thickness. After pouring, use a spike roller or tap the surface gently to release trapped air. Allow ample curing time as specified, typically 24 hours. Rushing curing can compromise the surface, leading to cracks under the new flooring.
Sand and Smooth Afterwards
If needed, lightly sand high spots after curing, especially in areas where the compound settled unevenly. This ensures a completely flat foundation, ready for your laminate or carpet. Over-sanding or aggressive grinding can weaken the surface, so proceed with care.
Verify Flatness Before Installation
Recheck the surface with a long level or straightedge across multiple points. Confirm there are no dips exceeding 3/16 inch over 10 feet. In my project, a second pass with leveling compound solved stubborn low spots, ensuring a perfect base. Accurate verification prevents costly adjustments during later stages.
Double-Check and Adjust as Needed
Address any remaining imperfections before installing your flooring. Small dips can be filled with additional compound and sanded down. Remember, a well-leveled surface reduces the risk of cracks, creaks, or gaps later. For tips on laying durable laminates, visit expert floor leveling for laminate.
 Even seasoned DIYers sometimes fall prey to misconceptions about floor and bathroom upgrades. One popular myth is that a perfectly smooth top surface guarantees a long-lasting finish. While the visible surface is crucial, many overlook the nuanced importance of subfloor preparation, especially when installing laminate flooring. For example, some believe that pouring quick-setting leveling compounds is enough to correct unevenness, but rushing this step can trap air bubbles or create inconsistent layers that crack over time. It’s vital to invest effort into thorough surface preparation and proper curing times to ensure durability.
Addressing showers, many homeowners assume that sealing grout lines or applying waterproof membranes is the sole safeguard against leaks. However, neglecting the detailed inspection of shower pans and the underlying subfloor can lead to hidden water damage, rot, and mold. Experts highlight that water intrusion often originates from overlooked weak points like improperly sealed drains or hairline cracks that develop under tile surfaces. Regularly inspecting these areas and employing proven waterproofing hacks, like those detailed in our guide on waterproofing for 2026, can save substantial repair costs.
When it comes to carpet installation, a common mistake is underestimating the importance of subfloor flatness. Some installers believe that stretching the carpet tightly is sufficient to hide unevenness, but this approach can cause increased wear and premature sagging. Advanced homeowners know that even minor dips or humps can lead to loosening threads and tearing. The secret lies in meticulous floor leveling, which enhances the carpet’s lifespan and maintains optimal comfort. For a comprehensive approach, review expert tips on carpet installation for lasting durability.
Advanced professionals contemplate the subtle interactions between different materials. For example, pairing laminate flooring over concrete with residual moisture requires understanding vapor barriers and sealants, as discussed in recent studies on subfloor moisture management. Failing to account for these nuances can result in cupping, buckling, or cracks, despite seemingly proper installation.
A hidden issue many overlook involves transitions where different flooring types meet—such as laminate edges adjoining carpet or tile. These junctions often develop gaps or become stress points, especially if floor leveling isn’t precise. Implementing transition strips with proper underlayment techniques can mitigate these issues, ensuring the entire floor system remains integrated and resilient.
Have you ever fallen into this trap? Let me know in the comments. Mastering the nuances of these processes not only extends the life of your renovations but also saves you money and future headaches. For detailed tips tailored to each step, explore related guides like how to stop subfloor sagging or the best waterproofing hacks for showers, which are invaluable resources for serious DIY enthusiasts and professionals alike.
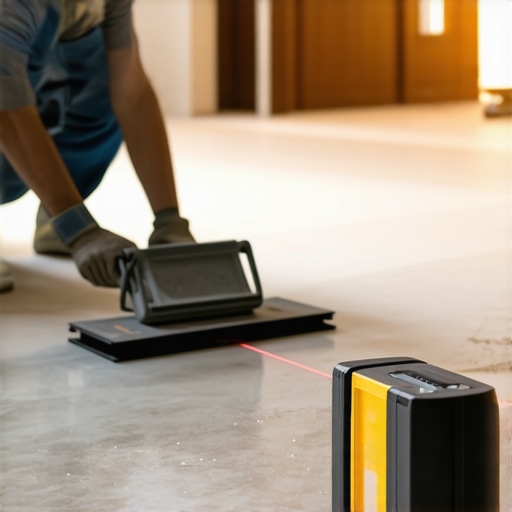
Maintaining your upgraded floors and showers requires the right tools combined with a strategic approach. For floor leveling, I rely heavily on a high-precision laser level, such as the Bosch GLL3-330C, which provides exceptional accuracy over large areas—crucial when ensuring a consistently flat surface for laminate, carpet, or tile. Unlike traditional bubble levels, laser levels project a continuous horizontal line, enabling me to spot even the slightest dips or bumps with ease, saving time and improving precision.
When it comes to preparing surfaces, I never skimp on quality. My go-to tool for surface cleaning is a heavy-duty cordless vacuum like the Dyson V15 Detect. Its powerful suction and HEPA filtration ensure dust and debris are eliminated, which is vital for optimal adhesion of leveling compounds or waterproof membranes. After cleaning, I always inspect with a moisture meter such as the Instromet EM50 to ensure concrete slabs are dry enough for installation—moisture issues are a leading cause of cracked laminate or compromised shower pans. Regular monitoring helps prevent costly repairs down the line.
For applying self-leveling compounds, I prefer a quality gauge rake like the Sakrete Leveling Rake. Its multiple blade sizes allow precise spreading and feathering, preventing air pockets or uneven layers that could crack over time (see testing tips here). Post-application, I utilize a vibration pad, such as the DeWalt D26960K concrete vibrator, to release trapped air and ensure a smooth, durable surface. Consistent curing and gentle sanding with a pole sander—like the Channellock 420—ensure flatness and readiness for subsequent flooring layers.
For ongoing maintenance of showers, I emphasize moisture monitoring with a handheld sensor like the Protimeter Aquant. Regular inspections for hidden leaks can save hundreds of dollars in water damage repairs. Plus, employing proven water-proofing hacks, like those discussed in our waterproofing guide, significantly prolongs shower lifespan. Don’t forget to replace or repair grout periodically; a silicon-based grout sealer keeps water from seeping beneath tiles and causing rot.
For carpet installation, I use a professional-grade power stretcher like the Roberts 10-121. Its adjustable arm allows me to stretch carpets precisely without over- or under-tightening, preventing early wear. An accurate installation hinges on correctly leveling the subfloor first; for that, I rely on the same laser level, combined with a string line for accuracy. When working with uneven surfaces, I always double-check with a long straightedge, referencing the tips found in expert leveling guides.
Looking ahead, I believe the future of maintaining these upgrades will lean heavily on automation—smart moisture sensors for showers and remote diagnostic tools for floors will become standard. To get started now, try calibrating your moisture meter regularly and scheduling routine inspections using these modern tools. Properly maintained, your renovation investments will last well beyond 2026 and keep your home stylish and functional.
Secrets the Pros Might Not Share About Floor Leveling
- One of my biggest lightbulb moments was realizing that rushing through the initial inspection can cost you dearly later—detecting uneven spots early, like that hidden 1-inch dip, saved me from costly repairs.
- I’ve learned that applying self-leveling compound isn’t just pouring and waiting; it requires patience, proper mixing, and immediate smoothing to prevent air bubbles and uneven layers that crack over time.
- Curious about curing? I found that rushing the drying process, even by a few hours, can compromise surface integrity, leading to cracks and failures in the long run.
- Balancing surface preparation with the right tools makes all the difference—using a laser level and gauge rake ensures consistency, which is the secret to a flawless finish.
- Patience during verification—double-checking flatness with multiple tools—can mean the difference between a durable floor and one riddled with cracks and creaks.
Tools and Reads that Changed My Approach
- Bosch GLL3-330C Laser Level — Its precision transformed how I ensured level surfaces, making assignments faster and more reliable.
- Expert guides on floor leveling — These resources provided me with nuanced techniques that elevated my craftsmanship and confidence.
- DeWalt D26960K Concrete Vibrator — Perfect for releasing trapped air, it helped me achieve smooth, crack-resistant surfaces.
- Trusted resources for shower waterproofing — They helped me avoid water damage pitfalls, ensuring longer-lasting renovations.
- Moisture sensors like the Instromet EM50 — Monitoring moisture levels before installation has prevented countless issues with cupping and mold.
Embrace the Journey—Your Floors Deserve It
Taking these lessons to heart can make a tangible difference in your home renovation journey. Proper foundation work isn’t glamorous, but it’s the backbone of lasting beauty and durability. Whether you’re upgrading your laminate, refreshing a bathroom with a new shower, or installing plush new carpet, a well-prepped subfloor sets the stage for success. Remember, every effort you make now pays dividends later, sparing you stress and expense in the future. Your home deserves that kind of care—so, get your tools ready, stay patient, and let your effort shine through every crack and crevice. Ready to turn these insights into action? The quality of your flooring depends on it!
Have you ever faced a surprising subfloor problem that caught you off guard? Share your story below—I’d love to hear how you tackled it!
http://Emily%20Carter
This post really highlights the importance of thorough surface preparation, which often gets overlooked. I once rushed the inspection step and skipped a detailed check for dips on my concrete slab, thinking a quick pour of leveling compound would do the job. Unfortunately, that led to an uneven surface that caused cracking in my laminate flooring after just a few months. Since then, I’ve learned that patience and precision in the initial stages are crucial. I also found that using a laser level makes a huge difference in ensuring accuracy across large areas. Does anyone have tips for dealing with larger dips or humps that require more than just leveling compound? I’m curious about methods others have used to handle stubborn uneven spots effectively. Overall, this post reinforces how vital proper foundational work is for long-term durability. Strong point about the need for multiple checks before final installation—skipping that step could easily lead to costly issues down the line.