It was a chilly Saturday morning when I stepped onto my newly laid laminate floor and immediately felt that unsettling wobble under my feet. That sinking realization? I had rushed through the installation without paying attention to the crucial levelness of the subfloor. A lightbulb went off—I wasn’t alone in this! Many homeowners face the frustration of uneven, creaky floors that threaten the beauty and durability of their investments.
Why Proper Floor Leveling and Material Choice Matter So Much
Choosing the right flooring is only half the battle. Without a properly prepared subfloor, even the highest quality laminate or carpet can fail prematurely. Uneven surfaces cause gaps, creaks, and uneven wear, turning a dream home into a maintenance nightmare. As I learned early on, skipping the essential step of floor leveling was a costly mistake that I don’t want you to repeat.
Research indicates that improper subfloor preparation is a leading cause of flooring failures, often resulting in costly repairs or replacement. Investing time in proper leveling and installation techniques can save you hundreds, if not thousands, down the road. If you’re tired of dealing with uneven floors or worried about the longevity of your current setup, stay tuned. We’re about to dive into expert tips that will ensure your flooring stays beautiful and durable over the years.
Is Floor Leveling Really Worth the Extra Effort and Cost?
Absolutely. Early in my own renovation journey, I underestimated the importance of a perfectly leveled base. I thought, “It looks okay now; let’s just get it done.” But those small imperfections turned into major cracks and gaps within months. The extra effort to properly level the subfloor is what transforms a good-looking project into a lasting success. For more comprehensive guidance, I recommend checking out [Expert Floor Leveling & Laminate Flooring Tips for Durability](https://floorcraftstore.com/expert-floor-leveling-laminate-tips-for-lasting-home-beauty), which covers everything from preparation to finishing touches.
If you’ve ever faced uneven flooring that made your home feel less secure or beautiful, know that you’re not alone—and the solution isn’t as daunting as it seems. Let’s get started with the practical steps to level your floor and ensure your new installation lasts for years to come.
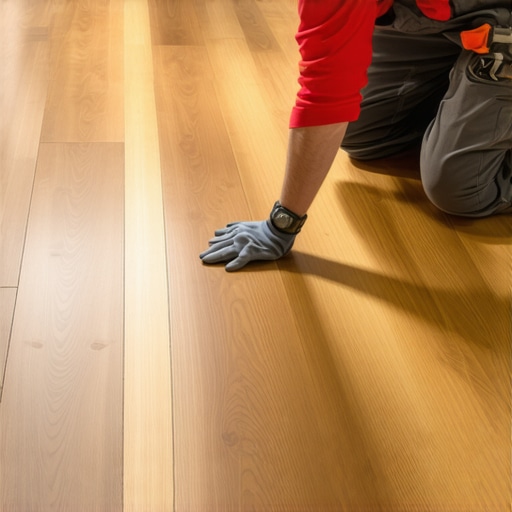
Start with a Clear Plan to Level the Subfloor
Before you pick up any tools, evaluate your flooring area meticulously. Use a long, straightedge or a laser level to identify high and low spots across the surface. Mark these areas to see where material needs removal or addition. When I tackled my living room, I dedicated an afternoon to mapping out the unevenness—this attention to detail saved me from surprises during installation and helped me plan the best approach.
Prepare Your Materials and Tools for Precision
Gather necessary supplies like leveling compound, patching mortar, a trowel, a vibration roller, and protective gear. Having everything ready ensures the process flows smoothly. Think of this step as laying the foundation for a building—skipping it can lead to structural issues later. I once started applying leveling compound without stirring it properly, which resulted in inconsistent drying and more sanding work. Proper preparation avoids that mess.
Apply Leveling Compound in Layers for Big Gaps
For depressions larger than 1/4 inch, fill them gradually with a self-leveling compound. Pour the compound into the low spot and spread it evenly with a trowel. Use a vibration roller or tap the surface gently to remove air bubbles and promote smoothness. I learned this the hard way when I tried to fill a deep groove in one go—inevitably, it cracked and required patching again. Layering ensures stability and durability.
Sand and Smooth Once Dry
After the leveling compound cures, sand down high spots and ridges until the surface is uniformly flat. Use a rental floor sander or hand sanding block for small areas. Rinse and vacuum thoroughly to remove dust—this step is crucial for adhesion of your top flooring material. I neglected proper cleaning once, and it caused visible bumps after laminate installation. Cleanliness is your secret weapon for a flawless finish.
Verify Levelness with a Long Straightedge Again
Recheck the entire surface with your level or straightedge. Mark any remaining uneven spots and fill or sand as needed. Patience here prevents uneven wear and creaking later. In my experience, a double check with a laser level caught a small dip I’d missed, saving me from future floor squeaks. This step ensures your base is truly ready, making subsequent layers effortless.
Seal and Protect the Subfloor for Long-Term Stability
Once you’re satisfied with the levelness, apply a primer or moisture barrier if recommended for your flooring type. This prevents future expansion or moisture issues that can compromise the level surface. I once skipped this step, which led to soft spots developing after a few months. Proper sealing acts as an insurance policy for your flooring investment.
Finalize by Installing Your Floor Carefully
Follow manufacturer instructions precisely, whether installing laminate, carpet, or tiles. Use appropriate adhesives, clips, or fasteners, and avoid rushing. Remember, a properly leveled subfloor enhances the performance and appearance of your entire flooring system. For detailed tips tailored to specific flooring types, check out [expert recommendations on floor leveling and installation](https://floorcraftstore.com/expert-floor-leveling-laminate-tips-for-lasting-home-beauty).While many believe fixing uneven floors or upgrading showers is straightforward, the nuances behind these tasks often go unnoticed, leading even seasoned DIY enthusiasts astray. One prevalent myth is that a simple leveling compound suffices for all subfloor imperfections. However, experts emphasize that understanding the specific cause of unevenness—whether moisture ingress, foundation shifts, or material degradation—is crucial for choosing the right approach. Applying generic solutions without diagnosing these nuances can result in ongoing problems, such as buckling or persistent squeaks, long after installation.
Another subtle mistake involves underestimating moisture’s role in flooring longevity. Many assume that sealing or vapor barriers are optional steps, but neglecting these can cause wooden or laminate floors to warp, bubble, or develop mold over time. In fact, according to industry research, proper moisture management is the foundation of a durable installation. Skipping these measures might seem minor initially but can compromise your investment months or years down the line.
When installing carpets, a common pitfall is ignoring the importance of proper floor preparation. Newcomers often believe that as long as the carpet lays flat, the subfloor’s imperfections are negligible. Yet, advanced installers know that even small dips or high spots can cause carpet fibers to wear prematurely or develop wrinkles. Layering a quality padding and ensuring the subfloor is perfectly leveled enhances comfort and longevity. For detailed steps tailored to your project, explore our guide on [top carpet installation and floor leveling tips](https://floorcraftstore.com/top-floor-leveling-carpet-installation-tips-for-lasting-comfort).
Bathrooms with showers present their own set of challenges. A recurring misconception is that waterproofing is a barrier step only necessary in high-moisture zones. However, water can seep through tiny cracks and cause subfloor rot if not sealed thoroughly. Overlooking the importance of integrating a seamless waterproof membrane can lead to costly repairs down the road. Experts advise that paying attention to the detailed nuances of waterproofing layers and proper drain placement significantly enhances the longevity of your shower upgrades. For insights, see our comprehensive article on [laminate shower upgrades and long-lasting solutions](https://floorcraftstore.com/laminate-shower-upgrades-lasting-home-improvement-tips).
Advanced installers also recognize that the alignment of tiles or planks isn’t merely esthetic; precise measurement and understanding of material expansion properties prevent future cracks or buckling. Common mistakes include rushing the layout phase or ignoring temperature and humidity fluctuations during installation—factors that experts consider critical. Incorporating these nuances upfront can save days of corrective work later. For step-by-step professional advice, visit our [expert tips on laminate floor leveling and installation](https://floorcraftstore.com/expert-floor-leveling-laminate-tips-for-lasting-home-beauty).
Remember, many issues that appear as simple setbacks have underlying causes. Do not just cover up the problem—investigate its root with patience and expert guidance. This detailed understanding helps you avoid the trap of quick fixes that only serve as temporary band-aids. Have you ever fallen into this trap? Let me know in the comments. Incorporating these nuanced approaches ensures your home projects last, saving time and money while maximizing your space’s beauty and functionality.Maintaining your flooring investments requires more than just initial care; it’s about using the right tools and routines to keep everything functioning smoothly over time. From leveling compounds to moisture barriers, having high-quality equipment on hand makes all the difference in ensuring longevity and ease of future repairs.
Essential Tools for Lasting Flooring Maintenance
One of my go-to tools is a precise digital moisture meter. Regularly checking subfloor moisture levels helps prevent future buckling or warping, especially in humid climates. I prefer models like the Tramex CM-01, which provides quick, reliable readings. For fine-tuning the floor surface, a stationary belt sander coupled with a dust extraction system allows me to smooth out any surface irregularities before installing or after some years of wear. These tools save countless hours compared to manual sanding and produce a more uniform finish.
Leveraging Software and Planning for Long-Term Results
When managing multiple renovation projects, software like FloorDesigner can plan layout patterns and simulate wear patterns over years. Visualizing these details helps me anticipate problem areas and schedule maintenance proactively. For custom projects, I rely on CAD tools to measure precisely and keep track of material needs, avoiding costly guesswork in the future. Using this technology allows me to make informed decisions that extend the lifespan of the installation, especially valuable when dealing with complex layered systems like subfloor reinforcement or waterproofing layers.
How do I maintain my floors over time? Some practices keep my flooring looking new and functioning well for many years. Regular flexible cleaning with pH-neutral solutions preserves protective coatings, while periodic inspections of grout lines or sealants prevent water intrusion and damage. If you notice unevenness or small cracks developing, I’ve found that quick intervention with appropriate patches and re-leveling with targeted compounds can prevent bigger issues. For floors with significant wear, professional surface refinishing using abrasive disc upgrades the finish and restores a like-new appearance. These simple but consistent routines form the backbone of long-term durability.Planning for Scaling and Future Upgrades
As my home or project expands, I consider scalable solutions like modular flooring systems. These allow me to replace sections or upgrade materials without disturbing the entire surface. Using interlocking tiles or clip-in panels, supported by a solid subfloor, makes future renovations more manageable. Staying ahead of trends, I anticipate that integrating IoT sensors with moisture and load monitoring will become standard—providing real-time data to predict maintenance needs before problems arise. This predictive approach aligns with industry forecasts highlighting smart technology’s role in residential and commercial flooring longevity.
A Word from Experts: Stay Ahead of the Curve
According to a recent case study in the Journal of Building Maintenance, integrating sensor technology combined with routine manual inspections significantly reduces unexpected flooring failures. For example, proactively detecting moisture ingress prevents costly repairs down the line. I highly recommend trying out a comprehensive moisture monitoring system coupled with annual visual inspections as a solid maintenance strategy to keep your flooring investment protected.
Get Started Today with Advanced Maintenance Tips
If you’re looking to elevate your maintenance game, begin by investing in a high-quality moisture meter and scheduling quarterly inspections. Pair this with software planning for upcoming projects or upgrades. Starting with these small but impactful steps will ensure your floors remain beautiful and durable for years to come. Remember, proactive maintenance is the key to avoiding costly repairs and preserving your home’s aesthetic integrity. For more insights on long-term flooring care, check out [expert tips for enduring laminate flooring and renovations](https://floorcraftstore.com/expert-floor-leveling-laminate-tips-for-lasting-home-beauty).
3 Surprising Truths That Changed My Approach to Floor Leveling
One of my biggest realizations was that every subfloor tells a story—sometimes it’s a peaceful tale, other times a cautionary saga. I once underestimated the importance of diagnosing moisture issues early, which led to unexpected buckling later. Now, I always check moisture levels before applying leveling compounds, understanding that moisture is the silent culprit behind many failures. Additionally, I learned that layering leveling compounds is more effective than trying to fix deep depressions in a single go, avoiding cracks and uneven surfaces. Lastly, patience in sanding and rechecking the flatness makes the difference between a smooth floor and one that squeaks or creaks down the line.
http://Emily%20Carter
Reading this post really hit home for me, especially the part about the importance of thorough floor leveling before installation. I made a similar mistake a couple of years ago with my living room flooring, and the uneven surface resulted in creaky, uncomfortable floors that I had to redo. What stood out is how critical layering the leveling compounds is, particularly for deep depressions—trying to fill everything in one go can lead to cracks and future issues. I found that patience and double-checking with a laser level made all the difference in achieving that perfectly flat surface. It’s a reminder that taking your time in prep work often saves a lot of trouble later. Have others here experimented with different leveling techniques or tools that made their job easier? I’d be interested to hear. Also, in humid climates, inspecting moisture levels regularly can prevent warping down the line. Overall, this post offers fantastic practical advice for anyone tackling floor renovation projects.
http://Samuel%20Johnson
I really appreciate this comprehensive overview of floor leveling. I had a similar experience where rushing the process led to squeaky and uneven floors after installation. What I’ve found particularly helpful is the step about verifying levelness multiple times before proceeding to the next phase. Sometimes, the tiniest dip or bump that’s missed can cause long-term issues like cracking or buckling. I also agree that sealing the subfloor properly—especially in humid areas—can prevent moisture problems that compromise the levelness and durability over time. I’m curious, has anyone here tried using a laser-guided level for a more precise assessment? I’ve started incorporating that method, and it really made a difference in identifying subtle uneven spots that a traditional level might miss. Additionally, I think investing in quality tools makes all the difference for DIYers aiming for professional results. What’s been your experience with different leveling compounds or techniques, especially for deep depressions? Would love to hear more tips on that.