The ‘Walnut’ Method for Hiding Scratches on Kansas City Hardwood Floors
The ‘Walnut’ Method for Hiding Scratches on Kansas City Hardwood Floors
If you live in the Kansas City metro, you know that our homes take a beating from the elements. From the historic bungalows in Brookside to the sprawling new builds in Overland Park, our local climate is a rollercoaster. We deal with humidity levels that can soar to 70% or 80% in the sweltering July heat, only to plummet to bone-dry levels when the winter winds whip across the plains. These extreme swings cause hardwood flooring in Kansas City to expand and contract constantly. This environmental stress makes our floors particularly susceptible to becoming brittle and prone to surface damage. There is nothing quite as heart-sinking as the sound of a kitchen chair dragging across a pristine floor or seeing a fresh claw mark from a hyperactive Labrador. When you need high-quality hardwood floor refinishing in Kansas City, the solution is often a phone call away, but for those minor, annoying scuffs, there is a “kitchen pantry miracle” you might not have heard of: The Walnut Method.
As a local craftsman who has spent years restoring the character of Kansas City homes, I’ve seen homeowners try everything to hide a blemish. Before you panic and assume you need a full-scale hardwood floor repair, it is worth looking into this simple DIY hack. While it isn’t a substitute for professional wood floor refinishing in Kansas City, it is an excellent stop-gap for light surface scratches that haven’t yet breached the wood’s structural integrity. Understanding the local wood behavior is key – if you’ve noticed gaps opening up alongside your scratches, you might want to read about Why Your Hardwood Floor is Gapping in the Winter and How to Fix It to understand how our local humidity plays a role.
Section 1: What is the ‘Walnut’ Method?
The “Walnut Method” sounds like an old wives’ tale, but it is actually rooted in basic organic chemistry. When you have a light scratch on your floor, what you are actually seeing is the light reflecting off the jagged, torn fibers of the wood and the fractured polyurethane finish. These “white” scratches are essentially areas where the wood has been dehydrated and exposed. The walnut method utilizes the natural properties of the walnut meat to “heal” the appearance of the scratch.
It’s not magic; it’s a combination of natural oils and tannins. Raw walnuts are incredibly rich in fatty acids and oils that act as a natural sealer. When you rub the walnut meat into a scratch, the pressure releases these oils directly into the parched wood fibers. Furthermore, walnuts contain natural dark tannins that act as a mild, organic dye. This helps the light-colored “wound” in the wood darken just enough to blend in with the surrounding finish. Research and demonstrations by the FIX IT Home Improvement Channel and influencers like Liz Lovery have popularized this technique because it effectively fills the microscopic voids in the wood finish, changing the way light reflects off the surface.
From a professional perspective, I appreciate the walnut method because it is non-invasive. Unlike some wax sticks or cheap “repair kits” found at big-box stores, walnut oil won’t interfere with future sanding and refinishing hardwood floors. Some silicone-based polishes can actually create a barrier that makes it impossible for a new coat of finish to adhere later on, but a raw walnut is a clean, natural alternative that respects the wood’s longevity.
Section 2: Step-by-Step Guide to the Walnut Fix
Before you start raiding your pantry, it is vital to ensure you are doing this correctly. A sloppy application won’t help, and you could end up with a sticky mess that attracts more dirt. Follow these steps to ensure your scratch repair hardwood floors project is a success.
Step 1: Clean the Area
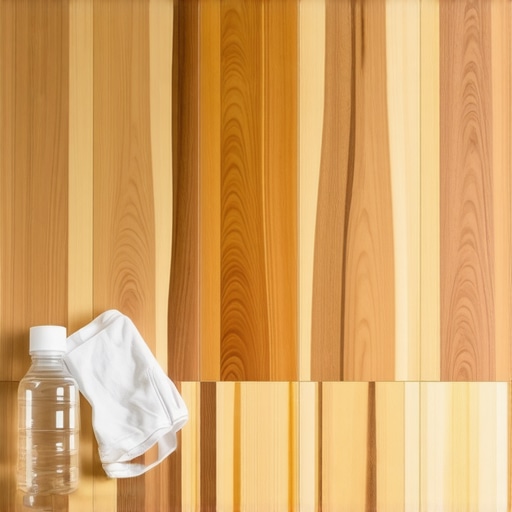
You must remove all dust, pet hair, and grit from the scratch. If you rub a walnut over a dirty floor, you are essentially sandpapering the dirt into the wood. Use a slightly damp (not wet!) microfiber cloth. If you’ve been over-cleaning your floors, you might be making them more brittle; check out my guide on Why You Should Stop Mopping Your Hardwood Every Week to ensure you aren’t damaging your floors during your cleaning routine.
Step 2: Use a Raw, Shelled Walnut
You need a raw walnut – not roasted, not salted, and certainly not honey-glazed. You want the natural, unaltered oils. Break the walnut meat in half to expose the oily center.
Step 3: Rub Diagonally Across the Scratch
Don’t rub along the length of the scratch. Instead, rub the walnut meat in a circular or diagonal motion across the blemish. This ensures the oil and tiny particles of the nut “meat” are packed into the crevice rather than just skating over the top.
Step 4: The Waiting Game
Wait about 5 to 10 minutes. This allows the wood fibers to absorb the oils and the tannins to react with the wood. You will notice the scratch starting to darken and “disappear” as the oils saturate the area.
Step 5: Buff with a Soft Cloth
Take a clean, dry microfiber cloth and buff the area firmly. This removes any excess nut fragments and polishes the oil into a smooth sheen that matches your floor’s natural luster. If the floor is particularly dark and the walnut isn’t quite cutting it, you might need to look into The ‘Marker’ Hack for Hiding Scratches in Dark Wood for a more pigment-heavy solution.
Section 3: When the Walnut Fails: Identifying Deep Damage
As much as I love a good DIY hack, I have to be honest with my fellow Kansas Citians: the walnut has its limits. This method is designed for surface-level “scuffs” – the kind that affect the top layer of the finish or the very surface of the wood grain. If you are dealing with a structural gouge, a walnut is just a waste of a good snack.
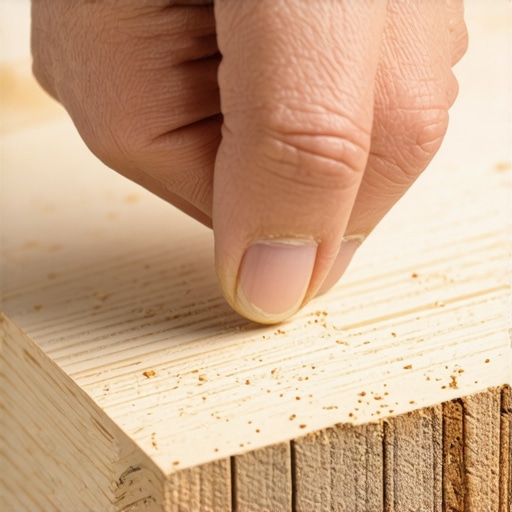
How do you know if the damage is too deep? Use the “Fingernail Test.” Run your fingernail across the scratch. If your nail “clicks” or drops into a valley, the wood fibers have been physically compressed or removed. In these cases, hardwood floor repair requires more than just oil; it requires wood filler, color matching, and a localized finish application. Attempting to DIY a deep hardwood floor patch can often backfire, leading to spots that look significantly different than the rest of your room. I’ve written more about this in Why Your Hardwood Patch Looks Darker Than the Rest of the Floor.
Furthermore, if your floor has suffered from hardwood floor water damage repair needs – perhaps from a leaking radiator in an old KCMO home or a spilled planter – the walnut method will not help. Water damage often causes the wood to “cup” or “crown,” and the graying effect of water-damaged oak is a chemical change that requires professional sanding and refinishing hardwood floors to correct.
Section 4: Professional Alternatives for Kansas City Homes
When the scratches are widespread, or the walnut method isn’t providing the “wow” factor you want, it’s time to look at professional wood floor refinishing in Kansas City. Many homeowners think their only option is to move out for a week and have the floors sanded down to the raw wood, but that isn’t always the case.
The Screen-and-Coat Method
If your floors are just looking dull and have hundreds of tiny surface scratches (the kind the walnut method would take years to fix one-by-one), a “Screen-and-Coat” might be the answer. This process involves lightly abrading the existing top coat of polyurethane and applying a fresh new layer. It’s faster, cheaper, and less dusty than a full refinish. You can learn more about this in our guide to The ‘Screen-and-Coat’ Method for Refreshing Dull Hardwood Floors. This is a favorite for refinishing hardwood floor contractors when the wood underneath is still in good shape.
Full Sanding and Refinishing
For homes in historic districts like the Northeast or Union Hill, we often encounter old hardwood floor restoration projects. These floors may have been covered by carpet for decades or have deep gouges from a century of use. In these instances, we perform a full sanding and refinishing. We sand the wood down to a fresh surface, apply custom stains to match the home’s period-correct aesthetic, and seal it with high-traffic finishes that can handle modern life. If you want to refinish hardwood floors in Kansas City to truly add value to your property, this is the gold standard.
Section 5: Beyond Hardwood: LVP and Carpet Transitions
Sometimes, during a consultation, I have to tell a homeowner that their floor has been sanded too many times and there isn’t enough “meat” left on the boards to survive another refinish. Or perhaps they are tired of the maintenance that comes with natural wood in a high-traffic mudroom or a basement prone to the Kansas City “spring soak.”
In these cases, we often discuss the transition from wood to other modern materials. Many homeowners choose to replace carpet with hardwood in bedrooms to match the rest of the house, but for basements and kitchens, luxury vinyl plank installers are in high demand. Luxury vinyl tile installation offers a waterproof, scratch-resistant alternative that looks remarkably like real wood. While it doesn’t have the same soul as a 100-year-old oak floor, it is a practical solution for modern families. If you are considering a kitchen remodel and switching to LVP, be sure to read Why Your Kitchen Island Should Not Be Anchored Through Laminate to avoid a very common (and expensive) installation mistake.
Conclusion: A Local Expert’s Final Word
The walnut method is a fantastic “party trick” and a genuine help for those minor scuffs that happen in the course of everyday life. It’s a testament to the resilience of natural wood that a simple nut can help restore its beauty. However, your home is likely your largest investment, and your floors are the foundation of its aesthetic and value.
While DIY hacks are great for the short term, they don’t address the underlying wear and tear that Kansas City’s climate imposes on your home. When you are ready to move beyond the pantry and want a floor that looks brand new, you need the expertise of professional refinishing hardwood floor contractors. Whether you need a simple screen-and-coat, a full old hardwood floor restoration, or a brand new luxury vinyl tile installation, we are here to help.
Don’t let scratches diminish the beauty of your home. Contact Floor Craft today for a professional consultation on hardwood floor refinishing in Kansas City. Let’s make your floors the envy of the neighborhood again.