How to Fix a Squeak in Your Hardwood Floor Fast
The physics of the friction point
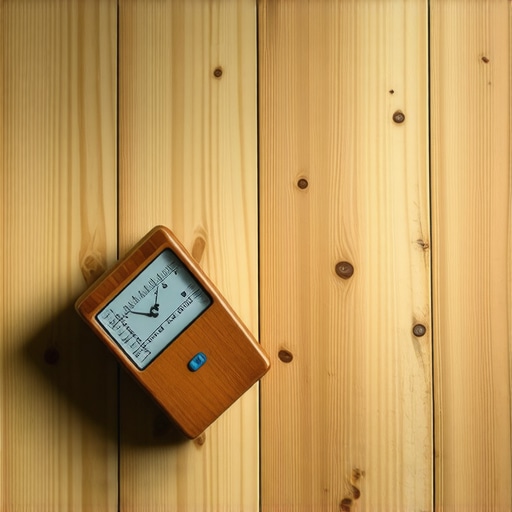
To fix a squeak in your hardwood floor fast, you must eliminate the movement between the flooring plank and the subfloor or the fastener. This friction typically occurs because of a gap that has formed over time, allowing the wood to rub against a nail or another piece of wood. Identifying the exact spot where the deflection occurs is the first step toward a permanent silence. I spent three days grinding concrete on a job last month just so the floor would not click like a castanet. Most guys skip the leveling compound. They think the underlayment will hide the dip. It won’t. I have spent 25 years on my knees with a moisture meter and a level, and I can tell you that a squeak is not personality, it is a mechanical failure. My hands smell like WD-40 and oak dust because I treat these surfaces like engineering projects. When you walk across a floor and hear that high-pitched chirp, you are hearing the sound of wood fibers screaming under the stress of movement. Solid 3/4 inch white oak is a beast that breathes. If you do not respect the physics of expansion and contraction, the floor will fight back. The sound is usually concentrated at the tongue and groove joint or where a cleat has backed out of the plywood. You cannot just spray some oil and hope for the best. You need to understand the structural integrity of the assembly.
Identifying the ghost in the joist
Locating the source of a floor squeak requires a second set of feet to walk the surface while you observe the deflection. You are looking for vertical movement that exceeds the tolerances set by the National Wood Flooring Association. If the plank moves even a fraction of an inch, it will create noise. I once walked into a house where a $15,000 wide-plank walnut floor was cupping so bad it looked like a potato chip because the installer did not check the crawlspace humidity. That job taught me that moisture is the primary driver of wood movement. When the air is dry, the wood shrinks. When it is humid, it expands. This constant cycling weakens the grip of the original nails. You might think your subfloor is solid, but if it was installed with builder-grade nails instead of ring-shank fasteners or screws, it is only a matter of time before the squeaks start. Unlike a carpet install where the padding absorbs some of the movement, hardwood is rigid and unforgiving. If the subfloor is not flat to within 1/8 inch over a 6-foot radius, you are going to have problems. I have seen guys try to fix this by pounding more nails blindly through the surface. That is a mistake. You will just end up with a floor that looks like it was hit by birdshot.
“A floor is only as good as the subfloor beneath it; deflection is the enemy of every joint.” – Master Flooring Axiom
Lubrication versus mechanical fastening
Temporary squeak relief can be achieved through dry lubricants, but permanent fixes require mechanical stabilization through screws or adhesives. Graphite powder or talcum powder can be worked into the joints to reduce friction between the tongue and the groove. This works when the squeak is caused by two boards rubbing together. However, if the board is lifting off the subfloor, powder is a waste of time. You need to pull that board back down. I prefer using specialized breakaway screws that are designed for this exact purpose. These screws have a section of the shaft that is unthreaded, and the head is designed to snap off below the surface of the wood. You drill a pilot hole, drive the screw through the plank and into the joist, and then snap the head off. The hole is so small that a bit of wood filler makes it disappear. This is much better than the old method of face-nailing and hoping the putty stays in place. I have seen laminate floors that click because the locking mechanism is under tension, but solid wood squeaks because of structural gaps. You have to be precise. If you miss the joist, you are just putting a hole in your floor for no reason.
| Method | Success Rate | Tools Required | Permanent? |
|---|---|---|---|
| Graphite Powder | Low | Applicator | No |
| Breakaway Screws | High | Drill, specialized bit | Yes |
| Subfloor Brackets | Very High | Screws, brackets | Yes |
| Wood Glue Injection | Medium | Syringe, adhesive | Partial |
The 1/8 inch that ruins everything
Floor leveling is the most ignored phase of installation and the most frequent cause of long-term noise issues. If the subfloor has a dip, the hardwood plank will span that gap like a bridge. Every time you step on it, the bridge flexes. This flexion eventually pulls the fasteners loose. I have spent entire weeks just leveling subfloors with self-leveling underlayment or plywood shims. It is tedious work. It is dirty work. But it is the only way to ensure a quiet floor. In showers, we level for drainage. In a living room, we level for silence. If you are dealing with a second-story floor, you can often fix the squeak from below. If the basement ceiling is unfinished, you can see the subfloor. Have someone walk above you while you look for movement. When you find the gap, you can drive a shim coated in wood glue into the space between the joist and the subfloor. Do not drive it too hard or you will lift the floor and create a new hump. Just snug it up. This stops the vertical deflection and kills the noise instantly. This is the kind of professional secret that big-box retailers will not tell you because they want to sell you a new floor instead of fixing the one you have.
- Identify the joist location using a stud finder or by tapping the floor.
- Verify the moisture content of the wood to ensure it is within 2 percent of the subfloor.
- Use a pilot bit to prevent the oak or maple from splitting.
- Counter-sink all fasteners and use matching wood dough for the repair.
- Check the crawlspace for excessive humidity that might be swelling the wood.
Why your subfloor is lying to you
A subfloor might look flat to the naked eye, but it often contains microscopic irregularities that cause the wood to oscillate. Oriented Strand Board (OSB) is notorious for this. It is a bunch of wood chips glued together, and it does not hold fasteners as well as CDX plywood. Over time, the glue in the OSB breaks down, and the nail starts to wiggle. This wiggle becomes a squeak. If you have OSB, you are better off using screws for every repair. I hate seeing builder-grade materials in a high-end home. It is like putting a lawnmower engine in a Ferrari. People spend all their money on the species of the wood but nothing on what is underneath. If the subfloor is compromised, the best hardwood in the world will sound like an old porch. You need to ensure the subfloor is 3/4 inch thick at a minimum. Anything thinner will flex too much under a human load. Wood is a hygroscopic material that expands and contracts with changes in relative humidity. This is not a suggestion. It is a law of nature. If you live in a place with high humidity, your floor needs more room to breathe at the edges. If you tight-fit the boards against the wall, they will have nowhere to go but up. That tension creates a symphony of squeaks that no amount of screws will fix. You have to go to the perimeter and cut an expansion gap. It is a mess to do after the fact, but it is necessary.
“Wood is a hygroscopic material that expands and contracts with changes in relative humidity.” – NWFA Technical Manual
The molecular reality of adhesive bonds
Injecting high-strength epoxy or polyurethane adhesive into the void beneath a squeaky board can create a structural bond that stops movement. This is the surgical approach to floor repair. You drill a tiny hole, often through a grain line or a knot to hide it. Then you use a pressurized syringe to pump adhesive into the cavity. As the adhesive cures, it expands slightly, filling the gap and locking the board to the subfloor. This is excellent for areas where you cannot access the joists or where you do not want to use visible fasteners. However, you must be careful with the chemistry. Some adhesives stay flexible, which is good for natural movement, while others become brittle. If the adhesive is too brittle, it might snap later on. I prefer a polyurethane glue because it reacts with the moisture in the wood to create a bond that is stronger than the wood itself. You have to weight the board down with something heavy, like a few buckets of joint compound, while the glue sets. If you do not, the expanding glue might actually push the board up, making the problem worse. This is the difference between a handyman and a master installer. One knows how to use a tool, the other knows how the material will react ten hours after he leaves the job site.