How to Install a Flush-Mount Vent in Your New Hardwood Floor
The smell of fresh-cut white oak and the sharp tang of floor wax are the only perfumes I need. I have spent twenty-five years on my knees with a moisture meter and a level, and I can tell you that a floor is a performance surface, not a piece of furniture. I once walked into a house where a $15,000 wide-plank walnut floor was cupping so bad it looked like a potato chip because the installer did not check the crawlspace humidity before starting. The vents were the worst part. They were cheap, drop-in metal grates that looked like an afterthought. A true craftsman knows that a floor is only finished when the transitions and vents are integrated into the structural plane. If you want your floor to look like a million dollars, you have to stop thinking about vents as covers and start thinking about them as precision-engineered components. This guide focuses on the physics of the flush-mount vent, the chemistry of the bond, and the mechanical reality of wood movement.
The geometry of a perfect vent cut
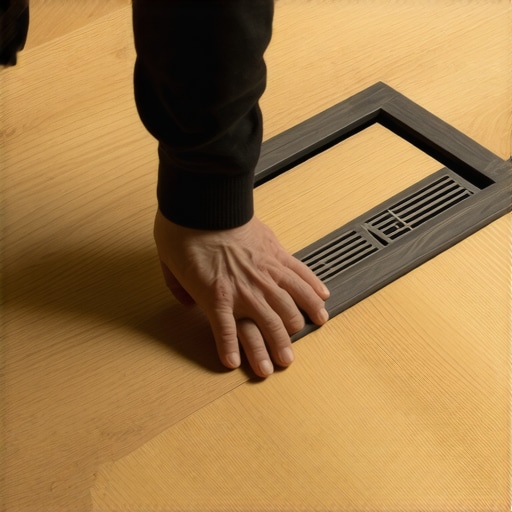
Flush-mount vent installation requires precision woodcutting, exact subfloor leveling, and a deep understanding of wood expansion coefficients. To achieve a flush finish, the vent frame must be integrated during the flooring installation, ensuring the frame sits on the same plane as the surrounding planks. This prevents trip hazards and maintains the visual continuity of the wood grain across the entire surface area. Most guys skip the leveling compound. They think the underlayment will hide the dip. It will not. I spent three days grinding concrete on a job last month just so the floor would not click like a castanet when someone walked near the air returns. If your subfloor is not flat to within 3/16 of an inch over a 10-foot radius, your flush-mount vent will eventually squeak, rub, or crack.
“A floor is only as good as the subfloor beneath it; deflection is the enemy of every joint.” – Master Flooring Axiom
Why your subfloor is lying to you
Subfloor preparation involves checking for moisture content and structural deflection before any wood is laid near a vent opening. You must use a pin-style moisture meter to verify that the subfloor is within 2 percent of the hardwood planks. If the subfloor is too damp, the wood around the vent will swell, pinching the register and making it impossible to remove for cleaning. This is especially true near high-moisture areas like showers or kitchens where humidity spikes. When dealing with floor leveling, do not rely on the wood to bridge gaps. Every void under a plank is a point of failure. I have seen laminate floors fail in weeks because the installer thought a thick pad would compensate for a 1/2 inch valley. Hardwood is even less forgiving. If you are installing over a crawlspace, you need a 6-mil poly vapor barrier. Without it, the vent becomes a chimney for moisture, rotting the frame from the inside out. It is a slow death for a floor.
The chemistry of the modern adhesive bond
Polyvinyl acetate glues and urethane-based adhesives provide the mechanical bond necessary to hold a vent frame in place against the lateral pressure of wood expansion. When you install a flush-mount vent, you are creating a fixed point in a moving sea of wood cells. The adhesive must remain flexible enough to handle the seasonal movement of the planks while being strong enough to resist the shear forces of foot traffic. If you use a cheap builder-grade glue, the bond will crystallize and snap. You want a high-solids adhesive that can withstand the temperature swings of an HVAC system. When the furnace kicks on, that vent frame is going to heat up faster than the rest of the floor. This thermal expansion can cause the finish to crack if the adhesive does not have a high elongation rating. I always look for a product with at least 150 percent elongation. It is the difference between a floor that lasts fifty years and one that needs a repair in five.
| Wood Species | Janka Hardness Rating | Acclimation Time (Days) | Expansion Risk |
|---|---|---|---|
| White Oak | 1360 | 7 to 10 | Moderate |
| Brazilian Cherry | 2350 | 14 to 21 | High |
| Black Walnut | 1010 | 5 to 7 | Low |
| Hickory | 1820 | 10 to 14 | High |
The math of the expansion gap
Calculating the expansion gap around a flush-mount vent requires knowing the species-specific shrinkage coefficient and the local average humidity. Wood is a hygroscopic material. It breathes. If you pin a vent frame tight against the planks in the summer, the floor will buckle when the humidity rises. You need a gap. I usually leave 1/16 of an inch on the long sides of the vent. It sounds small, but over the width of a room, that adds up. While most people want the thickest underlayment, too much cushion actually causes the locking mechanisms on floors to snap under pressure. This is a common mistake in carpet install transitions as well. People think soft is better. In the world of flooring, soft is dangerous. Soft means movement, and movement means noise. A flush-mount vent must be rock solid. If there is any bounce when you step on it, the miters on the frame will open up and collect dirt until they look like black scars on your floor.
- Verify subfloor flatness using a 10-foot straightedge.
- Acclimate wood planks for at least 7 days in the room of installation.
- Use a carbide-tipped blade for all vent frame miter cuts.
- Apply a moisture-cured urethane adhesive to the vent frame base.
- Maintain a consistent expansion gap around the perimeter of the room.
- Seal the inside of the vent opening with a vapor-retardant coating.
The physics of the airflow transition
Proper airflow through a flush-mount vent depends on the internal bevel of the wood louvers and the vertical clearance of the ductwork. Most homeowners forget that a vent is a functional part of the HVAC system. If the louvers are too thick or the angle is too shallow, you create backpressure in the system. This makes your AC work harder and increases your energy bill. A master installer trims the underside of the vent to ensure it does not sit directly on the metal ducting. This prevents