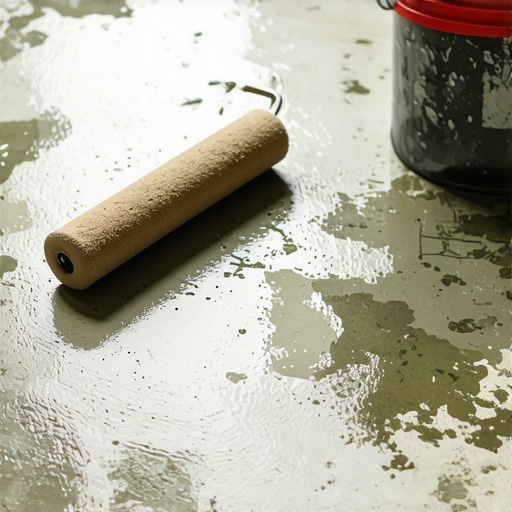
Why Your Subfloor Primer is Bubbling and How to Fix It Fast
Most guys skip the leveling compound. They think the underlayment will hide the dip. It won’t. I spent three days grinding concrete on a job last month just so the floor wouldn’t click like a castanet. I have spent twenty five years on my knees with a moisture meter and a level. I have seen every failure in the book. A floor is a performance surface. It is not just a decoration. When you see your subfloor primer bubbling, you are looking at a chemical and physical rejection that will eventually ruin a thousand dollar laminate or carpet install. I smell like WD-40 and oak dust most days. I do not have time for aesthetic advice that ignores the slab. If the foundation is wrong, the finish is garbage. That is the reality of the trade. Most homeowners think waterproof LVP means they can turn the room into a swimming pool. They are wrong. It starts with the bond. If the primer fails, the leveler fails. If the leveler fails, the floor fails.
The science of why primer bubbles on concrete
Subfloor primer bubbles occur due to moisture vapor emission, hydrostatic pressure, or outgassing from porous concrete slabs. When liquid primer meets a slab with high relative humidity, the moisture trapped in the pores attempts to escape. This creates internal pressure that pushes against the drying film of the primer, creating unsightly and structurally weak air pockets or blisters. This is a common issue in basement floor leveling or showers where the slab has not reached a proper equilibrium with the surrounding environment. Most people ignore the calcium chloride test. They just pour. That is a mistake. Concrete is a sponge. It breathes. If you seal the top while the bottom is wet, the air has nowhere to go but up. It pushes through the surface tension of the primer. It creates a dome. That dome is a hollow point. It will eventually collapse under the weight of a heavy furniture leg or the constant walking traffic of a family. The chemistry of a modified thin-set or a high solids primer requires a stable substrate. If the substrate is moving or breathing too hard, the bond is dead on arrival.
“A floor is only as good as the subfloor beneath it; deflection is the enemy of every joint.” – Master Flooring Axiom
The hidden danger of high pH levels in your slab
High alkalinity in concrete slabs can chemically attack the resins in subfloor primers and cause delamination. When water moves through a concrete slab, it carries salts and minerals to the surface. This raises the pH level. If your slab has a pH above nine, most standard primers will struggle to maintain a bond. The chemicals literally eat the adhesive properties of the primer. You need to test your concrete. You cannot just look at it and assume it is ready. I have seen million dollar homes where the laminate was clicking like a typewriter because the installer did not check the pH. They used a cheap primer that could not handle the salt. The bubbling was the first sign. Then came the white powder. That is efflorescence. It is the ghost of a failed installation. You need to neutralize the slab or use a primer specifically designed for high pH environments. This is structural engineering. It is not home decor. If you do not respect the chemistry, the chemistry will humble you. It will happen during the most humid part of the year. Your floor will lift. Your seams will gap. You will be calling me to tear it all out. Use a pH pen. It takes thirty seconds. It saves thirty hours of rework.
The physics of outgassing and the porous surface
Outgassing happens when air trapped in the pores of the concrete is displaced by the liquid primer or leveler. As the liquid enters the tiny voids of the slab, it forces the air out. If the primer is drying too fast on the surface, that air gets trapped in a bubble. This is why professional installers often use a spiked roller. We need to break those bubbles before the material sets. If you are working in a room with a lot of sunlight, the slab warms up. Warm air expands. It pushes out of the concrete with more force. I always tell my crew to prime in the evening or when the temperature is falling. Never prime a slab that is heating up. That is a recipe for a bubble field. You are fighting the laws of thermal expansion. You will lose every time. The air has to go somewhere. If you do not give it a path or slow down the drying time, it will create a moonscape on your floor. This is especially true for self leveling underlayment. The surface tension of these products is high. They want to stay smooth. But the air from below has other plans. It is a battle of pressures. You need to win that battle before the clock runs out on the pot life of your material.
| Substrate Type | Required Acclimation | Max Moisture Content | Standard Primer Type |
|---|---|---|---|
| New Concrete | 28 to 60 Days | 3.0 Percent | Acrylic or Epoxy |
| Plywood Subfloor | 72 Hours | 12.0 Percent | Latex Based |
| Old Tile | None | N/A | Non Porous Primer |
| Radiant Heat Slab | 7 Days (off) | 2.0 Percent | High Temp Rated |
Why your shower subfloor requires different rules
Shower installations require waterproof membranes and specialized primers because of the constant exposure to hydrostatic pressure and vapor. You cannot use a standard floor leveling primer in a wet area. It will emulsify. The water will get under the tile. It will rot the subfloor. I have ripped out hundreds of showers where the installer used the wrong primer. The bubbles were the least of their problems. They had black mold and structural rot. In a shower, you need a vapor barrier. You need a primer that can handle standing water. The TCNA has strict standards for this. If you ignore them, you are liable for the damage. A shower is a pressurized box. When you turn on the hot water, you create steam. That steam wants to go through the walls and the floor. If your primer has bubbles, those are entry points for moisture. It is a slow death for your bathroom. You need to use an epoxy based primer or a specialized liquid applied membrane. Do not cut corners here. A leak in a second floor shower can ruin the kitchen ceiling below. I have seen it happen. It is an expensive mistake. It is avoidable with the right prep work.
A checklist for preventing primer failure
- Check the moisture content of the slab using an electronic meter or calcium chloride test.
- Vacuum the floor twice to remove every grain of dust and loose debris.
- Verify that the slab temperature is between 50 and 85 degrees Fahrenheit.
- Dilute the primer exactly according to the manufacturer instructions for your specific porosity.
- Apply the primer with a long nap roller to ensure it reaches deep into the concrete pores.
- Wait for the primer to turn from a milky white to a clear, tacky film before pouring leveler.
The solution for bubbling primer and how to fix it fast
To fix bubbling primer, you must scrape away the failed areas and reapply the product after addressing the underlying moisture or dust issue. You cannot just pour over a bubble. It will pop later and leave a void. Take a sharp floor scraper. Cut the bubbles out. If the concrete underneath is dusty, you did not clean it well enough. If it is damp, you have a moisture problem. You might need a moisture vapor barrier. This is a thick, epoxy like coating that stops the water from coming up. It is expensive. But it is cheaper than a new floor. Once the area is clean and dry, reprime. Use a brush to work the primer into the pores. Do not let it puddle. Puddles lead to soft spots. If the whole floor is bubbling, you have to start over. It is a hard truth. I have had to do it. It hurts the wallet, but it saves your reputation. A professional does it right the second time if he messed up the first. A hack just covers it up and hopes the check clears before the floor fails. While most people want the thickest underlayment, too much cushion actually causes the locking mechanisms on LVP to snap under pressure. The same logic applies to primer. More is not always better. The right amount of the right product is what matters.
“Cementitious underlayments shall not be used to bridge moving cracks or expansion joints.” – TCNA Handbook
The trap of the dirty concrete slab
Dust is the number one bond breaker in the flooring industry and it is the primary cause of small, frequent primer bubbles. You think the floor is clean because you swept it. You are wrong. Concrete dust is microscopic. It fills the pores. When you roll on the primer, the liquid sits on top of the dust. It does not touch the concrete. It creates a skin. That skin has no grip. It bubbles instantly. I use a HEPA vacuum. I go over the floor until I can run my white gloved hand across it and see nothing. If you see grey on your hand, the floor is dirty. You are wasting your time. You are wasting your money. I have seen guys try to prime over drywall mud. That is even worse. Drywall mud is water soluble. The primer hits it, turns it back into mush, and the whole thing lifts. It is a disaster. You need to grind that mud off. You need to get down to the raw, open pores of the aggregate. That is where the strength is. That is where the bond happens. If you are doing a carpet install or laminate, you might think you can hide a little dust. You cannot. It will crunch under the floor. It will feel like sand in your shoes for the next ten years. Clean the floor. Then clean it again.
The 1/8 inch that ruins everything
Tolerance levels for subfloor flatness are typically 1/8 inch over 10 feet, and failing to meet this leads to structural failure. Bubbling primer prevents you from reaching this tolerance. If the primer fails, your leveling compound will not stick. It will crack. When the leveler cracks, it moves. When it moves, the floor above it moves. This is how you get those annoying squeaks in a new laminate floor. It is how you get grout lines that crack in a tile shower. You are looking for perfection. The subfloor is the foundation of that perfection. If you have a dip that is 1/4 inch deep, you cannot just fill it with primer. You need a high quality leveler. But that leveler is only as good as the primer bond. It is a chain. Every link must be solid. If one link is a bubble, the chain is broken. I have spent my life chasing that 1/8 inch. It is the difference between a floor that lasts fifty years and one that lasts five. Do not ignore the small things. The small things are what make the big things possible. Precision is not an option in this trade. It is a requirement. If you cannot be precise, stay off the slab. Let a professional handle the chemicals and the physics. It is harder than it looks. It requires patience that most people do not have.