Why Your Shower Tile is Falling Off the Wall in Large Sections
I spent three days grinding concrete on a job last month just so the floor wouldn’t click like a castanet. Most guys skip the leveling compound. They think the underlayment will hide the dip. It won’t. But I walked into a master bathroom recently where the homeowner was staring at a pile of twelve-by-twenty-four porcelain planks that had just given up the ghost. They had peeled away from the wall like wet wallpaper. The smell of mildew was thick enough to chew. It was a classic case of structural negligence and chemical failure. People think tile is a decorative skin. It is not. It is an assembly of components that must work in perfect thermal and moisture synchronization. When that assembly fails, it does not fail slowly. It fails in sheets. This is the reality of the wet-area physics that most weekend warriors and low-bid contractors ignore. We are going to look at why your shower is disintegrating and how the physics of the bond determines the lifespan of your bathroom.
The disaster behind the grout
Shower tile falls off in large sections because of a catastrophic failure in the bond between the tile and the substrate or the substrate and the framing. Common causes include using organic mastic in wet areas, inadequate thin-set coverage, or extreme wall deflection that snaps the rigid bond of the mortar. When moisture finds its way through porous grout lines or unsealed corners, it begins a process of re-emulsification or rot. If the installer used a bucket of pre-mixed mastic instead of a bag of polymer-modified thin-set, you are living on borrowed time. Mastic is basically organic glue. Add water, and it turns back into mush. I have seen entire walls of marble slide down like a slow-motion avalanche because someone wanted to save ten dollars on a bag of proper cementitious mortar. This is not just a cosmetic issue. It is a structural failure that can lead to framing rot and black mold colonies that thrive in the dark, damp cavities of your walls.
Waterproof tile is a lie
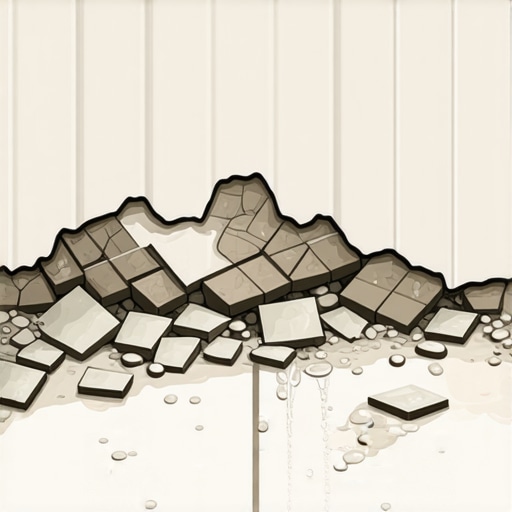
The most dangerous myth in the flooring industry is that tile and grout are waterproof. Grout is a cementitious sieve that allows moisture to pass through via capillary action into the substrate behind it. If that substrate is not a dedicated waterproofing membrane or a closed-cell backer board, the wall will fail. You cannot rely on the glaze of a ceramic tile to protect your studs. Water moves through the molecular structure of cement grout every time you take a shower. If you have standard green-board drywall back there, it is absorbing that water like a sponge. Eventually, the paper facing on the drywall separates from the gypsum core. At that point, the bond is gone. The tile might still be stuck to the paper, but the paper is no longer stuck to the wall. This is why we see large sections of tile come off at once. It is a total delamination of the wall surface. [IMAGE_PLACEHOLDER]
“A floor is only as good as the subfloor beneath it; deflection is the enemy of every joint.” – Master Flooring Axiom
The chemical suicide of organic mastic
Organic mastic should never be used in a shower environment because it is a water-soluble adhesive that lacks the structural capacity to handle constant saturation. Contractors use it because it is sticky and easy to apply, but it fails to create a permanent crystalline bond with the tile. Real thin-set mortar undergoes a chemical reaction called hydration. It creates millions of microscopic needles that grow into the pores of the tile and the backer board. Mastic just dries. When it gets wet again, it softens. If you see a contractor walk into your bathroom with a pre-mixed bucket of goop for a shower install, fire them on the spot. They are building a temporary floor. Whether it is a carpet install or a shower renovation, the adhesive must be rated for the environment. You wouldn’t use wood glue to hold a boat together, and you shouldn’t use mastic to hold a shower together. The lack of mechanical keying and chemical resistance in organic adhesives is the number one reason for large-scale tile detachment.
Deflection is the silent killer of wet walls
Deflection refers to the amount of bend or flex in a wall or floor under load. If your wall studs are spaced too far apart or are undersized, the wall will bow when someone leans against it or during natural house settling. Ceramic tile is rigid and cannot flex. If the substrate moves even a fraction of an inch, the bond between the tile and the mortar snaps. Think of it like a piece of glass glued to a rubber band. When you stretch the rubber band, the glass breaks or pops off. The Tile Council of North America has strict rules for deflection. For natural stone, the requirements are even tighter. If your subfloor is bouncy, your floor tile will crack. If your wall is flimsy, your shower tile will fall. This is why floor leveling and wall plumbing are the most important steps in any installation. You have to ensure the structure is stiff enough to support the weight and the rigidity of the finish material. Without that stiffness, no amount of glue will keep those tiles on the wall.
| Substrate Type | Water Resistance | Bond Strength | Recommended Use |
|---|---|---|---|
| Greenboard Drywall | Very Low | Low | Dry areas only |
| Cement Backer Board | High | Moderate | Showers with membrane |
| Extruded Polystyrene | Absolute | High | High-end steam showers |
| Fiber-Reinforced Gypsum | Moderate | Moderate | Occasional moisture zones |
The precise math of thin set coverage
Proper tile installation requires at least ninety-five percent mortar coverage in wet areas to ensure there are no hollow voids where water can pool. Most failing showers only have fifty to sixty percent coverage, often applied in a technique called spot-bonding or dot-molding. Spot-bonding is the mark of a hack. It creates air pockets behind the tile. These pockets act as reservoirs for moisture. When water gets trapped in these voids, it creates hydrostatic pressure and supports the growth of mold. Furthermore, without a solid bed of mortar, the tile is unsupported. A slight impact or even the thermal expansion of the house can cause the tile to pop off the wall. You need to use a notched trowel and collapse the ridges by back-buttering each tile. This ensures a vacuum-tight bond that spans the entire surface of the tile. If you pull a fallen tile off the wall and the back of it is clean, you had a coverage problem. The mortar stayed on the wall, and the tile never truly grabbed it. This is often due to the mortar skinning over before the tile was set, a result of working in a room that is too hot or taking too long between spreading and setting.
Why your subfloor prep matters for your walls
The integrity of a shower wall often starts at the floor. If the floor is not level and stable, the base row of tiles will be uneven, leading to a stack of errors that compromises the entire vertical surface. Much like a laminate floor requires a flat subfloor to prevent the locking joints from snapping, a shower wall requires a plumb and square foundation. If the floor is shifting, it exerts pressure on the bottom row of wall tiles. This pressure is transferred up the wall, creating tension in the mortar joints. Eventually, that tension finds a weak point, and the tiles release. I have seen situations where a lack of floor leveling caused the entire shower pan to flex, which pulled the wall tiles away from the corners. It is all connected. You cannot treat the walls as if they exist in a vacuum. The physics of the room requires every plane to be stable. Whether you are dealing with a carpet install or a high-end tile job, the preparation of the structural base is where the battle is won or lost.
- Always use a liquid-applied or sheet-membrane waterproofing layer.
- Ensure thin-set mortar meets ANSI A118.4 or A118.15 standards.
- Never use drywall or green-board in a direct shower spray zone.
- Verify that wall studs are spaced no more than 16 inches on center.
- Collapse all mortar ridges to achieve 95 percent coverage.
- Maintain a 1/8 inch gap at all change of plane joints for silicone sealant.
The ghost in the expansion gap
A common reason for tile popping off in large sections is the lack of expansion joints at the corners. When a house shifts or when the temperature changes, the walls move independently. If you fill the corners with rigid grout, the tile has nowhere to go. The pressure builds up until the tiles buckle and explode off the wall. This is called tenting. You must leave a gap at every corner and at the floor-to-wall transition. These gaps should be filled with 100 percent silicone caulk, which remains flexible. Rigid grout in a corner is a recipe for failure. It will crack within months, and shortly after, the tiles will follow. This is the same principle we use in a laminate installation where we leave a gap at the perimeter. Materials expand and contract. If you do not give them room to breathe, they will find their own room by tearing themselves off the substrate. Precision in these small details is what separates a master from an amateur. The chemistry of the sealant is just as important as the chemistry of the mortar. If you ignore the expansion gap, you are building a ticking time bomb.
The microscopic reality of curing
The curing of cementitious mortar is a complex chemical process that requires specific humidity and temperature ranges to succeed. If the mortar dries too fast, the crystals do not have time to interlock with the tile surface, resulting in a weak and brittle bond. This is why the environment of the job site matters. If the bathroom is too breezy or too hot, the water in the thin-set evaporates before it can hydrate the cement. You end up with a layer of dust instead of a layer of stone. Conversely, if the room is too cold, the chemical reaction slows to a crawl, and the bond never reaches its full strength. A professional installer monitors these conditions with the same intensity that a mechanic watches a pressure gauge. We are not just slapping mud on a wall. We are facilitating a chemical transformation. When that transformation is interrupted, the result is the large-scale failure you see when your tiles hit the floor. Every step, from the moisture content of the studs to the mil-thickness of the waterproofing, dictates the final success of the project.