Why Your New Shower Curb is Already Leaking: The ‘Cap’ Mistake Most DIYers Make
I spent three days grinding concrete on a job last month just so the floor wouldn’t click like a castanet. My back still hurts from the vibration of the seven inch diamond cup wheel and my lungs probably still have a trace of that gray dust despite the HEPA vacuum. Most guys skip the leveling compound. They think the underlayment will hide the dip. It won’t. I was there because the previous installer thought a thick foam pad would mask a half inch valley in the slab. Three months later every joint in that laminate floor was snapping like dry twigs. It is the same story with shower curbs. People focus on the pretty tile and the expensive grout but they ignore the structural reality of water. I have seen fifteen thousand dollar wide plank walnut floors cupping so bad they looked like potato chips because someone ignored the crawlspace. I have seen brand new bathrooms gutted after six months because a DIYer or a cheap contractor put a screw through the top of a shower curb cap. If you do not respect the physics of moisture and the requirements of the subfloor your project is on a timer toward failure.
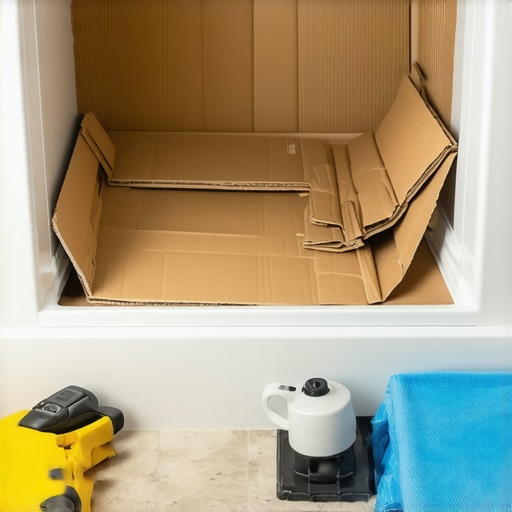
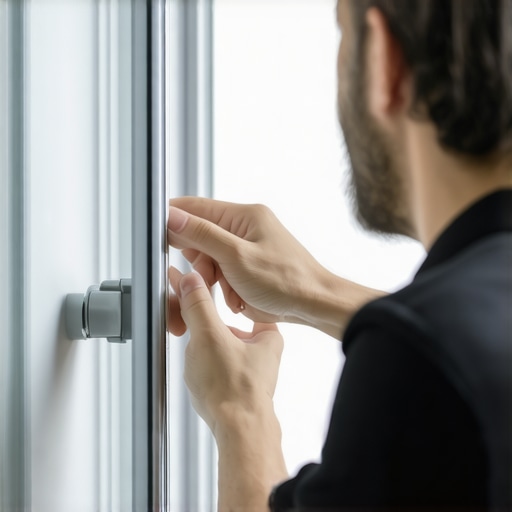
The hidden rot of the curb cap
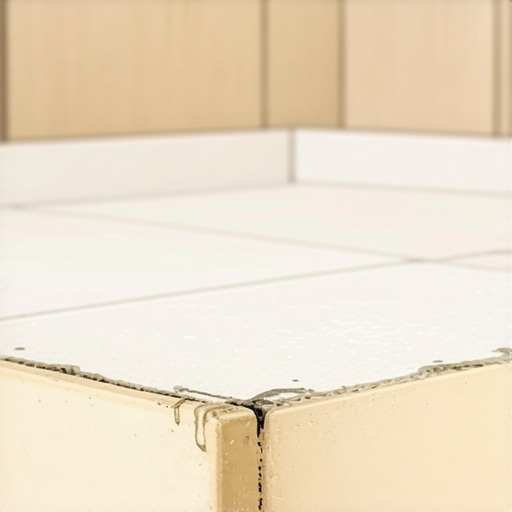
Shower curb leaks happen because installers penetrate the waterproof membrane on the horizontal top surface of the curb with mechanical fasteners. This mistake allows water to bypass the liner and enter the wood framing through capillary action. When you screw a cement backer board or a piece of trim into the top of the curb you create a direct highway for moisture to travel into the heart of the wood. The shower curb is a structural dam. It must remain a continuous, un-pierced barrier. If you must secure something to the curb you use epoxy or modified thin-set. Never use nails or screws on the top or inside face of the dam. I have pulled apart curbs where the 2x4s were so rotten they had the consistency of wet oatmeal. This happened because someone wanted to save ten minutes by using a nail gun instead of letting the mortar set. You need to use a liquid waterproofing membrane like RedGard or a sheet membrane like Kerdi and you must ensure it wraps over the curb without a single puncture. The cap, whether it is a piece of granite or a marble slab, should be set in a full bed of mortar to prevent any air pockets where condensation can collect. Water is a patient enemy. It will find the one hole you left behind and it will use gravity to destroy your floor joists.
“A floor is only as good as the subfloor beneath it; deflection is the enemy of every joint.” – Master Flooring Axiom
Why your subfloor is lying to you
Floor leveling requires a subfloor to be flat within 3/16 of an inch over a ten foot radius to prevent structural failure of the floor covering. Most people look at a plywood subfloor or a concrete slab and assume it is flat because it looks flat to the naked eye. It is not. There are humps at the seams and valleys in the center of the spans. If you are installing laminate or engineered wood these dips create a vertical movement every time you step on the floor. This movement puts immense stress on the tongue and groove locking system. Eventually the plastic or wood lip will shear off. This is why your floor clicks. This is why the seams start to gap. Before you even open a box of flooring you need a ten foot straight edge. You mark the low spots and you fill them with a high quality self leveling underlayment. Not the cheap stuff from the big box store that cracks if you look at it wrong. You want a calcium aluminate based leveler that has a high compressive strength. If you have high spots you get the grinder out. It is messy and it is loud but it is the difference between a floor that lasts thirty years and one that lasts thirty days. You also have to check for deflection. If your joists are spaced too far apart the plywood will bounce. No amount of leveling compound will fix a bouncy floor. You might need to sister the joists or add a second layer of underlayment grade plywood to stiffen the structure.
The ghost in the expansion gap
Laminate flooring and engineered wood require a minimum expansion gap of 1/4 inch to 1/2 inch around the entire perimeter of the room to account for thermal expansion. Many installers make the mistake of tight fitting the boards against the baseboards or drywall. This is a fatal error. Wood and composite materials are hygroscopic. They absorb moisture from the air and they grow. In a high humidity environment like Houston or the coastal regions of Florida a floor can expand by nearly an inch across a large room. If the floor has nowhere to go it will move upward. This results in buckling or peaking where the boards lift off the subfloor. You also cannot lock the floor down with heavy objects. I have seen homeowners wonder why their waterproof vinyl is buckling. Usually it is because they installed a heavy kitchen island right on top of the floating floor. You have essentially pinned the floor to the subfloor at one end. When the other end tries to expand the floor has to go up. You must install the floor around heavy cabinetry not under it. Use a transition strip or a T-molding if the run of the floor exceeds thirty feet in any direction. These transition pieces are not just for looks. They are the lungs of your flooring system.
| Material Type | Janka Hardness Rating | Typical Acclimation Time | Expansion Risk |
|---|---|---|---|
| Solid White Oak | 1360 | 7 to 14 Days | High |
| Engineered Hickory | 1820 | 3 to 5 Days | Medium |
| Laminate Core | N/A | 48 Hours | Low to Medium |
| Solid Brazilian Cherry | 2350 | 14 to 21 Days | Extreme |
The chemistry of the bond
Modified thin-set mortars contain liquid latex or dry polymer additives that increase bond strength and provide flexibility for tile installations. When you are working in a shower or on a floor with radiant heat you cannot use standard unmodified mortar. The heat causes the subfloor to expand at a different rate than the tile. If your bond is rigid it will snap. The polymers in modified thin-set act like microscopic rubber bands. they allow for a tiny amount of movement without the tile popping off. You also have to consider the mil thickness of your wear layer on vinyl products. A twenty mil wear layer is the standard for commercial traffic. If you buy a six mil product from a discount retailer it will look like trash within two years of dog claws and chair legs. You should also be wary of underlayments that are too thick. While most people want the thickest underlayment for comfort too much cushion actually causes the locking mechanisms on LVP to snap under pressure because the floor is bending too much into the foam. You want a high density underlayment with a high compression resistance. This supports the joints while still providing the sound dampening you need. If the underlayment feels like a sponge it is the wrong choice for a click lock floor.
“Wood flooring will perform best when the environment is controlled to stay within a relative humidity range of 30 to 50 percent.” – NWFA Technical Guidelines
- Check the moisture content of the subfloor using a pin or pinless meter.
- Ensure the concrete slab has a moisture vapor emission rate below 3 pounds per 1000 square feet.
- Remove all paint, oil, and drywall mud from the subfloor before applying adhesive.
- Stagger the end joints of your boards by at least six to eight inches for structural integrity.
- Vacuum the subfloor three times before laying your underlayment to prevent crunching sounds.
Regional climate and the Houston humidity problem
The swampy humidity of Houston means solid wood is a death wish for most residential slab on grade homes. In regions where the humidity stays high for nine months of the year you are fighting a constant battle against wood expansion. If you put solid 3/4 inch oak over a concrete slab in the South it will cup. Even with a moisture barrier the air humidity will get to it from the top. For these climates you must use engineered cores. Engineered wood is constructed in cross-ply layers which cancels out the natural movement of the grain. It is a more stable product for the variable climates of the Gulf Coast or the Pacific Northwest. Conversely if you are in the dry heat of Phoenix your wood will shrink. You will see gaps between the boards that are large enough to drop a dime through. In those regions you need to acclimate the wood for a longer period and perhaps invest in a whole home humidification system to keep the floor from cracking. Every region has a different building code requirement for moisture barriers. In many coastal areas you are required to use a six mil poly film under any floating floor. This is not a suggestion. It is a requirement to keep the ground moisture from rotting your floor from the bottom up. Do not trust the guy at the big box store who says the pad is enough. Read the manufacturer specifications. They are the ones who will deny your warranty claim when the floor fails.
The final check of the installation
The transition from the shower curb to the main floor is where most mistakes are hidden. You must ensure that your floor leveling extends right up to the bathroom door. Any dip at the threshold will cause the tile to crack or the laminate to bounce. I always use a level one last time before the final board goes in. If I find a dip I pull it up and fix it. It is easier to fix it now than it is to explain to a client why their floor feels like a trampoline. You also need to verify that your carpet install is handled with a power stretcher. If the installer only uses a knee kicker the carpet will develop ripples within two years. These ripples are more than just ugly. They are trip hazards and they cause premature wear on the carpet fibers. A floor is a system. The subfloor is the foundation, the underlayment is the cushion, and the surface is the shield. If any part of that system is weak the whole thing fails. Take your time with the prep. The actual laying of the floor is the easy part. The work you do on your knees with a level and a grinder is what makes you a master. Stick to the TCNA and NWFA standards and you will never have to worry about a callback or a rotten joist. Just remember to keep the screws out of the curb cap. It is the simplest rule in the book but it is the one that ruins the most homes.