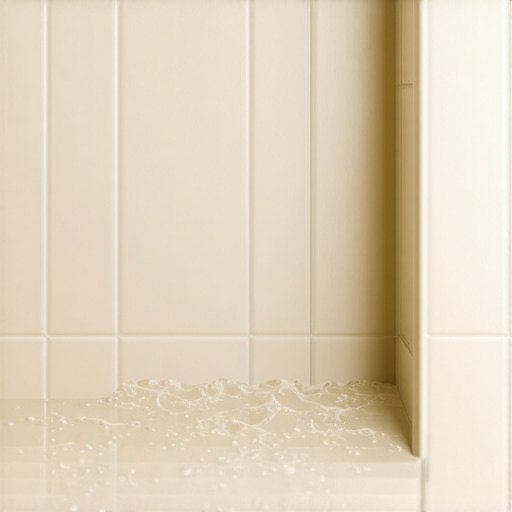
Why Your Shower Niche is Sloping Back Toward the Wall
Most guys skip the leveling compound. They think the underlayment will hide the dip. It won’t. I spent three days grinding concrete on a job last month just so the floor wouldn’t click like a castanet. That experience stays with you. It reminds you that in this trade, gravity is the only boss that never takes a day off. When you walk into a bathroom and see a shower niche that traps a pool of water at the back corner, you are looking at a ticking time bomb. This is not just an aesthetic oversight or a minor annoyance for the cleaning crew. It is a fundamental breach of structural engineering. Flooring is a performance surface. If the water does not move toward the drain, it moves into your house. Most people treat a shower like a piece of furniture, but it is a complex hydraulic system. If you do not respect the pitch, the house will eventually pay the price through rot and structural failure.
The physics of the negative pitch in wet environments
Shower niches slope back toward the wall due to framing errors, improperly shimmed substrates, or mortar shrinkage. This negative pitch allows standing water to penetrate grout joints through capillary action, eventually reaching the wall studs and causing mold growth and substrate saturation within the wall cavity. It is basic fluid dynamics. Water follows the path of least resistance. If that path leads into the corner of a niche rather than over the ledge and down the wall, you have failed the most basic requirement of tile work. I have seen guys try to blame the tile itself. They claim the tile is bowed. Tile does not move water uphill. Only a bad substrate does that. You need to understand that the tile is just the skin. The bones are where the disaster lives. If the framing was not plumb or if the installer did not use a level during the rough-in, the finished product is doomed from the start. This is why I am obsessed with the prep work. You cannot fix a bad frame with a pretty tile.
“A floor is only as good as the subfloor beneath it; deflection is the enemy of every joint.” – Master Flooring Axiom
Why your subfloor prep dictates the wall outcome
Floor leveling is the foundation of every successful showers installation because a sloped subfloor forces the wall studs and backer boards out of vertical alignment. Without a level base, the niche framing will naturally lean, creating an unintended slope that directs moisture into the building envelope rather than the drain. I have walked onto jobs where the contractor thought they could eyeball the niche. They think because they can do a carpet install or slap down some laminate that they understand how to manage water. They don’t. Carpet hides a multitude of sins. Tile reveals them all. If the floor is off by a quarter inch, that deviation travels up the wall. By the time you reach the niche at chest height, that quarter inch has become a half inch of lean. You cannot simply build up the thin-set to fix this. High-performance, polymer-modified thin-set is designed for a specific thickness. When you exceed that, the mortar shrinks as it cures. That shrinkage can actually pull the tile further back into the niche, worsening the slope you were trying to fix. It is a chemical reality that you cannot ignore without consequences.
| Membrane Type | Vapor Permeance | Best Use Case | Cure Time |
|---|---|---|---|
| Liquid Applied | 0.5 – 1.5 Perms | Complex Geometries | 12-24 Hours |
| Sheet Membrane | < 0.1 Perms | Steam Showers | Immediate |
| Foam Board | < 0.5 Perms | Full Rebuilds | Immediate |
The 1/8 inch rule that kills a bathroom
Structural tolerances for tile installation require no more than 1/8 inch deviation over ten feet, meaning any sloping niche is a code violation of TCNA standards. A back-sloping ledge creates hydrostatic pressure against the waterproof seal, eventually finding micro-fissures in the cementitious grout to rot the framing lumber. Listen to me. That tiny gap in your grout is not the problem. The problem is the quart of water sitting behind the tile because the niche ledge was not pitched at a 1/4 inch per foot toward the shower floor. I have spent years studying how moisture moves through materials. Even with a waterproof membrane, constant standing water is a risk. We call it the birdbath effect. In humid regions like the Gulf Coast, this moisture never evaporates. It stays in the niche, breeding bacteria and slowly breaking down the bond between the tile and the substrate. A contrarian fact most installers hate is that thicker underlayments or extra layers of membrane often cause more harm than good. Too much cushion or build-up creates a sponge effect. You want a rigid, pitched, and monolithic surface. Anything else is just a suggestion to the water to go where it does not belong.
- Check framing for plumb before any backer board is installed.
- Use a dedicated niche pitch tool or a pre-fabricated foam niche.
- Apply waterproofing membrane in a continuous, void-free layer.
- Verify pitch with a spirit level before the thin-set cures.
- Ensure the finished tile ledge has a visible 2-degree downward slope.
The chemistry of modified thin-set and foam boards
Polymer-modified mortars provide the tensile strength needed for vertical tile, but they cannot compensate for structural voids or negative slopes in a shower niche. The chemical bond requires full coverage, and when standing water sits in a sloped niche, it can lead to efflorescence or latex leaching, which ruins the aesthetic finish and weakens the adhesion. This is where the science of the job really kicks in. When you use a high-quality foam niche system, you are working with closed-cell technology. It is waterproof by nature. However, if the installer does not account for the thickness of the tile and the mortar, they often set the niche flush with the studs. This is a mistake. The niche should be proud of the studs or shimmed so that the final tile layer has room to breathe and, more importantly, room to slope. I have seen guys try to use a carpet install mentality where they think they can just stretch and tuck the materials. You cannot stretch tile. You cannot tuck water. If the chemistry of the mortar is compromised by constant immersion due to a bad slope, the tiles will eventually pop off the wall. I have seen it happen in as little as two years. It usually starts with the bottom row of the niche. It gets loose, the grout falls out, and then you see the black mold behind it.
“Waterproof membranes are not a substitute for proper drainage and slope; they are a secondary defense against moisture migration.” – TCNA Handbook Wisdom
Fixing the pitch without tearing out the tile
Remediating a sloping niche without a full tear-out involves over-tiling with a sloped stone threshold or using epoxy grout to create a synthetic pitch. While not ideal, these mechanical fixes address the drainage failure by providing a non-porous surface that forces water runoff back into the shower pan. If you find yourself in this situation, do not just put more grout in the corner. That is a temporary fix that will fail within months. You need a permanent solution. Sometimes I recommend getting a custom-cut piece of granite or quartz that is slightly wider than the niche ledge. You can bond this directly over the existing tile using a high-grade epoxy adhesive. This allows you to build in the necessary 1/4 inch pitch. It looks like a design choice, but it is actually a functional repair. It is much cheaper than ripping out the entire wall and starting over. However, you must ensure that the new ledge is sealed perfectly at the back. If water gets under the new ledge, you have just created a hidden reservoir of filth. Always think about where the water is going. If you can answer that question with confidence, you are a better installer than ninety percent of the people working today. Final inspection of the assembly should always include a water test. Pour a cup of water into the niche. If it does not immediately run out, you still have work to do.