The Real Reason Your Floor Leveler is Peeling Up Like Old Glue
The Real Reason Your Floor Leveler is Peeling Up Like Old Glue
Most guys skip the leveling compound. They think the underlayment will hide the dip. It won’t. I spent three days grinding concrete on a job last month just so the floor wouldn’t click like a castanet. That job was a nightmare because the previous crew had poured a high-flow gypsum leveler over a sealed slab without checking for bondability. It came up in sheets. It looked like sunburnt skin peeling off a back. If you don’t respect the chemistry of the slab, the slab will reject your work. I have been on my knees for twenty five years with a moisture meter and a level, and I can tell you that a floor is only as good as the prep work. If you find your leveler peeling up like old glue, you didn’t fail at pouring, you failed at the microscopic level of surface preparation.
The invisible barrier of laitance
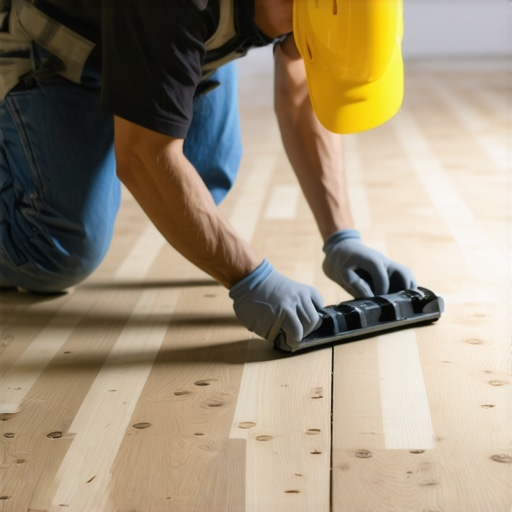
Laitance is a weak, milky layer of cement fines and sand that rises to the surface of concrete during the curing process. If this layer is not mechanically removed, the floor leveler will bond to the dusty residue instead of the structural slab, causing delamination and cracking. You cannot simply vacuum this away. Laitance is a structural defect in the concrete finish itself. When you pour a heavy, polymer-modified leveler on top, the internal tension of the leveler as it dries is stronger than the bond between the laitance and the solid slab. It pulls. It shears. The result is a hollow sound when you walk across it. To fix this, you need to use a diamond grinder. You need to see the aggregate. If you are not seeing the small stones inside the concrete, you are not bonding to anything permanent. Most installers are afraid of the dust. I embrace the dust because it means I have reached the bone of the building. [image]
Moisture and the concrete slab betrayal
Moisture vapor emission is the primary cause of floor leveler failure because it creates hydrostatic pressure that pushes the material off the substrate. Even if a slab looks dry, capillary action can draw alkaline water to the surface, breaking the chemical bond of the primer and the underlayment. You must test the relative humidity (RH) of the slab using ASTM F2170 probes. If you are over eighty five percent RH, you are begging for a disaster. The water is not just sitting there. It is moving. It is a gas. It finds the tiny pores in your leveler and it gathers there. Eventually, the pH level rises so high that it eats the adhesive resins in your primer. It turns the bond into a soapy slurry. This is why your floor feels soft in the corners. It is not the leveler failing. It is the earth breathing through your floor. Stop thinking about floors as static objects. They are living, breathing parts of a structural system.
“A floor is only as good as the subfloor beneath it; deflection is the enemy of every joint.” – Master Flooring Axiom
The chemistry of the mechanical bond
A mechanical bond occurs when the floor leveling compound penetrates the open pores of the concrete substrate and locks into place like a puzzle. Without mechanical profile, often referred to as Concrete Surface Profile (CSP) 3 or 4, the leveler merely sits on top of the surface, held only by surface tension. You need to understand the difference between a chemical bond and a mechanical bond. A chemical bond is what the primer tries to do. A mechanical bond is what the grinder does. I always aim for both. If your concrete is smooth as a garage floor, your leveler will peel. It is basic physics. The material shrinks as it hydrates. This shrinkage creates inward pressure. If there are no nooks and crannies for the leveler to grab onto, that pressure will pop the leveler right off the floor. I have seen thousand square foot pours lift up like a giant carpet because the installer thought a mop and some water was enough prep. It never is.
Why your subfloor is lying to you
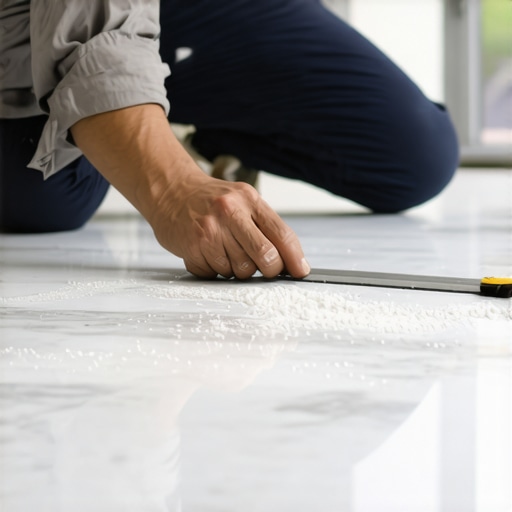
A subfloor may appear flat and level to the naked eye, but optical illusions and lighting often hide deflection and dips that exceed the 1/8 inch tolerance required for laminate or carpet install. Use a ten foot straightedge. Do not use a four foot level. A four foot level is for hanging pictures. For floors, you need length. If you find a dip, you cannot just fill it with more leveler without checking for movement. If the subfloor is wood, and it bounces when you walk on it, no leveler in the world will stay put. It will crack like an eggshell. You need to screw that subfloor down every four inches into the joists. You need to eliminate the bounce. Leveler has zero structural strength against bending. It is meant for compression. If you treat it like a structural patch for a rotting floor, you are going to lose your shirt on the callback.
The reality of carpet install and laminate preparation
Preparing for a carpet install or laminate flooring requires a flat surface to prevent premature wear on the locking mechanisms or seams. For laminate, a floor leveling error of even 3/16 of an inch will cause the tongue and groove system to snap under the weight of furniture, leading to gapping. With carpet, you might think you can hide a bad floor. You can’t. You will feel that dip every time you walk across the room. It will feel like a hole in the earth. Furthermore, the tack strips used in carpet installation need a solid, non-crumbly surface. If your leveler is peeling, those tack strips will pull right out of the floor when the carpet is stretched. You will end up with a wrinkled mess that looks like a cheap motel room. Do it right the first time. Grind, prime, and pour.
Shower pans and the leveling dilemma
In showers, floor leveling is complicated by the need for a pre-slope and a waterproof membrane, which requires a leveling compound that can withstand saturated conditions without re-emulsifying. You cannot use gypsum-based products in a shower. Never. If you do, the first time that liner leaks, the leveler will turn back into mud. You need a high-strength, Portland cement-based leveler. And even then, you need to ensure the bond is absolute. I have seen entire walk-in showers fail because the installer didn’t prime the mud bed before applying the leveler. The dry mud bed sucked the water out of the leveler so fast that the leveler didn’t have time to hydrate. It just turned into a layer of dust sitting under the tile. It will fail. It is just a matter of when.
“The surface must be structurally sound and free of any contaminants that may act as a bond breaker.” – TCNA Handbook Standards
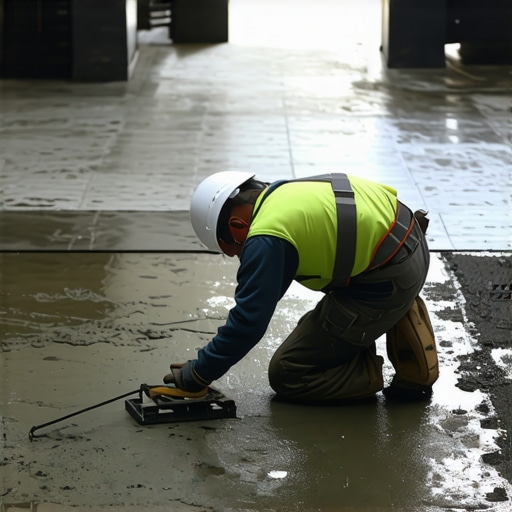
The performance metrics of leveling agents
Choosing the right leveling compound requires analyzing compressive strength, flow rates, and polymer content to match the substrate requirements of the specific flooring material being installed. Not all bags are created equal. Some are designed for thick pours, others for feather-finishing. If you use a deep-pour leveler for a thin skim coat, it will burn out and crack. If you use a thin-finish leveler for a two inch fill, it will never cure properly in the middle. You have to read the technical data sheet. Stop guessing. The chemistry is calibrated for specific thicknesses.
| Leveling Compound Type | Compressive Strength (PSI) | Drying Time | Best Use Case |
|---|---|---|---|
| Portland-Based | 4,000 to 5,000 | 24 Hours | High traffic areas |
| Gypsum-Based | 2,000 to 3,500 | 12 Hours | Light residential |
| Fiber-Reinforced | 5,500 Plus | 16 Hours | Wood subfloors |
The checklist for a permanent subfloor
Follow this systematic protocol to ensure your floor leveling project achieves a permanent bond that will not peel or crack over time, regardless of the flooring type. If you skip a step, you are gambling with the integrity of the entire room. I do not gamble with my reputation, and you shouldn’t either. The following list is the bare minimum for a professional result.
- Vacuum the floor twice using a HEPA filter to remove micro-dust.
- Perform the water drop test to check for sealers or wax.
- Check RH levels in the slab using internal probes.
- Apply a high-solids acrylic primer with a soft-bristle brush.
- Mix the compound at 1,000 RPM maximum to avoid air entrainment.
- Maintain a wet edge during the pour to ensure a flat transition.
The ghost in the expansion gap
The expansion gap at the perimeter of the room is the most frequently ignored aspect of floor leveling, yet it is where most delamination begins due to structural shifting. You need to place foam sill sealer around the edges before you pour. If you pour your leveler right up against the drywall or the sill plate, the leveler has nowhere to go when the building settles. It will pinch. It will buckle. It will eventually crack at the edges and start to peel. This is the 1/8 inch that ruins everything. People think they are being thorough by filling every crack and corner. They are actually creating a ticking time bomb. The floor needs to be independent of the walls. It needs to float in a sense, even if it is bonded to the slab. Respect the gap. The gap is your friend.
The final word on structural integrity
Success in flooring is not about the wood or the tile you see at the end. It is about the chemistry and the physics of what lies beneath. If your floor leveler is peeling, it is a symptom of a deeper issue. You likely have a moisture problem or a surface contamination problem. Do not just pour more leveler over the top. That is like putting a band-aid on a broken leg. You have to go back to the beginning. You have to grind. You have to test. You have to prime. Only then can you build a surface that will last for thirty years. I have seen too many young guys try to rush the prep. They save four hours on day one and spend forty hours on day ten ripping the whole thing out. Do it once. Do it right. Wear your knee pads and check your levels. Your floor depends on it.