The ‘Power Stretcher’ Rule for Large Room Carpeting
Most guys skip the leveling compound. They think the underlayment will hide the dip. It won’t. I spent three days grinding concrete on a job last month just so the floor wouldn’t click like a castanet. That job was supposed to be a carpet install over an old slab, but the client didn’t understand that a floor is only as good as the prep. I smell like oak dust and WD-40 most days because I do the work the right way. If the subfloor isn’t flat to within an eighth of an inch over ten feet, your carpet will eventually develop waves that no amount of kicking will fix. You have to treat every carpet install as a structural project. Carpet is a fabric under tension. If the surface below it is irregular, the tension distribution fails. This leads to premature wear, delamination of the primary backing, and those ugly ripples that make a five-thousand-dollar room look like a cheap apartment. I have seen it a thousand times. An installer comes in with a knee kicker and thinks they are done. Three years later, the homeowner is calling someone like me to stretch the carpet back into place because the original guy was too lazy to pull out the big tools. Quality installation is a science of physics and friction.
The necessity of power stretching in large rooms
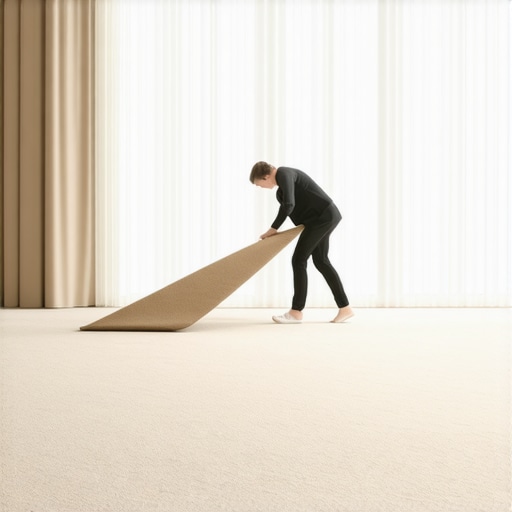
Power stretching is mandatory for any carpet installation in rooms exceeding ten feet in any direction to ensure long term stability. This tool uses mechanical leverage to pull the carpet taut from wall to wall, preventing the fabric from expanding or shifting under heavy foot traffic or humidity changes. It is the only way to achieve the necessary tension for a professional finish. Without it, the carpet remains loose. Over time, the latex in the backing relaxes. When that happens, the carpet grows. If it is not already stretched to its limit, it will bunch up. I have walked into homes where the carpet was so loose you could grab a handful of it in the middle of the room. That is a failure of the installer. A knee kicker is meant for positioning and small closets, not for the main field of a great room. You need the force of a leveraged steel pipe to get the job done right. We are talking about hundreds of pounds of pressure applied evenly across the width of the roll. That is the difference between a floor that lasts twenty years and one that fails in five.
The physics of the power stretcher tool
A power stretcher works by anchoring against one wall and pushing the carpet toward the opposite wall using a series of interlocking steel tubes. The head of the stretcher has adjustable teeth that bite into the carpet backing, allowing the installer to apply massive tension without tearing the fibers. This process ensures the floor leveling and the carpet tension work together to create a flat, immovable surface. You have to understand the resistance of the secondary backing. Most modern carpets use a synthetic secondary backing like ActionBac. This material is stiff and designed to hold tension. When you use a power stretcher, you are actually elongating the entire sheet. This elongation is what keeps the carpet from moving when people walk on it or move furniture. The teeth on the head must be adjusted for the pile height. If they are too shallow, they slip. If they are too deep, they can damage the pad or the subfloor. It is a delicate balance of force. I always check the tension at several points. You want to see the carpet move at least one percent of its total length. In a twenty foot room, that means stretching it two full inches. A knee kicker cannot do that. Your knee would give out before the carpet did.
“A floor is only as good as the subfloor beneath it; deflection is the enemy of every joint.” – Master Flooring Axiom
Subfloor prep and the floor leveling requirement
Floor leveling is a prerequisite for any high quality flooring installation because it prevents the mechanical failure of the surface material. Using a self-leveling compound creates a perfectly flat plane, which is necessary for both laminate and carpet to perform as engineered. I often find that homeowners try to save money here. They think the pad will fill the holes. It does not. A dip in the subfloor causes the carpet to bridge over the gap. When you step there, the carpet pushes down. This constant flexing breaks down the latex bond between the primary and secondary backings. Eventually, you get a bubble. If I am working on a concrete slab, I check for moisture first. High moisture will rot the tack strips and the carpet pins. I use a calcium chloride test or an in-situ probe to get the numbers. If the slab is too wet, we seal it. Then we level it. I use a high-flow, calcium aluminate-based leveler. It dries fast and stays hard. You can’t just slap it on. You have to prime the concrete first so the leveler doesn’t lose its water too fast. If it loses water, it cracks. If it cracks, your floor is compromised. I don’t compromise. I spend the time with the floor grinder and the vacuum until the surface is like glass.
How nearby showers affect your carpet install
Moisture from showers and bathrooms can migrate through wall cavities and subfloors, causing localized carpet buckling or mold growth. High humidity levels in residential homes often originate in poorly ventilated wet areas, leading to the expansion of carpet fibers and the softening of adhesives. I always tell clients to keep their bathroom fans running for thirty minutes after a shower. If the air in the master bedroom hits seventy percent humidity, the carpet will grow. The moisture gets into the jute or synthetic backing and makes it more pliable. If the carpet was only knee-kicked, it will ripple immediately. This is why the power stretcher is even more vital in rooms adjacent to showers. You need that extra tension to counteract the inevitable expansion from humidity. I also look at the transition strips. I never use those cheap silver bars. I want a solid wood or metal transition that is screwed into the subfloor, not just nailed. It acts as a dam. It keeps the moisture in the tile area and the carpet in the bedroom. If I see water damage on the tack strips near a bathroom door, I know the installer didn’t seal the subfloor or provide a proper moisture break.
| Feature | Knee Kicker | Power Stretcher |
|---|---|---|
| Max Tension | Minimal | High (Leveraged) |
| Room Size Suitability | Closets Only | Over 10 Feet |
| Physical Strain | High (Joint Damage) | Low (Mechanical) |
| Risk of Ripples | High | Very Low |
| Tool Engagement | Manual Strike | Steel Tube Lock |
Transitioning from carpet to laminate flooring
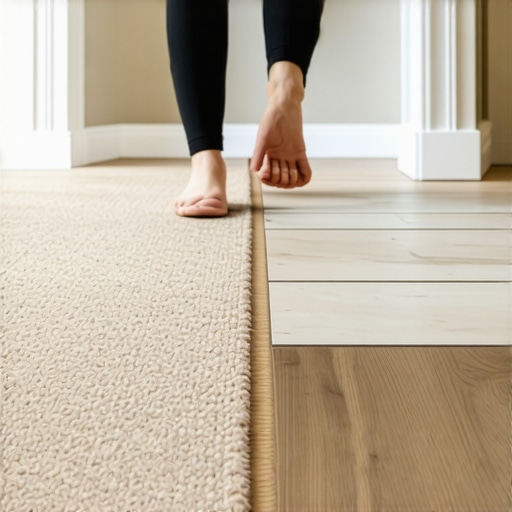
Laminate flooring requires a flat subfloor and specific expansion gaps to prevent the planks from peaking or buckling at the edges. Unlike carpet, which is held under tension by tack strips, laminate is a floating floor system that must be allowed to move as a single unit. When I transition from a power-stretched carpet to a laminate hall, the transition point is a critical engineering junction. The tack strip for the carpet must be exactly one quarter inch away from the laminate track. This allows for a clean tuck. The laminate needs its expansion gap against the wall, but it also needs room at the transition. I see guys jam the laminate right against the carpet. That is a mistake. When the laminate expands in the summer, it will push against the carpet and cause a hump. You need a T-molding or a reducer that is properly anchored. The subfloor under the laminate must be just as level as the one under the carpet. If there is a dip, the click-lock joints will snap. I have seen floors that were only two years old fall apart because the installer didn’t use a leveling compound. It is a waste of material and a waste of the homeowner’s money.
“Hardwood and laminate systems require a subfloor that does not exceed 3/16 inch deviation over 10 feet to maintain structural integrity.” – Master Flooring Axiom
The architectural checklist for carpet longevity
A successful installation follows a strict protocol of environmental assessment, tool application, and material handling to ensure the product meets its rated lifespan. Following these steps prevents the most common failures associated with residential and commercial flooring. Most people think they can just buy the carpet and have it installed the next day. That is how you end up with a disaster. You need a process. Here is what I do on every single job, no exceptions:
- Acclimate the carpet in the home for at least forty eight hours to stabilize the fibers.
- Test the subfloor moisture and pH levels to ensure adhesive and tack strip compatibility.
- Verify that the subfloor is flat to within an eighth of an inch over a ten foot radius.
- Install premium density padding that does not exceed seven sixteenths of an inch in thickness.
- Layout the tack strips with a consistent gap from the baseboards to allow for professional tucking.
- Seal all seams with a high quality heat tape and a seam roller to prevent peaking.
- Engage the power stretcher on all four walls using the industry standard 1-2-3-4 pattern.
- Trim the carpet edges with a sharp blade to avoid fraying the secondary backing.
The chemical reality of carpet adhesives
Adhesive chemistry plays a massive role in the stability of a carpet install, especially in areas where floor leveling compounds have been applied. The bond between the tack strip and the floor must resist the hundreds of pounds of lateral force generated by the power stretcher. If you are nailing into old concrete, the concrete often shatters. I prefer to use a high-strength epoxy or a specialized construction adhesive for the tack strips on slabs. This ensures that when I crank down on that stretcher, the strip doesn’t fly off the floor. The latex used in the carpet backing itself is also sensitive to temperature. If the house is too cold, the latex is brittle. You can’t stretch it. It will snap or delaminate. The house needs to be at a consistent temperature of seventy degrees for at least two days before I arrive. This allows the materials to become flexible. When I apply the power stretcher, I am looking for that sweet spot where the backing gives just enough to stay tight without tearing. It is a feeling you only get after twenty five years on your knees. I can hear the carpet groan when it hits the right tension. That sound means it is never going to move again.
The high cost of skipping the power stretcher
Homeowners pay a significant premium in the long run when they hire installers who do not use the correct stretching equipment. A carpet that is not properly tensioned will wear out twice as fast because the fibers are not held in a consistent vertical orientation. When the carpet is loose, the foot traffic causes the fibers to bend and rub against each other. This creates friction that destroys the yarn. I call it internal abrasion. Within a few years, the carpet looks matted and dirty even if it is cleaned regularly. The reality is that the dirt is trapped in the ripples where the vacuum can’t reach. Then you have the safety issue. People trip on carpet ripples. I have seen elderly clients take a fall because of a loose carpet in a hallway. It is a liability. If you are an installer and you don’t own a power stretcher, you aren’t an installer. You are a handyman with a knife. Doing the job right means bringing in the heavy boxes and spending the time to set up the tubes. It means checking your work with a stand-up carpet cutter to ensure every edge is crisp. It means taking pride in the physics of the floor.