How to fix a squeaky floor through the carpet
The ghost in the subfloor
Fixing a squeaky floor through the carpet requires locating the floor joists and driving specialized breakaway screws through the carpet and padding directly into the wood. This process binds the subfloor tightly to the joist, eliminating the friction that causes the annoying sound without damaging the carpet fibers. I spent three days grinding concrete on a job last month just so the floor wouldn’t click like a castanet. That job taught me that most guys skip the leveling compound. They think the underlayment will hide the dip. It won’t. I have seen 15,000 dollar wide plank walnut floors cup like a potato chip because an installer ignored the subfloor. When you are dealing with a squeak under a carpet install, you are fighting a battle against physics and time. The house settles, the wood dries out, and suddenly every step sounds like a haunted house. I have spent 25 years on my knees with a moisture meter and a level. I can tell you that a squeak is not just a noise. It is a warning that your fasteners have failed. The nails used during the original construction have likely pulled away from the joist. This creates a small gap. When you step on the floor, the plywood moves down the shank of the nail and rubs against the wood fibers. That friction is the source of the screech. You do not need to pull up the carpet to fix this. You just need to understand the mechanics of the fastener and the chemistry of the wood.
The mechanics of wood friction
Wood squeaks occur when two surfaces rub together under pressure, usually due to a loose nail or a gap between the subfloor and the floor joist. This friction generates sound waves that resonate through the hollow cavities of the floor structure, amplified by the drum effect of the carpet. The physics of this are quite simple but often misunderstood. Wood is a cellular material. It expands and contracts based on the relative humidity in the room. If your home is near a high moisture area like showers or a damp crawlspace, the wood fibers swell. When the furnace kicks on in the winter, the wood shrinks. This constant movement eventually loosens the grip of smooth shank nails. Once that grip is gone, the subfloor is free to move. This is why floor leveling is so critical during the initial build. If the subfloor has a dip, the plywood is under constant tension. Eventually, that tension will pull the fasteners loose. I have seen laminate floors that sounded like a firing range because the installer did not check for subfloor deflection. A floor is a performance surface. It is a structural engineering challenge. You are not just looking for a cosmetic fix. You are looking to restore the structural integrity of the bond between the plywood and the joist.
“A floor is only as good as the subfloor beneath it; deflection is the enemy of every joint.” – Master Flooring Axiom
Finding the joist through the padding
Locating the floor joist is the most critical step in fixing a squeak through the carpet because a screw driven only into the plywood will not provide enough clamping force to stop the movement. Joists are typically spaced 16 inches or 24 inches on center in modern residential construction. To find them, you can use a stud finder designed for deep scanning or the old fashioned method of thumping the floor with a hammer. A hollow sound means you are between joists. A dull thud means you are over a structural member. For the ultimate precision, use a thin drill bit or a specialized joist finding tool that pokes through the carpet. The carpet fibers will hide the tiny hole. Once you find one joist, you can usually map out the rest of the room. Do not assume the joists are perfectly straight. Builders make mistakes. Always verify the joist location at multiple points along the squeak. If you miss the joist, the screw will simply spin in the plywood. This does nothing. You need the screw to bite into the solid lumber of the joist to pull the plywood down. This creates a compression bond that stops the vertical movement. It is the same principle as a clamp in a wood shop. You need two points of pressure to hold the material still.
The 1/8 inch that ruins everything
The gap between the subfloor and the joist is often less than an eighth of an inch, but this tiny space is enough to cause significant noise when a 180 pound human steps on it. The weight forces the plywood down, and the friction against the nail shank creates the sound. While most people want the thickest underlayment, too much cushion actually causes the locking mechanisms on LVP to snap under pressure. The same logic applies to carpet padding. A very thick, soft pad can allow more movement in the subfloor over time because it does not provide any structural resistance. When you are fixing a squeak, you are essentially trying to close that 1/8 inch gap. You need a fastener that can pass through the carpet without snagging the loops. If you use a standard wood screw, the head will catch the carpet and create a visible pull. This is where specialized breakaway screws come in. These screws have a section of the shank that is unthreaded, and a score line below the head. You drive the screw through a plastic tripod guide. When the screw reaches a certain depth, the head snaps off. The threaded portion remains buried in the joist and the subfloor, holding them together, while the top of the screw disappears below the surface of the carpet fibers. It is a surgical strike on a structural problem.
| Fastener Type | Grip Strength | Visibility in Carpet | Primary Use Case |
|---|---|---|---|
| Smooth Shank Nail | Low | Hidden | Initial construction only |
| Ring Shank Nail | Medium | Hidden | Subfloor installation |
| Standard Wood Screw | High | High | Structural framing |
| Breakaway Squeak Screw | High | Zero | Through-carpet repairs |
The risk of the blind screw
Driving screws blindly into a floor carries the risk of hitting electrical wires, plumbing lines, or gas pipes that may be routed through the floor joists. Professionals always check the direction of the joists and look for utility penetrations in the basement or crawlspace before starting work. This is the part where the amateurs get in trouble. I have heard stories of guys fixing a squeak in a bedroom and accidentally piercing a PEX line for the upstairs showers. Suddenly, you have a silent floor and a massive water leak. Always be aware of what is beneath you. In most modern homes, wires and pipes are supposed to be drilled through the center of the joist to avoid fasteners, but you cannot bet your house on a plumber following the rules. If the squeak is in a kitchen or a bathroom area, be doubly cautious. Use a screw that is long enough to bite into the joist but not so long that it reaches the bottom half of the lumber. A 2.5 inch screw is usually the sweet spot for a standard 3/4 inch subfloor and a 2×10 joist. It gives you enough depth to hold without venturing into the danger zone where the utilities live. You have to think like an architect. You are managing the hidden infrastructure of the home.
Why your subfloor is lying to you
Subfloors can appear level even when they are structurally compromised by moisture or poor fastening, which is why a simple visual inspection is never enough to diagnose the root cause of a squeak. You must use a straightedge and a moisture meter to understand the environmental conditions of the wood. If the moisture content of your subfloor is above 12 percent, the wood is likely too swollen for a permanent fix. You need to dry the area out first. Otherwise, when the wood eventually shrinks, the squeak will return. This is especially true in humid climates where the air is thick enough to drink. I have seen installers try to fix squeaks in the middle of a summer heatwave only to have the homeowner call back in January because the floor is screaming again. You have to account for the seasonal cycle of the lumber. If you are fixing a squeal in the winter, the wood is at its driest. This is the best time to act. The bond you create then will be at its tightest. If you have to do it in the summer, consider using a slightly longer screw to ensure you are deep into the heartwood of the joist where the moisture levels are more stable.
“Wood moves. It breathes. If you do not give it room to expand, it will find a way to move, usually by pulling your fasteners out.” – NWFA Technical Manual
- Identify the exact location of the squeak by walking slowly across the room.
- Use a stud finder or hammer to map out the floor joists.
- Mark the joist locations with masking tape on top of the carpet.
- Clear a small path in the carpet fibers with a screwdriver or awl.
- Insert the breakaway screw into the tripod guide tool.
- Drive the screw until the head snaps off below the carpet backing.
- Rake the carpet fibers back over the hole to hide the entry point.
- Test the area by jumping on the spot to ensure the noise is gone.
Modern adhesives and the chemistry of silence
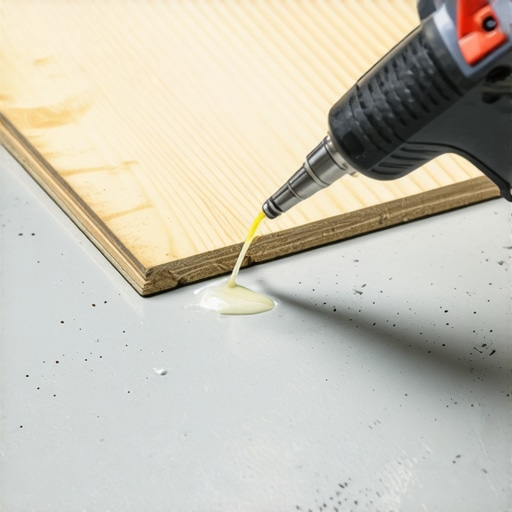
Structural adhesives have evolved to provide a secondary line of defense against floor noise by creating a flexible yet incredibly strong bond between the joist and the subfloor. While you cannot easily apply these under existing carpet, they are the gold standard for new carpet install projects. If you ever have the carpet up, do not just rely on screws. Use a subfloor adhesive that meets the ASTM D3498 specification. These glues are designed to stay flexible. This is important because if the glue is too brittle, it will crack when the house settles, and you will be right back to square one. The chemistry of these adhesives allows them to bridge small gaps where the plywood might be slightly bowed. In a repair scenario where you have access from below, such as a basement, you can run a bead of adhesive along the side of the joist where it meets the subfloor. Then, drive a shim coated in glue into the gap. This is the permanent way to kill a squeak. You are essentially welding the wood together. It stops the movement, which stops the friction, which stops the noise. It is a molecular solution to a mechanical problem. I have used this method on high end custom homes where the client will not tolerate a single peep from the floorboards. It works every time because it respects the physics of the material. Do not settle for a quick fix that will fail in six months. Do it right, do it once, and enjoy the silence of a well engineered floor.