The ‘Marble Test’ for Finding Hidden Dips in Your Kitchen Floor
Most guys skip the leveling compound. They think the underlayment will hide the dip. It won’t. I spent three days grinding concrete on a job last month just so the floor wouldn’t click like a castanet. I have spent twenty-five years on my knees with a moisture meter and a level, and I can tell you that a floor is only as good as the structural surface beneath it. You might think that expensive wide-plank oak or that fancy waterproof laminate is the star of the show, but the star is the subfloor. If that subfloor is not flat, your expensive investment is just a ticking clock. I smell like WD-40 and oak dust most days, and I have seen enough failed click-lock joints to know that aesthetic choices mean nothing if the physics of the floor are ignored. The kitchen is the hardest room in the house because of the weight of the appliances and the constant foot traffic. A small dip under a refrigerator or a stove can cause the floor to bounce and eventually snap the locking mechanisms. This is where the marble test comes in. It is a low-tech, high-accuracy method to see the truth about your floor before you commit to the install.
The marble method and its practical application
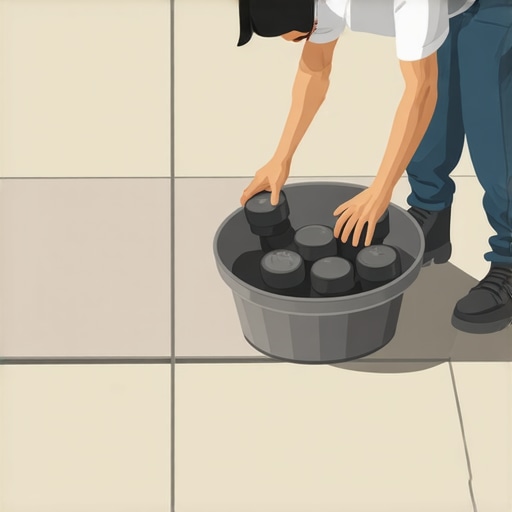
The marble test is the most reliable manual technique for identifying subfloor depressions and high spots in a kitchen floor prep scenario. By using a standard glass marble, an installer can map the topography of the plywood or concrete to determine if floor leveling or grinding is required for a successful laminate or hardwood install. I always carry a pouch of marbles in my tool bag. You place a marble in the center of the room and watch it. If it moves, you have a problem. If it speeds up, you have a slope. If it settles in one spot every time you roll it from different directions, you have found a dip. This is not just a trick for homeowners; it is a fundamental diagnostic tool for anyone who cares about the longevity of a surface. Most people think their eyes are enough to see a dip. Your eyes will lie to you. The lighting in a kitchen often hides the subtle 3/16-inch wave that will ruin a tile job. The marble does not lie. It follows gravity. It finds the lowest point in the room with absolute mechanical certainty.
“A floor is only as good as the subfloor beneath it; deflection is the enemy of every joint.” – Master Flooring Axiom
Subfloor levelness for professional results
Subfloor levelness is measured by the deviation over a ten-foot span, with the National Wood Flooring Association and TCNA setting the maximum tolerance at 1/8 inch or 3/16 inch depending on the flooring material. Proper floor leveling ensures that the locking joints of laminate do not flex and fail under dynamic loads. When a marble rolls into a dip, it indicates a space where the floor will not have support. Imagine a bridge with no pilings in the middle. That is what your floor becomes when it spans a dip. Every time you walk over that spot, the material bends. For laminate or engineered wood, this bending stresses the tongue and groove. Over a few months, the friction causes the material to wear down. You will start to hear a ‘click-clack’ sound. That is the sound of your floor dying. In a kitchen, where you have heavy islands and refrigerators, the floor is under constant tension. If the subfloor is not dead flat, the floor cannot expand and contract as it should. It gets pinned down in the low spots, leading to buckling at the edges.
The science behind self leveler chemistry
Self-leveling underlayment or SLU uses a calcium aluminate cement base to provide a high-flow, high-strength surface that bonds to concrete and plywood substrates. This chemical compound is engineered for low shrinkage and rapid hydration, allowing for a flat surface that can support heavy tile or laminate within hours of application. I have seen guys try to use cheap patch for a large dip. Patch is for small holes. If you have a wide, shallow dip found by the marble test, you need a flowable leveler. The molecular structure of these compounds is fascinating. The polymers inside allow the liquid to maintain its surface tension while gravity pulls it to a perfect level. It is not just about filling a hole; it is about creating a structural plane. You have to prime the subfloor first. If you skip the primer, the thirsty plywood will suck the water out of the leveler before it can flow. This results in a lumpy, brittle mess. A professional install requires a mechanical and chemical bond that can withstand the thousands of pounds of pressure from kitchen cabinetry.
| Floor Type | Flatness Tolerance (per 10 ft) | Primary Failure Risk |
|---|---|---|
| Laminate | 1/8 inch | Joint Separation |
| Engineered Wood | 3/16 inch | Squeaking / Noise |
| Solid Hardwood | 3/16 inch | Cupping / Gapping |
| Large Format Tile | 1/8 inch | Lippage / Cracking |
| Carpet | 1/4 inch | Uneven Wear Patterns |
The failure of cheap carpet and padding
Carpet installation often hides subfloor imperfections, but a significant dip will cause premature carpet wear and stretching over time. While thick padding can mask the tactile feel of a dip, the delamination of the carpet backing occurs when the fibers are forced into a void under heavy foot traffic. I hate it when people tell me that carpet doesn’t need a level floor. They are wrong. If you have a dip in a high-traffic hallway or the entrance to a kitchen, the carpet will eventually take the shape of that hole. This creates a permanent shadow. It also makes the carpet harder to clean because the vacuum head loses suction when it hits the depression. Carpet is a textile, but it is a textile under tension. When the subfloor drops away, that tension is lost. The carpet ripples. You end up having to pay someone to come back and restretch it every two years. If you had just used a bag of leveler at the start, you would have saved five hundred dollars in maintenance.
Expansion gaps and the structural perimeter
An expansion gap is a required space between the flooring edge and the wall that allows the material to move during changes in humidity and temperature. Without a minimum 1/4 inch gap, the flooring planks will bind against the drywall, causing the floor to peak or buckle in the center of the room. This is the most common mistake I see. People install their floor right up to the baseboard. They think it looks better. Then summer hits, the humidity rises, the wood expands, and it has nowhere to go. It goes up. If you combined a lack of expansion gap with a subfloor dip, you have a recipe for a disaster. The floor will lift off the subfloor like a sail. You can feel the air underneath it. In a kitchen, you must also be careful with the cabinets. You cannot pin a floating floor down with a heavy kitchen island. The floor must be able to slide under the toe kick of the cabinets freely. If you lock it down, it will rip itself apart at the weakest joint.
“Subfloor preparation is not an option; it is the fundamental requirement for all surface longevity.” – TCNA Handbook Principles
The tight limit for tile surface prep
Tile installation on a kitchen floor requires the strictest levelness standards because rigid ceramic or porcelain cannot bend over a dip. If the subfloor deflection exceeds L/360, the grout lines will crack and the tiles will pop due to shear stress on the thin-set mortar bond. When I do the marble test for a tile job, I am looking for anything over 1/8 inch. If I find a dip, I am grinding or pouring. Tile is brittle. It has zero flexibility. If you have a dip and you try to ‘back-butter’ the tile to make up the difference, you are creating a thick bed of mortar that will shrink as it cures. This shrinkage pulls the tile down, creating ‘lippage’ where one tile edge is higher than the next. This is a trip hazard and it looks like a amateur did the job. For showers, the logic is reversed; you need a specific slope to the drain, but that slope must be a perfect plane. Any dip in a shower floor will hold standing water, leading to mold and the eventual failure of the waterproofing membrane.
- Clear the kitchen floor of all debris and dust before starting the marble test.
- Roll the marble from each corner toward the center to find the low point.
- Mark the areas where the marble settles using a carpenter’s pencil.
- Use a six-foot or ten-foot straight edge to verify the depth of the marked dip.
- Check the moisture content of the subfloor to ensure it is below 12 percent for wood or 3 pounds for concrete.
- Apply a high-quality primer if you determine that self-leveling compound is necessary.
- Allow the leveler to cure for the full manufacturer-recommended time before walking on it.
Concrete moisture and the chemical bond
Concrete moisture vapor can destroy floor adhesives and cause laminate to swell if a proper vapor barrier is not integrated into the subfloor prep. Even if the marble test shows a flat surface, high MVER levels will lead to hydrostatic pressure that delaminates the flooring. In regions like Houston or Florida, the concrete is never truly dry. It is a sponge. If you have a dip in a concrete slab, moisture often collects in that low spot more than anywhere else. When you fill that dip with leveler, you have to make sure the leveler is rated for high moisture. If you use a cheap, gypsum-based leveler on a wet slab, it will turn back into mush within a year. I always use a calcium chloride test or a pinless moisture meter. If the slab is screaming wet, I use a epoxy moisture barrier before I even think about the marble test. You have to solve the chemistry of the floor before you solve the physics of the levelness. Flooring is not just carpentry; it is science. If you ignore the microscopic reality of the slab, the macroscopic reality of your floor will be a failure. Spend the time to do it right. Grind the high spots, fill the low spots, and respect the expansion gaps. Your knees and your wallet will thank you ten years from now when the floor still looks like the day it was installed. [Article Schema] { “@context”: “https://schema.org”, “@type”: “Article”, “headline”: “The Marble Test for Finding Hidden Dips in Your Kitchen Floor”, “author”: { “@type”: “Person”, “name”: “Master Floor Installer” }, “description”: “A professional guide to using the marble test for subfloor leveling and kitchen floor preparation.”, “publisher”: { “@type”: “Organization”, “name”: “Flooring Excellence” } }