The ‘Bucket Weight’ Trick for Keeping Large Format Tiles Flat
Most guys skip the leveling compound. They think the underlayment will hide the dip. It won’t. I spent three days grinding concrete on a job last month just so the floor wouldn’t click like a castanet. That job was a luxury condo where the owner spent forty dollars a square foot on Italian porcelain. If I had just slapped that tile down, the lippage would have been a disaster. You see, when you are dealing with tiles that are 24 by 48 inches or larger, the margin for error disappears. A single millimeter of height difference turns a floor into a series of tripping hazards. I have spent twenty-five years with sawdust under my nails and the smell of WD-40 on my clothes. I have seen every shortcut in the book, and I am here to tell you that the bucket weight trick is the only way to ensure a truly flat finish when the subfloor is fighting you.
The physics of mortar shrinkage and tile lippage
Lippage occurs when the edges of adjacent tiles are not at the same elevation, often caused by mortar shrinkage during the curing process or inherent warpage in large format porcelain planks. To combat this, the bucket weight trick uses gravity to counteract the upward tension of leveling clips. When you mix a high-performance, polymer-modified thin-set, you are initiating a complex chemical reaction. The Portland cement begins to form crystalline structures that lock onto the tile and the substrate. However, as the water evaporates or is consumed in the hydration process, the volume of the mortar bed slightly decreases. This shrinkage can pull a tile downward unevenly. If you have used a mechanical leveling system, the clips are designed to hold the edges together, but they cannot always overcome the heavy mass of a large tile that wants to sag in the middle or lift at a corner. By placing a five-gallon bucket filled with water or sand on the problematic junction, you apply constant, even pressure that forces the tile to stay seated in the mortar bed until the initial set is achieved. This ensures that the bond is formed exactly where you want it, rather than where the shrinking mortar pulls it.
“A floor is only as good as the subfloor beneath it; deflection is the enemy of every joint.” – Master Flooring Axiom
Why your subfloor is lying to you
Subfloors rarely meet the stringent flatness requirements for large format tile, which typically demand a variance of no more than one-eighth of an inch over ten feet. You must use a long straightedge to identify high spots and low spots before you ever open a bag of thin-set. If you are working on a concrete slab, you are likely dealing with humps near the walls and dips in the center of the room. These are the results of the concrete finishing process. I always carry a diamond-cup grinder. I don’t care how much dust it makes. I will bag the room in plastic and grind those high spots down to the aggregate. If you leave a hump, the large format tile will act like a seesaw. No amount of bucket weight can fix a floor that is physically arched. You must get the substrate within spec first. For wood subfloors, the challenge is deflection. If the plywood is bouncing, your grout lines will crack, and your tiles will de-bond. You might need to add a second layer of plywood or an uncoupling membrane like Ditra to manage the lateral movement. Only after the floor is stiff and flat can you start thinking about the aesthetic layout.
The hidden danger of thick underlayment
While most people want the thickest underlayment to provide a soft feel underfoot, too much cushion actually causes the locking mechanisms on laminate and LVP to snap under pressure. This is a contrarian truth that many big-box retailers ignore. They sell you a thick, foam-based pad promising a quiet floor, but that compression is the enemy of a floating floor’s structural integrity. When you walk across a floor with too much flex, the tongue and groove joints are stressed. Over time, the plastic or wood fiber will fatigue and break. The same logic applies to tile. You want a rigid, stable base. If you are transitioning from tile to a carpet install, you need to ensure the subfloor heights are adjusted so the transition strip sits flush. A common mistake is leaving a massive gap that requires a bulky T-molding. I hate T-moldings. They are the hallmark of an amateur who didn’t plan the floor leveling phase correctly. A true professional grinds and preps until the transition is a clean, zero-threshold line.
| Solid White Oak | 1360 lbf | 10 to 14 Days | 3/4 Inch |
| Engineered Maple | 1450 lbf | 3 to 5 Days | 1/2 Inch |
| Large Format Porcelain | High PSI Strength | None | 1/8 Inch (Grout) |
| Laminate Planks | Varies by AC Rating | 48 Hours | 3/8 Inch |
Strategic placement of the bucket weight
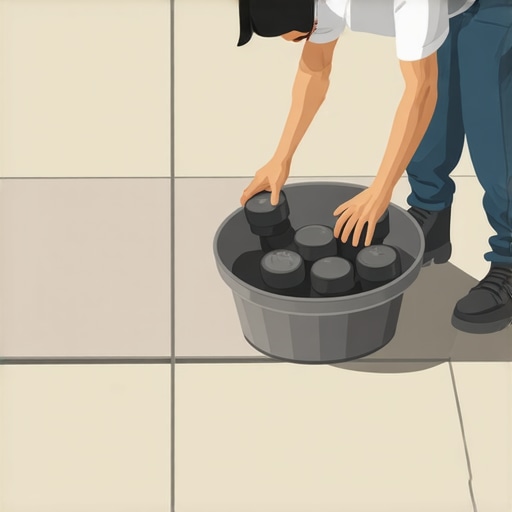
The bucket weight trick should be applied to the four corners of a large format tile where the leveling clips are under the most tension. You don’t just throw buckets randomly. You place them on the intersections. I prefer using five-gallon buckets filled halfway with water. This gives you about twenty pounds of localized pressure. If you are working in showers, this is even more critical. Shower pans often have complex slopes toward the drain. Large tiles don’t like to bend. To get those tiles to follow the pitch without creating sharp edges, you have to use smaller tiles or be a master of the envelope cut. If you insist on large tiles in a shower, the bucket weight ensures the mortar bed is compressed enough to prevent voids. According to TCNA standards, you need ninety-five percent coverage in wet areas. If you have a void, water will sit there and grow mold. It will eventually rot out the thin-set and cause the tile to pop.
“Proper coverage for large format tile in wet areas must reach ninety-five percent to prevent water pooling in voids.” – TCNA Handbook Standards
The chemistry of the bond
Modified thin-sets use liquid latex or powdered polymers to increase the shear bond strength and allow for a small amount of movement without failure. When you are installing large format tiles, you cannot use the cheap stuff. You need a medium-bed mortar. Standard thin-set is designed to be applied at a thickness of three-sixteenths of an inch. If you try to build it up to hide a dip, the mortar will shrink excessively and pull the tile out of alignment. Medium-bed mortars are engineered with larger sand particles that support the weight of the tile and resist shrinkage. They allow for a thickness of up to three-quarters of an inch. This is where the chemistry meets the physics. The polymers in the mortar create a bridge between the non-porous back of a porcelain tile and the porous surface of the concrete or backer board. If you don’t back-butter your tiles, you are asking for a failure. I always flat-trowel a thin layer of mortar onto the back of every tile to ensure every microscopic pore is filled before I set it into the combed ridges on the floor.
- Check the subfloor for flatness using a ten-foot straightedge.
- Grind down all high spots and fill low spots with a high-quality self-leveler.
- Vacuum the floor twice to remove every grain of dust that could break the bond.
- Select a polymer-modified medium-bed mortar rated for large format tile.
- Back-butter every tile to achieve ninety-five percent coverage.
- Use a mechanical leveling clip system in conjunction with five-gallon bucket weights.
- Wait a full twenty-four hours before removing clips or walking on the surface.
The ghost in the expansion gap
Expansion gaps are not optional and neglecting them will cause your floor to buckle or tent as the building shifts and temperatures fluctuate. Every material on earth expands and contracts. Wood does it with humidity. Tile does it with temperature. If you run your tile tight against a wall, when that floor warms up, it has nowhere to go but up. I have seen floors tent so violently that they sounded like a gunshot when they finally let go. You need a minimum of a quarter-inch gap at the perimeter for tile, and even more for laminate or hardwood. This gap is hidden by your baseboards or shoe molding. Do not fill this gap with grout. Grout is rigid. Use a color-matched 100 percent silicone caulk. Silicone is flexible and will allow the floor to breathe. This is especially true near exterior doors or large windows where the sun beats down on the floor. The thermal expansion of a dark porcelain tile can be significant, and without that gap, you are building a ticking time bomb.
The final word on floor prep
I don’t care how pretty the tile is. If the subfloor is garbage, the floor is garbage. People get mad when I tell them the prep work will cost more than the installation. They want the ‘builder-grade’ speed, but they want the custom-architect look. It doesn’t work that way. You have to respect the materials. You have to respect the chemistry. If you take the time to level the floor, choose the right mortar, and use the bucket weight trick to manage the curing phase, you will have a floor that lasts fifty years. If you rush it, you will be calling someone like me in two years to rip it all out and start over. And trust me, I charge a lot more to fix a mess than I do to do it right the first time. Keep your levels calibrated and your buckets full.