The ‘Hot Iron’ Trick for Saving Visible Carpet Seams
I have spent forty years standing behind this counter. I have seen every DIY disaster known to the flooring world. People think carpet is just a soft blanket for the floor. They think it is easy to toss down and forget. It is not. Carpet is a structural textile. It is a complex assembly of primary backings, secondary backings, and thousands of individual fibers held together by latex and thermal bonds. When a seam fails, it is not just an eyesore. It is a failure of engineering. I once walked into a luxury penthouse where the owner had spent twelve thousand dollars on a custom Axminster. The installer had rushed the seams. Every joint looked like a scar across a face. The owner was ready to rip it all out. I saved it with a hot iron and a wet towel. But before you pick up a tool, you need to understand why that seam is showing. It is usually because you ignored the subfloor or you did not respect the chemistry of the adhesive.
The physics of the thermal bond
Carpet seam tape relies on thermoplastic adhesives that must reach a specific melting point to create a mechanical bond with the carpet backing. Most installers fail because they do not understand the heat transfer rates between the iron, the tape, and the synthetic fibers. If the iron is too cold, the glue stays thick and does not penetrate the backing. If it is too hot, you melt the face fibers and ruin the pile. The goal is a molecular marriage between the molten glue and the weave of the secondary backing. When you are trying to save a visible seam, you are essentially performing a controlled re-melting of that bond to realign the fibers and the tension. It requires a steady hand and a deep knowledge of how ethylene-vinyl acetate behaves under pressure. You are not just ironing a shirt. You are resetting the structural memory of a high-tension fabric system.
“A floor is only as good as the subfloor beneath it; deflection is the enemy of every joint.” – Master Flooring Axiom
Why your subfloor is lying to you
Floor leveling is the silent partner of a carpet install because any subfloor deflection or unevenness will cause a seam to peak or valley under tension. You might think a thick pad hides a dip in the plywood. It does not. It creates a pivot point. When you stretch the carpet over a hump, the seam is forced open. When it goes over a dip, the seam peaks. I spent three days grinding concrete on a job last month just so the floor would not click like a castanet. If you are dealing with a visible seam, check the floor level first. If the subfloor is not flat to within 3/16 of an inch over a ten foot radius, your seam will always be visible. No amount of heat will fix a structural shadow caused by a crooked floor. You must address the calcium sulfate or portland cement underlayment before you even think about the iron.
The ghost in the expansion gap
Expansion gaps are not just for laminate or hardwood floors because even textile floor coverings react to ambient humidity and thermal expansion. Most people forget that carpet backings are often made of polypropylene or jute. These materials move. If you tuck your carpet too tight against the baseboard without a proper gap for the transition, the pressure has nowhere to go but the seam. This is especially true near showers or bathrooms where the moisture vapor transmission rate is high. The humidity from a hot shower can cause the latex in the carpet backing to soften. When it softens, the tension from the power stretcher pulls the seam apart. You need a moisture barrier at every wet-to-dry transition to prevent the subfloor from wicking water into the carpet tape. Without it, the adhesive emulsifies and the seam ghosts.
| Tape Grade | Adhesive Weight | Melting Point | Best Use Case |
|---|---|---|---|
| Standard Residential | 22 Grams | 250 Degrees | Low traffic bedrooms |
| Premium Commercial | 38 Grams | 275 Degrees | Heavy traffic corridors |
| Silicone Release | 30 Grams | 260 Degrees | Delicate specialty fibers |
| Extra Wide Bridge | 45 Grams | 280 Degrees | Patterned loop carpet |
The 1/8 inch that ruins everything
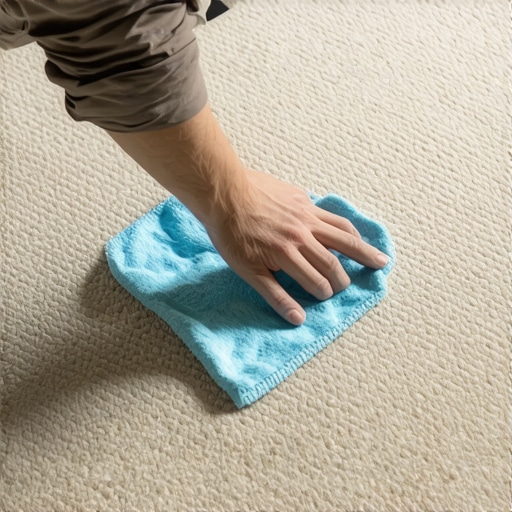
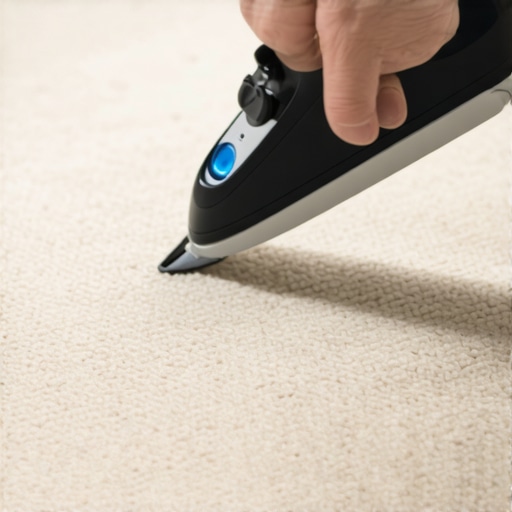
Seam peaking is the result of lateral tension overcoming the shear strength of the seam adhesive. If you cut your carpet even 1/8 of an inch too short, the stretch will be too aggressive. This pulls the two pieces of carpet away from each other at the top of the pile while the tape holds them together at the bottom. The result is a peak that catches the light and creates a permanent shadow. To fix this with the hot iron trick, you have to relax that tension. You use a damp white cotton cloth and a standard seam iron. You place the damp cloth over the visible seam. You set the iron to a medium heat. You press it onto the cloth for exactly ten seconds. The steam penetrates the fibers and the backing. It relaxes the polypropylene memory. You then use a seam roller to flatten the peak while the glue is still warm and pliable. It is a surgical procedure.
The structural cost of cheap padding
Underlayment density determines the vertical displacement of the carpet which directly impacts the longevity of the seamed joint. If your padding is too soft, every footstep causes the carpet to flex excessively. This constant movement acts like a hinge on the seam tape. Eventually, the glue cracks. You want a high-density 8-pound rebond pad. It provides enough support to keep the seam from bending but enough cushion to protect the fibers. In areas like the Pacific Northwest, you also need to worry about mildew resistance in your padding. High humidity can turn a cheap pad into a sponge. That moisture will eventually rot the jute backing of your carpet and destroy your seams from the bottom up. Always invest in a pad with a vapor shield if you are installing over a concrete slab or near a bathroom.
- Verify the pile direction of both carpet pieces before cutting.
- Check the subfloor moisture content with a pin-less meter.
- Use a row-cutter to ensure you are not cutting through the face fibers.
- Pre-seal the edges with a latex seam sealer to prevent fraying.
- Allow the seam to cool completely for 30 minutes before stretching.
When the glue fails to bite
Adhesive transfer is the only metric that matters when you are bonding two pieces of secondary backing. If you look at the back of a failed seam, you will often see that the glue stayed on the tape and never touched the carpet. This is called a dry bond. It happens because the installer moved the iron too fast. To save a dry bond, you must re-heat the tape through the face of the carpet using the steam method. The steam acts as a thermal conductor. It carries the heat deeper into the pile than dry heat alone. You must be careful not to over-saturate the area. Too much water will cause the latex binder in the carpet to break down. You want a hygroscopic balance. Once the glue is tacky, you use a weighted seam tractor to force the backing into the molten thermoplastic. This is the only way to achieve a permanent mechanical lock after the initial install has failed.
The regional climate expert perspective
The dry heat of Phoenix will shrink your baseboards until they show a gap and it will also dry out your carpet latex binders prematurely. In arid climates, carpet seams can become brittle. If you are installing in the desert, you need a tape with a higher plasticizer content to remain flexible. Conversely, in the swampy humidity of Houston, solid wood is a death wish and carpet seams will swell. The moisture in the air can actually cause the seam tape to lose its grip if the subfloor was not properly sealed. I always tell my customers that the climate inside the house must be stabilized for 72 hours before the carpet arrives. Acclimation is not just for wood. It is for the dimensional stability of the textile. If you skip this step, your seams will move as soon as the air conditioner kicks on.
“The integrity of a carpet installation relies entirely on the stability of the seams and the tension of the stretch.” – Master Flooring Axiom
The truth about waterproof flooring
Waterproof LVP has made people believe that floors should be invincible but carpet technology still relies on permeable materials. You cannot treat a carpeted room like a wet room. When you have a seam near a shower transition, you must use a silicone-based sealer at the edge of the tack strip. If water gets under that seam, it will wick into the tape and the glue will release. I have seen countless seams fail because a homeowner walked out of a shower with soaking wet feet onto the carpet transition. The water follows gravity. it goes straight to the subfloor. It sits there. It breeds mold and it kills the adhesive bond. The hot iron trick can fix the appearance of the seam, but it cannot fix a moldy subfloor. You have to be proactive about moisture management at every interface.
Refining the invisible transition
Light refraction is the final boss of any flooring professional. A seam might be technically perfect but still be visible because of the way photons hit the fiber tips. This is why row cutting is mandatory. If you cut across the pile, you create a blunt edge that reflects light differently than the surrounding area. When you use the hot iron to save a seam, you are also trying to re-orient the pile direction. By using a seam brush while the fibers are still damp and warm from the steam, you can blend the two sides together. You are essentially grooming the textile at a microscopic level. It takes patience. You cannot rush the cooling process. If you move the weights too soon, the fibers will spring back to their distorted position. You must wait for the glass transition temperature of the adhesive to be reached so the bond sets in its new, flat orientation.
{“@context”:”https://schema.org/”,”@type”:”HowTo”,”name”:”The Hot Iron Trick for Saving Visible Carpet Seams”,”description”:”A professional guide to repairing visible carpet seams using thermal reactivation and moisture.”,”step”:[{“@type”:”HowStep”,”text”:”Identify if the seam visibility is caused by a peak, a valley, or a dry bond.”},{“@type”:”HowStep”,”text”:”Place a damp, white cotton cloth over the affected area to protect the fibers.”},{“@type”:”HowStep”,”text”:”Apply a medium-heat seam iron to the cloth for 10 seconds to generate steam.”},{“@type”:”HowStep”,”text”:”Use a seam roller or tractor to press the carpet backing into the reactivated adhesive.”},{“@type”:”HowStep”,”text”:”Weighted the area and allow it to cool for 30 minutes to set the bond.”}]}