The ‘Blue Tape’ Method for Perfectly Straight Shower Silicone Lines
The Blue Tape Method for Perfectly Straight Shower Silicone Lines
Most guys skip the leveling compound. They think the underlayment will hide the dip. It won’t. I spent three days grinding concrete on a job last month just so the floor wouldn’t click like a castanet. That job taught me that shortcuts in the substrate always manifest as failures in the finish. Whether you are prepping for a carpet install or finishing a high end shower, the transition points are where the amateur is separated from the master. In the world of showers, that transition is the silicone bead. It is the final barrier against structural rot and the most visible indicator of craftsmanship.
The microscopic failure of a messy bead
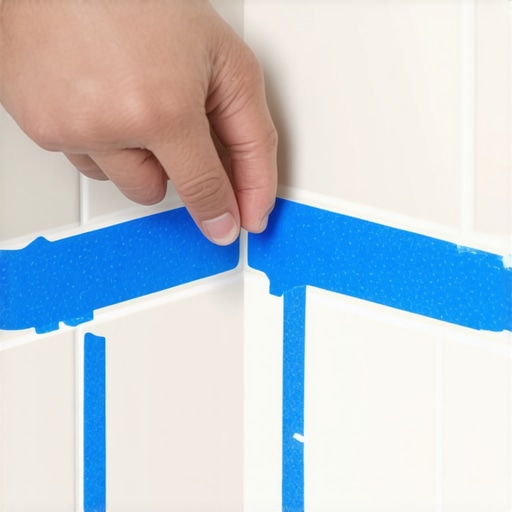
Applying high quality 100 percent silicone sealant requires absolute surface purity and geometric precision to prevent water infiltration. Using blue painter tape creates a mechanical boundary that ensures the sealant bonds only to the intended surfaces. This method eliminates the ragged edges that trap soap scum and lead to premature mold growth in wet environments. When we talk about showers, we are talking about managed water systems. A sloppy silicone bead is not just an eyesore. It is a hydraulic failure waiting to happen. If the bead is too thin, it lacks the elongation capacity to handle the expansion and contraction of the shower pan. If it is too thick, it peels. The blue tape method provides the exact mil thickness required for a long term structural seal.
Why your subfloor is lying to you
Before you ever touch a tube of silicone, you have to look at what is happening underneath the tile. A floor that lacks proper floor leveling will eventually shift. This movement, often measured in fractions of a millimeter, puts immense stress on the perimeter joints of a shower. I have seen laminate floors buckle because the installer ignored a 3/16 inch hump in the plywood. The same physics apply to showers. If the substrate moves, the silicone must stretch. If you have not leveled your floor or secured your subfloor, no amount of expensive sealant will save you from a leak. You are asking a chemical bond to do the job of a mechanical fastener. It will fail every time.
“A floor is only as good as the subfloor beneath it; deflection is the enemy of every joint.” – Master Flooring Axiom
The chemistry of adhesion in wet environments
Silicones are not all created equal. You have acetoxy cure and neutral cure. Acetoxy silicone smells like vinegar and is generally cheaper, but it can cause corrosion on certain natural stones or metals. Neutral cure is the gold standard for professional showers because it offers superior adhesion without the acidic byproduct. When you apply this to a joint, you are creating a molecular bridge. The blue tape acts as a dam, forcing the silicone into the microscopic pores of the tile and grout. This creates a gasket that is physically integrated into the shower assembly. Without the tape, you often end up wiping away the very material that was supposed to form the core of the seal.
The 1/8 inch that ruins everything
Precision in flooring is measured in eighths of an inch. In a carpet install, an 1/8 inch gap at the tack strip means the carpet will eventually pull loose. In a shower, an 1/8 inch bead that is off center will eventually pull away from the wall. The blue tape allows you to define a perfect 1/8 inch or 1/4 inch channel. You must place the tape exactly 1/8 inch away from the corner on both the vertical and horizontal planes. This ensures the silicone has enough surface area to grab onto. If the contact area is too small, the bead will snap like a rubber band when the house settles during the winter months.
The physics of the blue tape technique
The secret to the perfect line is the timing of the tape removal. You apply the tape, run your bead, and smooth it with a finger dipped in a mixture of water and dish soap. The soap breaks the surface tension, allowing your finger to glide without dragging the silicone out of the joint. But the real magic happens when you pull the tape. You must pull it while the silicone is still wet. If you wait for a skin to form, you will tear the edge of the bead, leaving a jagged line that will catch hair and dirt. Pull the tape at a 45 degree angle away from the joint to create a clean, crisp edge that looks like it was molded in a factory.
| Material Type | Typical Cure Time | Movement Capacity | Best Use Case |
|---|---|---|---|
| 100% Silicone | 24 Hours | 25 to 50 percent | Shower Corners and Pans |
| Siliconized Acrylic | 4 to 6 Hours | 12 percent | Drywall Baseboards |
| Polyurethane | 48 to 72 Hours | 35 percent | Exterior Concrete Joints |
Managing moisture before the first drop hits the pan
Humidity is the enemy of a good install. I have walked into jobs where the installer was trying to silicone a wet joint. It will not stick. You need the joint to be bone dry. Use a heat gun or a hair dryer if you have to. If there is moisture trapped behind the tile, it will eventually push the silicone out from the inside. This is why floor leveling and proper waterproofing membranes like Schluter or Wedi are vital. They ensure that moisture stays in the tile layer and drains into the pan rather than soaking into the subfloor. A dry substrate is the only way to ensure the blue tape method yields a permanent result.
The professional checklist for shower sealing
- Vacuum the joints to remove all construction dust and debris.
- Wipe the tile edges with 90 percent isopropyl alcohol to remove oils.
- Apply blue painter tape exactly 1/8 inch from the center of the joint.
- Use a high quality caulking gun with a drip free trigger mechanism.
- Cut the nozzle at a 45 degree angle to match the desired bead width.
- Smooth the bead with a soapy finger in one continuous motion.
- Remove the tape immediately by pulling away from the wet silicone.
- Do not use the shower for at least 24 hours to allow full cross linking.
The ghost in the expansion gap
In every flooring project, from laminate to porcelain tile, you have to account for the ghost of movement. Houses are living things. They breathe, they sink, and they expand. If you butt your tile tight against the wall without a movement joint, the tile will tent or crack. The silicone bead is your expansion joint. By using the blue tape method, you are not just making it look pretty. You are engineering a flexible buffer that allows the walls and the floor to move independently. This prevents the grout in the corners from cracking, which is the number one complaint homeowners have six months after a renovation. If you see cracked grout in a shower corner, it means the installer was lazy and didn’t use silicone.
“A floor must be allowed to move, or it will choose its own path of destruction.” – NWFA Technical Manual Reference
The durability of the final seal
When you finish a job with the blue tape method, you are giving the homeowner a product that will last ten to fifteen years. Without it, you are looking at a three year lifespan before the silicone starts to peel. The clean edges produced by the tape prevent the edges from lifting. Once an edge lifts, water gets behind it, and mold starts to colonize the space. This leads to that black staining that no amount of bleach can fix. By taking the extra twenty minutes to tape off the shower, you are saving the client thousands of dollars in future remediation costs. It is the hallmark of a mechanic who actually cares about the structural integrity of the home. It is about more than just the look. It is about the physics of the seal.