The ‘Wet Finger’ Trick for Smoothing Silicone Around Your Shower Base
The myth of the steady hand
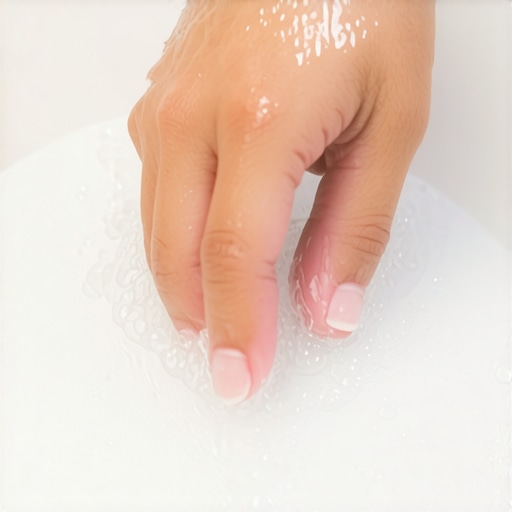
Smoothing silicone around shower bases requires a wet finger to break the surface tension of the sealant and prevent it from sticking to your skin. This technique ensures a concave profile that directs water away from the joint. You must use a mixture of water and dish soap or isopropyl alcohol to achieve a professional finish. I spent three days grinding concrete on a job last month just so the floor wouldn’t click like a castanet. The homeowner thought the vinyl would hide the dip. It never does. That same job had a shower base where the previous guy used a dry finger to smear the caulk. It looked like a kindergarten art project. The silicone was peeled back in six months because it lacked a mechanical bond to the tile edge. When you are on your knees with a tube of high-grade sealant, you are not just decorating. You are engineering a moisture barrier that has to withstand hundreds of pounds of hydrostatic pressure and the inevitable shifting of the subfloor. Most people think a leak is a plumbing failure. Usually, it is a structural failure at the joint. If your subfloor flexes more than the L/360 standard required by the Tile Council of North America, that silicone bead is the only thing standing between your joists and rot. Wetting your finger allows you to apply the exact amount of pressure needed to force the material into the microscopic pores of the substrate without pulling the bead out of the gap. This is the difference between a seal that lasts twenty years and one that fails before the first bottle of shampoo is empty.
The structural failure of a flexing base
Floor leveling and subfloor rigidity are the primary factors in determining how long a silicone seal will last in a shower. A stable base prevents the differential movement that causes sealant to delaminate from the shower pan or the adjacent tile. Use high-flow self-leveling underlayment to eliminate voids under the base. It does not matter how good your finger technique is if the floor beneath the shower is soft. I have seen guys try to install carpet install techniques in wet areas by using thick pads to hide unevenness. You cannot do that here. If the shower base moves even a fraction of an inch when a person steps inside, the silicone is under a state of constant tension.
“A floor is only as good as the subfloor beneath it; deflection is the enemy of every joint.” – Master Flooring Axiom
Moisture is a patient hunter. It finds the tiny cracks where the silicone has pulled away because the installer did not check the joist spacing. You need to ensure the subfloor is solid plywood or a concrete slab that has been leveled to within 1/8 inch over 10 feet. Any more deviation than that and the shower base will act like a see-saw. That movement snaps the chemical bond of the silicone. I always tell apprentices that the wet finger is for aesthetics, but the leveling compound is for survival. If you are working on a second-story bathroom, check the deflection. If the floor bounces, you need to sister the joists or add a layer of 3/8 inch exterior grade plywood before the tile goes down. This prevents the silicone from having to act as a structural adhesive, which it was never designed to be. It is a sealant, not a weld.
Physics of the wet finger technique
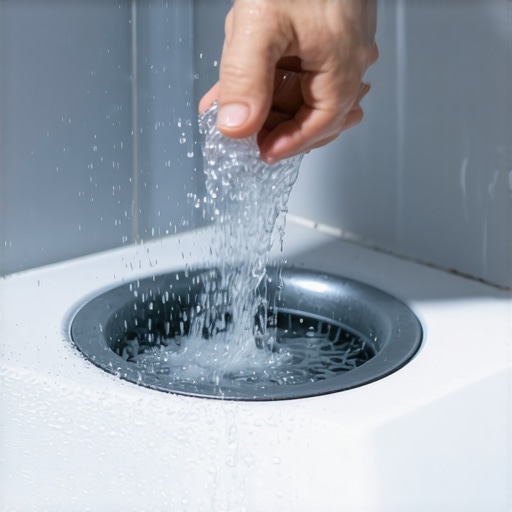
Surface tension management is the core principle behind smoothing silicone with a lubricated digit. A mixture of soap and water creates a temporary barrier that prevents the silicone from adhering to your skin while allowing the material to flow into the joint. This creates a smooth finish and a tight seal. The chemistry of silicone is fascinating. Most high-quality shower sealants are acetoxy-cure or neutral-cure silicones. When they hit the air, they begin to cross-link. This is why you cannot take a lunch break halfway through a bead. The wet finger trick works because the liquid lubricant reduces the friction between your skin and the polymer chain. If you use a dry finger, the silicone sticks to your skin cells. As you pull your hand along the joint, you end up dragging the material out of the gap rather than compressing it into the corner. You want a concave shape. This shape is achieved by the rounded tip of your finger. It pushes the material into the two meeting surfaces while thinning out the edges. This creates a feathered edge that is less likely to catch a scrub brush or a towel. I prefer a spray bottle with a 10 percent dish soap solution. Spray the bead after you have laid it down but before you touch it. This encapsulates the outer layer of the sealant in a slippery film. When your finger passes over it, the silicone stays in the joint, and the excess slides onto your glove. Never use saliva. The bacteria in your mouth can get trapped under the silicone and cause mold to grow inside the seal within weeks. That is a rookie mistake that costs thousands in remediation.
| Sealant Type | Cure Time | Flexibility | Best Use Case |
|---|---|---|---|
| Acetoxy Silicone | 24 Hours | High | Non-porous tile and glass |
| Neutral Cure Silicone | 48 Hours | Very High | Stone, metal, and PVC bases |
| Polyurethane | 72 Hours | Extreme | Structural joints and exterior |
| Acrylic Latex | 12 Hours | Low | Baseboards and dry areas |
Adhesive chemistry and the acetic acid smell
The chemical composition of silicone determines its adhesion strength and resistance to fungal growth. Acetoxy silicones release acetic acid during the curing process, which is why they smell like vinegar. Neutral cure silicones are better for sensitive materials like natural stone or metal shower pans. If you are working in a tight bathroom, that vinegar smell can be overwhelming. It is more than just a scent. It is a sign of the chemical reaction that is turning a liquid into a rubberized solid. For showers, you should always look for a product that contains a high percentage of fungicides. Cheap silicone will turn black with mildew in a year regardless of how well you smoothed it. The molecular zooming of this process reveals that the silicone is seeking a mechanical key. It needs to grab onto the microscopic pits in the tile glaze. This is why cleaning the joint with 99 percent isopropyl alcohol is mandatory before you even open the tube. If there is a single molecule of soap residue or dust in that gap, the silicone will not bond. It will just sit there like a gasket. A gasket can fail. A bond does not. When you use the wet finger trick, you are actually hydraulicly pressing the sealant into those pores. The water in your soap solution acts as a lubricant for your finger but should not get behind the silicone bead. That is why you apply the silicone to a dry joint first and then spray the lubricant on top. If you spray the joint before you apply the caulk, you have just guaranteed a leak. The water will act as a bond breaker, and the floor will rot out from under you.
The 1/8 inch that ruins everything
Gap sizing is the most ignored aspect of shower sealing and leads to the majority of joint failures. A silicone bead needs a minimum width of 1/8 inch to accommodate the thermal expansion and contraction of the shower base. Joints that are too thin will tear under minimal stress. People love a tight, invisible line. They try to jam the tip of the caulk gun into a hairline crack and think they have done a good job. They haven’t. Silicone is an elastomer. It works by stretching and compressing. If a joint is only 1/32 of an inch wide, the material has no room to stretch. It will rip. I have seen $20,000 bathrooms ruined because the installer didn’t leave a proper expansion gap at the perimeter. This is especially true if you are transitioning from a shower base to a laminate floor or a tile floor. Laminate floors move a lot. If you lock that laminate against a shower base with a tiny bead of caulk, the floor will buckle when the humidity rises. You need a 1/4 inch gap there, filled with a backer rod and then capped with silicone. The backer rod is a foam cylinder that prevents the silicone from sticking to the bottom of the joint. You only want the silicone to stick to the two sides. This is called two-point adhesion. If it sticks to the bottom as well, it will tear the moment the floor moves.
“A joint without a backer rod is just a ticking time bomb for moisture intrusion.” – Master Flooring Axiom
This is the technical reality of flooring. It is a system of moving parts, not a static object.
- Deep clean the joint with 99 percent isopropyl alcohol.
- Ensure the subfloor has no deflection under the shower base.
- Apply a consistent bead of high-grade 100 percent silicone.
- Mist the bead with a mixture of water and a few drops of dish soap.
- Smooth the bead with a gloved finger in one continuous motion.
- Remove the excess silicone immediately from your glove.
- Let the joint cure for at least 24 hours before introducing water.
The ghost in the expansion gap
Managing the transition between a rigid shower base and a floating floor like laminate or luxury vinyl plank requires an understanding of expansion coefficients. These floors move at different rates based on temperature and humidity changes. A thick silicone bead acts as a flexible bridge between these materials. I have seen many DIY jobs where the homeowner ran the laminate right up to the shower and then used a tiny bead of clear caulk. By the next summer, the floor was peaked at the doorway. This is because the laminate expanded and had nowhere to go. It hit the shower base and started to climb the wall. You must leave a gap. The wet finger trick is used here to create a wider, more robust seal that can handle the floor’s movement. In regions with high humidity like the Gulf Coast, this movement is extreme. The air is so thick you can wear it, and wood-based products like laminate soak that moisture up. They grow. If you do not have a proper expansion joint filled with a flexible sealant, your floor will fail. This is the structural engineering of the home. The silicone is the shock absorber. It takes the hit so the tile and the floor don’t have to. When you smooth that wide bead, you are creating a waterproof gasket that can move 25 percent of its width in either direction without breaking. That is why we use 100 percent silicone. It stays flexible for decades, unlike the cheap latex stuff that turns into a brittle cracker after three years in the sun. This is how you build a floor that lasts. You plan for the movement. You respect the physics of the materials. And you use a wet finger to make sure the seal is as tight as it is beautiful.{“@context”:”https://schema.org”,”@type”:”Article”,”headline”:”The Wet Finger Trick for Smoothing Silicone Around Your Shower Base”,”author”:{“@type”:”Person”,”name”:”Master Floor Architect”},”datePublished”:”2023-10-27″,”description”:”Master the wet finger trick for smoothing silicone around shower bases. Learn about subfloor leveling, silicone chemistry, and preventing leaks.”,”articleSection”:”Home Improvement”}