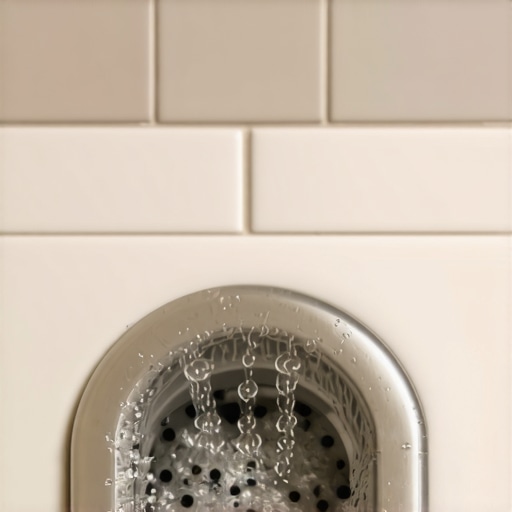
Why Your New Shower Drain Is Gurgling and How to Fix It
I can smell a bad subfloor from the driveway. It is a mix of stale water and the chemical off-gassing of cheap glue. I have spent twenty-five years on my knees with a moisture meter and a level. I have seen it all. I have seen multimillion dollar homes where the floors felt like walking on a trampoline because the builder wanted to save a few bucks on plywood. People think a floor is just something pretty to walk on. They are wrong. A floor is a structural performance surface. If the foundation is trash, the finish is trash. This is especially true in the bathroom where water is a constant threat. When you hear your shower drain gurgling, it is not just an annoying sound. It is a warning. It is a sign that the physics of your home are out of balance. Most people think it is just a clog, but as a master installer, I know it is often linked to the way the entire subfloor system was handled. I once spent three days grinding concrete on a job last month just so the floor would not click like a castanet. The homeowners thought I was crazy. They asked why I was wearing a respirator and pushing a heavy grinder for seventy-two hours. I told them that if I did not fix the five-eighths inch dip in the slab, their expensive new floor would fail in six months and their plumbing would suffer from the lack of support. Most guys skip the leveling compound. They think the underlayment will hide the dip. It won’t. If you ignore the subfloor, you are building on sand.
The mechanics of the bathroom gurgle
A gurgling shower drain indicates a pressure imbalance within the plumbing ventilation system or a partial obstruction in the waste line. This phenomenon occurs when air is forced through the P-trap water seal because the system cannot find a path of least resistance through the vent stack. When water moves through a pipe, it creates a vacuum behind it. If the atmospheric pressure cannot be equalized through a roof vent, the air is sucked through the trap. This creates that rhythmic glugging sound. In many cases, this is exacerbated by a subfloor that has settled. If the floor leveling was not performed correctly during the initial build, the drain pipes can lose their mandatory pitch. A standard waste line requires a quarter-inch drop for every foot of horizontal travel. If the subfloor sags under the weight of a heavy tile shower, that pitch disappears. You end up with a belly in the pipe. Water sits in that belly and slows down the flow. This creates a perfect environment for hair and soap scum to accumulate, which leads to the gurgle. You cannot fix a structural belly with a plunger. You have to understand the chemistry of the subfloor and the physics of the weight load. When we talk about laminate or carpet install projects near a bathroom, we are looking at how the transition from the wet zone to the dry zone affects these structural components.
“A floor is only as good as the subfloor beneath it; deflection is the enemy of every joint.” – Master Flooring Axiom
Why your subfloor is lying to you
Subfloor surfaces often appear flat to the naked eye but contain significant deviations that compromise the integrity of the finish flooring. You need a ten-foot straightedge to see the truth. The industry standard is an eighth of an inch of deviation over ten feet. Anything more than that and you are asking for trouble. When we deal with laminate in areas near showers, the levelness of the floor is the only thing keeping the click-lock joints from snapping. Laminate is made of high-density fiberboard. It is basically compressed sawdust and resin. It has zero structural strength on its own. It relies entirely on the subfloor for support. If there is a void under the plank, every time you step on it, the joint flexes. This is called deflection. Eventually, the tongue or the groove will shear off. Once that happens, the floor is toast. Water from a steaming shower will migrate into those broken joints and the floor will swell like a sponge. I have seen people try to use thick underlayment to hide these dips. That is a rookie mistake. Too much cushion actually makes the problem worse. It increases the range of motion in the joint. You want a firm, flat base. That is why we use self-leveling underlayment. We are talking about calcium aluminate cements that flow like water and dry as hard as granite. This creates a monolithic surface that supports the plumbing and the flooring simultaneously. If the floor is level, the shower pan sits flat. If the shower pan sits flat, the drain stays aligned. It is all connected.
The chemical reality of modern adhesives
Modern flooring adhesives rely on a precise chemical bond that is easily disrupted by improper subfloor pH levels or excessive moisture vapor transmission. When you are installing a floor after fixing a plumbing issue, you have to look at the concrete. New concrete is highly alkaline. It has a pH of twelve or thirteen. Most adhesives will emulsify if they touch concrete with a pH higher than nine. You are basically turning your glue into soup. This is why we use a pH test kit before every job. We also look at the moisture vapor transmission rate. Concrete looks solid, but it is a porous material. It is a forest of microscopic capillaries. Water is constantly being pushed up through the slab by hydrostatic pressure. If you seal that slab with a non-breathable flooring like vinyl or laminate without a proper moisture barrier, you are trapping that water. It will build up until it destroys the bond or starts growing mold. In a bathroom environment, this is amplified. The humidity from the shower permeates the air and settles into the floor. If you have a carpet install in an adjacent bedroom, that carpet acts as a giant wick. It pulls the moisture out of the bathroom and traps it in the padding. This is why you smell that musty odor. It is not the carpet; it is the science of the subfloor being ignored.
| Material Type | Moisture Resistance | Janka Hardness | Ideal Environment |
|---|---|---|---|
| Solid White Oak | Low | 1360 | Living Areas |
| Engineered Maple | Medium | 1450 | Basements |
| Waterproof Laminate | High | N/A | Kitchens |
| Porcelain Tile | Extreme | N/A | Showers |
The one eighth inch that ruins everything
Precision measurements are the difference between a lifetime floor and a failed renovation that requires a complete tear-out. I have seen installers think that a small hump in the plywood is fine because they are putting down a thick carpet. They are wrong. Even with a carpet install, a hump in the subfloor will cause premature wear on the fibers. It creates a high point where the foot traffic grinds the carpet against the subfloor like sandpaper. In a bathroom, if the floor leveling is off by even a tiny bit, the water will find the low spot. Water follows gravity with zero exceptions. If your subfloor slopes toward the wall instead of the drain, you are going to have rot in your baseboards within a year. This is why I am a stickler for the NWFA and TCNA standards. They are not suggestions. They are the rules of the game. I have walked off jobs where the contractor refused to let me grind the floor. I won’t put my name on a failure. If I see a gurgling drain and a wavy floor, I know exactly what is happening. The house is shifting and the installer didn’t compensate. You need to use a primer before you pour your leveler. The primer seals the pores of the wood or concrete so the leveler doesn’t lose its water too fast. If it loses water too fast, it won’t flow. It will just sit there in a clump. You need to mix it at exactly six hundred RPM to avoid whipping air into the mix. Air bubbles are weak points. A floor is a structural engineering challenge, not a decorative choice.
“Subfloor preparation is not an optional step; it is the fundamental basis of all structural finish work.” – NWFA Professional Guidelines
Essential steps for a stable shower environment
Ensuring a quiet and functional bathroom requires a systematic approach to both the plumbing and the structural flooring components. You cannot address one without the other. If you are dealing with a gurgle, start by checking the vent on the roof. Birds love to build nests in them. If the vent is clear, look at the P-trap. If the trap is clear, you are looking at a slope issue. Here is my checklist for a proper bathroom floor prep. First, strip it down to the bare subfloor. Second, check the joist spacing. If you have sixteen-inch centers, you need at least three-quarters of an inch of subfloor. Third, use a moisture meter. If the wood is over twelve percent, stop. You need to dry it out. Fourth, apply a high-quality primer. Fifth, pour your self-leveling compound and use a spiked roller to release the air. This process ensures that your showers stay leak-free and your drains stay quiet. We are looking for a surface that is like glass. Once you have that, your laminate or tile will last forever. Don’t be the guy who thinks the baseboard will hide the gap. The gap is where the air goes, and the air carries the moisture. Treat every floor like it is the most important part of the house, because it is. It is the only part of the house you are in constant physical contact with. If it is loud, cold, or bouncy, you will hate it. If it is flat, solid, and quiet, you won’t even notice it. That is the mark of a master installer.
- Inspect the roof vent for obstructions that cause vacuum pressure.
- Verify the subfloor slope is a minimum of one quarter inch per foot.
- Test the concrete slab for moisture vapor transmission using a calcium chloride kit.
- Ensure the expansion gap at the perimeter is at least one quarter inch for laminate.
- Use a transition strip that allows for independent movement between rooms.