The ‘Blue Tape’ Method for Getting Perfectly Straight Grout Lines in Your Shower Niche
The subfloor secret that haunts every shower niche
Professional shower niche installation requires absolute substrate stability and precision alignment to prevent grout cracking. Most guys skip the leveling compound. They think the underlayment will hide the dip. It won’t. I spent three days grinding concrete on a job last month just so the floor wouldn’t click like a castanet. That same lazy attitude is what kills a shower niche. You think you can just eyeball a grout line in a tight corner. You can’t. Not without the tape. If your substrate is not perfectly plumb and level, your grout lines will betray you the moment the first bucket of water hits that tile. A niche is a high-stress area where water, gravity, and thermal expansion meet. If you do not treat it like a structural engineering project, you are just waiting for a leak. Most installers focus on the color of the tile. They should be focusing on the deflection of the backer board and the chemical bond of the thin-set. I have seen fifteen thousand dollar walnut floors cup because of humidity. I have seen shower niches crumble because the installer thought a level was a suggestion. This guide is about the reality of the work. It is about the grit and the precision required to make a grout line look like it was laser-cut into the wall.
The physics of the niche wall and substrate preparation
Shower niche structural integrity depends on a rigid substrate and a waterproof membrane that prevents moisture from reaching the wall studs. Before you even think about the blue tape, you must address the floor leveling and wall plumbness. If the floor is out of level, the entire wall assembly is compromised. In wet areas, you must use a high-performance thin-set that meets ANSI A118.15 standards. This provides the shear strength necessary to hold tile in a vertical orientation without slipping. I use a moisture meter on every single job. If the subfloor is holding more than four percent moisture, I do not lay a single tile. The niche itself must be sloped toward the shower floor. A quarter-inch per foot is the standard. This ensures that water does not pool at the grout lines. Pooling water leads to efflorescence, which is the white, crusty mineral deposit that ruins the aesthetic of your tile. I have seen homeowners blame the grout when the real culprit was the lack of slope on the niche shelf.
“A floor is only as good as the subfloor beneath it; deflection is the enemy of every joint.” – Master Flooring Axiom
Why your grout lines look like a zig zag
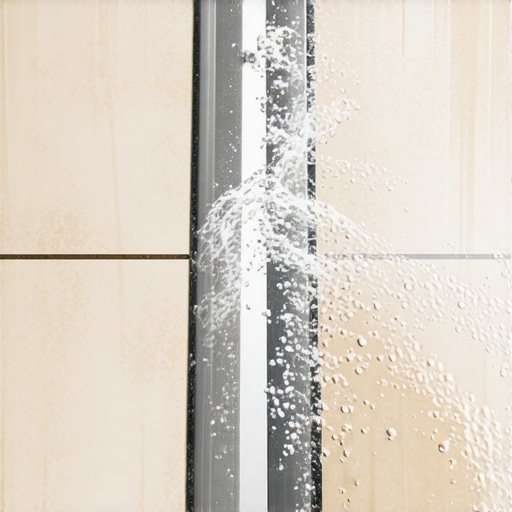
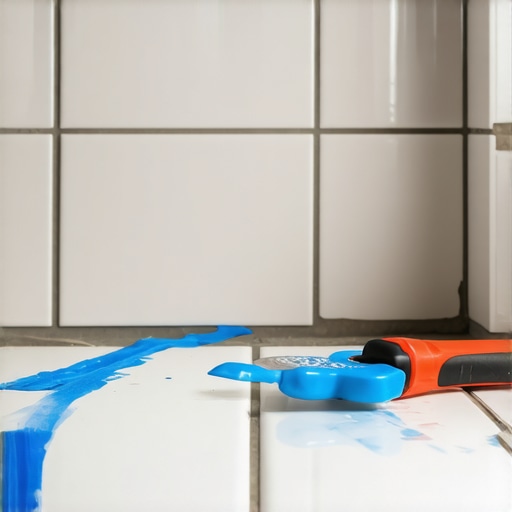
Grout line misalignment in shower niches usually stems from poor tile layout and the failure to account for tile thickness at the corners. When you wrap a tile into a niche, you are dealing with three planes of movement. If your thin-set is too thick, the tile will swim. If it is too thin, it will not bond. The blue tape method provides a physical stop and a visual guide for your grout float. It prevents the grout from bleeding into areas where it does not belong. This is especially important with high-contrast grout. If you are using black grout with white subway tile, every mistake is a permanent scar on the job. The tape creates a clean break. It allows you to pack the joint tight without smearing the face of the tile. I see guys trying to clean as they go. They end up washing out the pigment from the grout with too much water. A soggy grout joint is a weak grout joint. It will shrink and crack within six months. You want a dry pack. You want a clean edge. The tape is the only way to get that edge consistently across the entire niche.
The blue tape procedure step by step
Executing the blue tape method involves masking the edges of the niche before applying grout to ensure sharp transitions and minimal cleanup. First, you must let your thin-set cure for at least twenty-four hours. Do not rush this. If the thin-set is still off-gassing, your tape will not stick. Use a high-quality painter’s tape with a medium tack. Run the tape exactly along the edge of the tile where the niche meets the main wall. Do not overlap the joint. The goal is to leave the grout channel completely exposed while protecting the tile face. Once the tape is down, apply your grout using a hard rubber float. Push the grout into the joint at a forty-five-degree angle. This ensures there are no voids behind the surface. Voids are where mold starts. After the grout has set for about ten minutes, pull the tape at a sharp angle. This shears the grout and leaves a crisp line. If you wait too long, the grout will bond to the tape and you will pull the grout out of the joint. It is a matter of timing and feel. It is the kind of thing you only learn after doing it five hundred times.
| Grout Type | Water Resistance | Flexibility | Best Use Case |
|---|---|---|---|
| Sanded Grout | Moderate | Low | Floor joints over 1/8 inch |
| Unsanded Grout | Moderate | Low | Wall joints under 1/8 inch |
| Epoxy Grout | High | High | Shower floors and niches |
| High-Performance Cement | High | Moderate | General wet areas |
The chemistry of thin-set and moisture barriers
Modified thin-set adhesives utilize polymers to increase bond strength and allow for slight movements in the substrate without de-bonding. You cannot use standard mastic in a shower. It will re-emulsify and turn back into mush. I only use a premium, large-format tile mortar even for small niche tiles. Why. Because it has less shrinkage. When mortar shrinks, it pulls the tile. This creates tension in the grout lines. That tension leads to hairline fractures. In my years of carpet install and laminate work, I have learned that the bond is everything. Whether it is a tack strip or a chemical adhesive, the preparation of the surface determines the lifespan of the floor. In a shower, you are also fighting vapor pressure. If you do not have a continuous moisture barrier behind the niche, the studs will swell. That swelling will pop your tiles off the wall. I use a liquid-applied membrane over the entire niche area. It is like a rubber suit for the house. It is the only way to sleep at night knowing the job won’t fail.
“Substrate preparation is ninety percent of the installation; the tile is merely the finishing touch.” – Master Flooring Axiom
The checklist for niche perfection
- Verify the niche shelf has a 1/4 inch slope toward the shower drain.
- Ensure all backer board joints are taped and thin-setted with alkali-resistant mesh.
- Check that the niche is framed into the studs with no movement or deflection.
- Apply a minimum of two coats of liquid waterproofing membrane.
- Layout tile to avoid small slivers or ‘dead’ spots in the corners.
- Use blue tape to mask the face of the tile before grouting.
- Pack grout joints fully to eliminate air pockets and potential mold growth.
Structural floor leveling requirements for wet areas
Floor leveling in bathrooms is a prerequisite for a successful shower installation because it ensures the drainage system functions as designed. You cannot have a flat floor in a shower. You need a slope. But outside the shower, the floor must be dead level. If your bathroom floor has a dip, the tile will lippage. Lippage is when one edge of a tile is higher than the adjacent tile. It is a trip hazard and it looks like amateur work. I use a self-leveling underlayment on every bathroom remodel. I prime the subfloor first. If you do not prime, the wood or concrete will suck the moisture out of the leveler too fast and it will crack. It is all about the chemistry. You want a smooth, monolithic surface. This provides the base for your waterproofing and your tile. When the floor is right, the walls go up easier. When the walls are plumb, the niche is easy to tile. It is a chain of events. One link breaks and the whole project is trash.
The final word on niche durability
Long-term durability in a shower niche is achieved through a combination of high-quality materials and rigorous adherence to installation standards. Do not listen to the people who say you can just caulk the corners. Caulk is a maintenance item. It fails. Grout is structural. When you use the blue tape method, you are ensuring that the grout is doing its job. You are protecting the edges of the tile from chipping. You are preventing water from getting behind the assembly. It is about the pride of the craft. I have seen guys rush through a niche in an hour. It takes me four. But my niches do not leak. My grout lines do not look like a snake crawling up a wall. You have to respect the materials. You have to respect the physics of the water. If you do that, the floor will last fifty years. If you don’t, you’ll be calling me in two years to rip it out and start over. And I’ll charge you double because I’ll have to fix your subfloor first. That is the reality of the trade. Keep your tools clean and your tape straight.