The Hidden Reason Your Shower Floor Puddles Near the Drain
The phantom pool in your shower stall
A shower floor that puddles near the drain is almost always caused by a failure in the subfloor slope or a blockage of the weep holes within the drain assembly. While many homeowners blame the tile, the reality is a structural or mechanical error deep within the mortar bed. I spent three days grinding concrete on a job last month just so the floor wouldn’t click like a castanet, and that same level of obsessive detail is required for shower pans. Most guys skip the leveling compound and they think the underlayment will hide the dip. It won’t. I have seen countless showers where the installer didn’t understand the difference between the primary slope and the secondary slope. When you see standing water, you are looking at a fundamental defiance of the laws of gravity and fluid dynamics. Water is heavy. It is also lazy. It will find the lowest point and stay there until it evaporates or rots your framing. If your shower has a puddle, the installer likely built a flat spot or a birdbath into the mud bed before the first tile was even buttered. This is not just a cosmetic nuisance. It is a sign of impending microbial growth and potential structural decay. I once walked into a house where the subfloor had actually softened because the trapped water had no path to the drain. The mechanic with sawdust under his nails knows that gravity is the only tool that never lies.
The structural lie of the level subfloor
Subfloor deflection and improper joist spacing create the foundation for shower puddling by allowing the mortar bed to settle unevenly over time. A floor is a performance surface. It must handle the weight of the water, the tile, the mortar, and the human standing on it without moving even a fraction of an millimeter. Most residential joists are designed for L/360 deflection, but for stone or heavy tile, you really want L/720. If your joists flex, your shower pan becomes a moving target. I have seen installers try to level a shower on a bouncy subfloor using nothing but extra thinset. This is a recipe for disaster. The thinset will crack and the puddle will form as the center of the pan sags under its own mass. You must ensure the plywood or OSB is glued and screwed to the joists with zero play. Even a 1/8 inch dip in the wooden substrate will translate through the pre-slope and the liner. The physics of weight distribution dictate that the water will always find the path of least resistance. In a shower, that path should be a straight line to the drain, but a sagging subfloor turns that line into a curve. I always check the floor with a 10-foot straight edge before I even think about mixing mud. If the floor is out of level, the shower is doomed before the plumber even shows up. Do not trust a subfloor that hasn’t been verified by a laser. The eye is easily fooled by long lines and shadows.
“A floor is only as good as the subfloor beneath it; deflection is the enemy of every joint.” – Master Flooring Axiom
The physics of the weep hole blockage
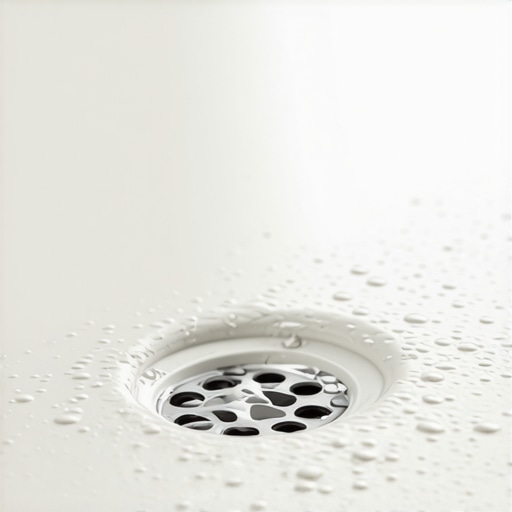
Weep holes are the secondary drainage system that allows water trapped in the mortar bed to exit through the drain assembly. When these tiny holes are clogged by thinset or accidental debris, the water has nowhere to go. It saturates the mud bed until the entire floor becomes a sponge. This is the hidden reason for the puddle. You might see water on top of the tile, but the real mess is beneath it. Capillary action pulls water through the grout joints and into the porous cement bed. In a properly built shower, this water hits the waterproof liner and flows down the pre-slope toward the weep holes. If those holes are plugged, the water builds up hydrostatic pressure. Eventually, the mortar bed stays so wet that the surface water cannot drain away. It is like a bathtub that is already full. I have dismantled showers where the weep holes were covered in plastic or smothered in a thick layer of unmodified thinset. It is a rookie mistake that costs thousands of dollars to fix. The chemistry of the bond matters, but the mechanical path for water is superior. You need to use pea gravel or a dedicated weep hole protector to keep those channels open. Without them, your shower is just a slow-motion flood waiting to happen. The water is trapped in a dark, warm environment which is the perfect breeding ground for mold. You will smell the problem before you see the structural failure. It smells like a damp basement that never dries out.
The chemistry of the mortar bed and pre-slope
The pre-slope is the most critical layer of a shower installation because it dictates the direction of water flow beneath the waterproof liner. Many installers skip the pre-slope and put the liner directly on the flat subfloor. This is a violation of TCNA standards and a guaranteed way to create a puddle. When the liner is flat, the water that gets through the grout just sits there. It does not move toward the drain. It stays in the mud bed until it becomes stagnant. I use a dry-pack mortar consisting of one part portland cement to four parts sand. It needs to be the consistency of a snowball. If it is too wet, it shrinks. If it is too dry, it lacks structural integrity. You have to pack it tight. The goal is a consistent 1/4 inch per foot slope toward the drain. This requires precision and a lot of patience. You cannot rush the geometry of a shower pan. I have spent hours screeding a single pan to ensure there are no humps or valleys. A valley is where a puddle is born. If your screed is off by even a few degrees, you are creating a permanent water feature in someone’s bathroom. The molecular bond of the cement is only effective if the physical shape of the installation allows for drainage. Water is the universal solvent, and over time, it will break down the chemistry of your mortar if it is allowed to sit. This leads to the tile popping off or the grout turning to mush. You have to respect the moisture. You cannot fight it, you can only guide it.
| Material Type | Water Absorption Rate | Cure Time Required | Structural Density |
|---|---|---|---|
| Modified Thinset | Low | 24 Hours | High |
| Dry-Pack Mortar | Medium | 72 Hours | Medium |
| Epoxy Grout | Zero | 12 Hours | Very High |
| Cementitious Grout | High | 48 Hours | Low |
The ghost in the expansion gap
Expansion gaps at the perimeter of a tile installation allow for the natural movement of the building without causing tiles to tent or crack. In a shower, these gaps are often filled with hard grout instead of flexible silicone caulk. When the house settles or the temperature changes, the tile has nowhere to go. It pushes against the walls. This pressure can cause a slight lift in the center of the floor or near the drain. Even a microscopic lift creates a lip that traps water. I have seen showers where the puddle was caused solely by the tile being wedged too tight against the studs. You need a 1/8 inch gap around the entire perimeter. That gap must be filled with 100 percent silicone. Silicone is the only thing that will expand and contract while maintaining a waterproof seal. Grout is rigid. It will crack or it will force the tile to buckle. Most people think more grout is better, but in a wet environment, flexibility is your best friend. The physics of thermal expansion are unavoidable. In the winter, the wood framing shrinks. In the summer, it expands. Your shower floor is a living thing that moves with the seasons. If you don’t give it room to breathe, it will ruin your pitch. I always leave the perimeter open and clean it out with a shop vac before I apply the caulk. Any bit of grit or dried mortar in that gap will act like a wedge. It is the small details that keep the water moving toward the drain and away from your framing.
- Verify the pre-slope is at least 1/4 inch per foot before installing the liner.
- Clean all debris from the drain’s weep holes and use a protector.
- Ensure the subfloor meets L/720 deflection standards for heavy tile.
- Use a 100 percent silicone sealant for all change-of-plane joints.
- Perform a 24-hour flood test to check for leaks and low spots.
The 1/8 inch that ruins everything
A deviation of just 1/8 inch in the surface of the tile is enough to create a persistent puddle that will not drain. This often happens when the installer uses tiles that are too large for the slope of the pan. If you use a 12×24 inch tile on a four-way pitch, the tile cannot conform to the curve. You end up with lippage. The edges of the tile stick up and act like tiny dams. This is why I always recommend mosaic tiles for shower floors. Mosaics are small enough to follow the contours of the mud bed. If a client insists on large format tile, you have to use a linear drain. A linear drain allows for a single-plane slope, which eliminates the need for complex geometry. But even then, if your level is off by a hair, the water will pool in the corners. I once spent a whole day grinding down a high spot in a marble floor because the installer didn’t check his work with a spirit level. He thought the thinset would even it out. It never does. Thinset is for bonding, not for leveling. While most people want the thickest underlayment, too much cushion actually causes the locking mechanisms on laminate or LVP to snap under pressure, and the same principle applies to thinset. Too much of it creates a soft spot that will eventually fail. You want the thinnest, most consistent layer possible. The geometry of the floor must be perfect before the first piece of tile is set in the mortar. If the mortar bed is wrong, the tile will be wrong. If the tile is wrong, the water will stay. It is a simple chain of cause and effect. You cannot argue with a puddle. It is the ultimate proof of a failed installation.
“Waterproof membranes are not a substitute for proper drainage geometry; they are merely the last line of defense.” – TCNA Handbook Wisdom
The chemistry of the bond
Modern thinsets use polymers to create a chemical bond that is far superior to the mechanical bonds of the past. However, this chemistry only works if the environment is controlled. If you have standing water because of a puddle, the moisture eventually gets behind the tile and weakens that chemical bond. Over years of saturation, the polymers can break down. This is why you see tiles starting to wobble or grout lines turning into a sandy mess. The water in the puddle is not just sitting there; it is actively attacking the structure of the installation. I prefer using high-quality modified thinsets that are specifically rated for submerged environments. Even if it is just a shower floor, you should treat it like a swimming pool. The hydrostatic pressure of the water sitting in a dip can force moisture deep into the mortar bed. This leads to efflorescence, which is those white, salty stains you see on grout lines. It is the minerals in the concrete being leached out by the constant presence of water. You can scrub them away, but they will keep coming back as long as the puddle remains. The only way to stop the chemistry from failing is to fix the physics of the slope. You have to remove the tile, fix the low spot in the mud bed, and re-install. It is a painful and expensive process, but it is the only way to save the shower. Don’t let a lazy installer tell you that a little water is normal. It isn’t. A dry shower floor is the hallmark of a master. I don’t care how pretty the tile is if it doesn’t drain. In my world, a floor that holds water is a failed floor. I have spent 25 years making sure my floors are as dry as a desert ten minutes after the shower is turned off.