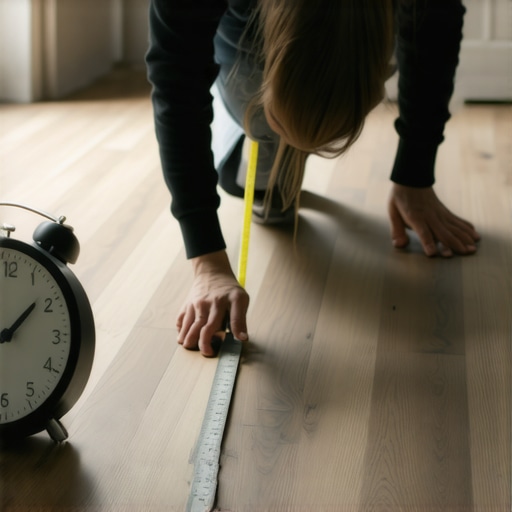
The 24-Hour Wait Rule for Walking on New Laminate
Look, I have sawdust in my boots and a moisture meter that has seen more job sites than most people have seen grocery stores. I have spent twenty five years on my knees making sure planks line up, and if there is one thing that drives me absolutely up the wall, it is a homeowner who thinks they know better than the laws of physics. Homeowners always ask why their laminate is buckling or why the joints are starting to peak like a mountain range after only six months. Usually, it is because they treated the floor like a finished product the second it clicked into place. They lock the floor under a heavy refrigerator or start walking on it before the locking mechanisms have had a chance to breathe. I saw it last Tuesday on a job where a beautiful wide-plank install was ruined because the owner decided to host a dinner party the same night we finished. The floor needs time. It is not just a piece of plastic; it is a structural system that depends on equilibrium.
The physics of the twenty four hour wait
The 24-hour wait rule for laminate flooring is a mandatory period that allows the floating floor system to settle into its mechanical equilibrium across the subfloor. During this window, the high-density fiberboard (HDF) core adjusts to the local ambient humidity and static load of the room. This prevents joint failure and plank separation caused by premature kinetic energy application. Laminate is a floating floor. It is not nailed. It is not glued. It sits on a thin layer of underlayment. When you first install it, the planks are in a state of tension. The tongues and grooves are tightly wedged together, but they have not yet found their natural seat. If you walk on them immediately, your body weight acts as a concentrated force that can snap the delicate HDF lips before they have flattened against the padding. This is especially true if you have a slight dip in the subfloor that you thought the underlayment would hide. It will not hide it. The floor will flex, the joint will stress, and you will hear that dreaded clicking sound for the next ten years.
Why your subfloor is lying to you
Floor leveling is the most ignored step in a DIY project, but it is the difference between a floor that lasts decades and one that fails in weeks. A subfloor must be flat within 3/16 of an inch over a 10-foot radius to ensure that the laminate planks do not suffer from excessive deflection. If the subfloor has a depression, the laminate will bridge that gap, creating an air pocket that leads to locking mechanism fatigue. I spent three days grinding concrete on a job last month just so the floor would not click like a castanet. People think they can just throw down some foam and it will fix the world. It won’t. If your subfloor is concrete, you are dealing with a porous sponge that is constantly exhaling moisture. Even if it feels dry to the touch, that slab is emitting water vapor. If you do not use a 6-mil poly film as a vapor barrier, that laminate core is going to suck up that moisture and expand. This expansion happens on a cellular level. The wood fibers inside the HDF core absorb the water molecules, causing the lignin to swell. If you are walking on the floor while this swelling and settling is happening, you are essentially grinding the joints against each other.
“A floor is only as good as the subfloor beneath it; deflection is the enemy of every joint.” – Master Flooring Axiom
The ghost in the expansion gap
Expansion gaps are the perimeter spaces required around the room edges to allow laminate to expand and contract without buckling. These gaps, typically 3/8 of an inch, must be maintained at all vertical obstructions including doorframes and cabinets. A floor is a living thing. It grows when it is humid and shrinks when the heater kicks on in the winter. If you jam the laminate tight against the drywall, the floor has nowhere to go. It will find the weakest point, which is usually a joint in the middle of the room, and it will pop up like a tent. This is why the 24-hour wait is so important. The floor needs to move. It needs to find its center. If you put heavy furniture on it or walk on it too early, you are pinning the floor down. You are essentially creating a fixed point that prevents the rest of the floor from moving. This is the same reason you never install a kitchen island on top of laminate. You are killing the floor’s ability to breathe.
Laminate in the proximity of showers
Moisture protection in wet areas like bathrooms or near showers requires perimeter sealing with 100% silicone sealant to prevent top-down water infiltration. While many modern laminate products are marketed as waterproof, the HDF core remains susceptible to hydrostatic pressure if water reaches the unsealed edges. If you are installing laminate near showers, that 24-hour wait rule is even more critical. You need to ensure that your silicone work has fully cured before any foot traffic disturbs the planks. If the planks move while the silicone is wet, the seal is broken. Once that seal is gone, a single splash from the shower will find its way into the core of the plank. It will swell, the edges will turn dark, and the floor is ruined. I have seen guys try to skip the transition strips near bathrooms. They think a tight fit is enough. It is not. You need a T-molding or a transition that allows for movement while providing a dam against water.
The transition from carpet install to hard surfaces
Transition strips and T-moldings are the structural bridges between different flooring types, such as a carpet install meeting a laminate surface. These components must be mechanically fastened to the subfloor and not the floating floor itself to allow for independent movement. When you move from a soft carpet install to a hard laminate floor, the height difference is often significant. You might have a 1/2 inch pad and a plush carpet next to a 7mm laminate. This creates a trip hazard and a point of failure for the laminate edge. You have to use a reducer or a transition strip. But here is the trick. Do not nail the transition through the laminate. If you do, you have just anchored the floating floor. Now, when the floor tries to expand, it will pull against that nail and snap the tongue. This is another reason to wait 24 hours. Let the floor settle into its final position relative to the carpet edge before you install the final trim pieces. If you rush it, your gaps will be uneven and your trim will look like a hack job.
Wait times by material type
| Material Type | Acclimation Time | Wait Time Before Foot Traffic | Humidity Tolerance |
|---|---|---|---|
| Standard Laminate | 48 Hours | 24 Hours | 30% to 50% |
| Waterproof LVP | 0 to 24 Hours | Immediate | 25% to 75% |
| Engineered Wood | 72 Hours | 24 to 48 Hours | 35% to 55% |
| Solid Hardwood | 7 to 14 Days | Immediate (Pre-finished) | 35% to 50% |
The 1/8 inch that ruins everything
Precision measurement of subfloor flatness is the primary predictive factor for long term laminate performance. A deviation of even 1/8 of an inch can cause vertical movement in the locking system, leading to micro-fractures in the resin bond of the HDF core. Most people want the thickest underlayment they can find. They think more cushion is better. That is a lie. Too much cushion actually causes the locking mechanisms on laminate and LVP to snap under pressure. It is like trying to build a house on a mattress. You want a high-density, thin underlayment that supports the joint. If the underlayment is too soft, the tongue will act as a lever every time you step on the plank. Eventually, that lever will break. This is why the 24-hour wait is so vital. You need to see how the underlayment compresses under the weight of the floor itself before you add the variable of human weight. While you are waiting, keep the room temperature between 65 and 75 degrees. If the room is too cold, the plastic wear layer becomes brittle. If it is too hot, the core expands too fast. You want a slow, steady acclimation.
- Verify that all expansion gaps are clear of debris or spacers before walking.
- Ensure the room temperature has been stable for at least 48 hours.
- Check that no heavy appliances are pinning the floor in one corner.
- Confirm that all transition strips are secured to the subfloor and not the laminate.
- Use a straight edge to ensure no planks have shifted or peaked during the night.
“The internal bond strength of high-density fiberboard is the only thing standing between a beautiful floor and a pile of scrap wood.” – NWFA Technical Manual
The molecular reality of adhesive chemistry
Chemical bonding in laminate accessories involves cyanoacrylates or polyurethane adhesives that require a specific curing window to reach full tensile strength. If you have used any glue for your miter joints or stair treads, the 24-hour rule is not a suggestion; it is a chemical requirement. When you apply a polyurethane adhesive, it reacts with the moisture in the air to create a cross-linked bond. If you walk on those stairs or joints before that cross-linking is complete, you are shearing the bond while it is still in a semi-liquid state. You might not see the failure today, but in three months, those joints will open up and collect dirt. It will look terrible and it will be your fault because you could not wait one day. I have seen people try to use blue painter’s tape to hold joints together while they walk on it. Tape does nothing against the 150 pounds of pressure a human foot exerts. The pressure of a footstep is concentrated into a small area, creating a PSI (pounds per square inch) that can easily exceed 500 at the heel. That is enough to crush the delicate foam cells of a cheap underlayment and permanently deform the tongue of the laminate. Give it 24 hours. Let the floor become a single, unified mass. Your patience is the most important tool in your toolbox. If you can’t wait a day, you shouldn’t be installing the floor.