How to Repair a Chipped Laminate Plank Without Replacing the Whole Row
The microscopic anatomy of a laminate wound
Repairing a chipped laminate plank requires understanding the melamine resin layer and the High-Density Fiberboard core. You must fill the void with a matching acrylic or wax resin, level the surface with a plastic scraper, and seal the repair to prevent moisture from causing localized fiberboard swelling.
I have spent twenty five years on my knees with a moisture meter and a level. I have seen the same mistake repeated a thousand times. Homeowners always ask why their waterproof vinyl or laminate is buckling or chipping. Usually, it is because they locked it under a heavy kitchen island, killing the floor ability to breathe and move. Laminate is a floating floor. It is a biological product trapped in a plastic suit. When you drop a heavy cast iron skillet or a rogue screwdriver, you are not just making a cosmetic mark. You are breaching the hull. You are exposing the HDF core, which is essentially compressed sawdust and glue, to the elements. Once that seal is broken, the clock starts ticking before ambient humidity turns that tiny chip into a swollen, peaking disaster. I have walked into jobs where a single chip turned into a four foot bubble because the homeowner thought a bit of wood glue would fix it. It will not. You need to understand the physics of the bond and the chemistry of the filler.
The photographic lie of the surface layer
Laminate flooring is a multi-layer composite consisting of a wear layer, a decorative image, and a structural core. Repairs focus on restoring the integrity of the aluminum oxide wear layer to stop hydraulic pressure from forcing water into the absorbent cellulose core during routine cleaning.
People call it wood. It is not wood. It is a photograph of wood glued to a board. The top layer is usually a melamine resin impregnated with aluminum oxide. This is what gives the floor its AC rating. When a chip occurs, you have literally punched through the armor. The decorative paper is thin, often only a few mils thick. Beneath that is the HDF. The HDF is the engine of the plank. It provides the density and the locking mechanism. However, HDF is hygroscopic. It loves water. If you live in a place like Houston or New Orleans, the humidity alone can enter a chip and cause the fibers to expand. This expansion is permanent. You cannot un-swell a laminate core. This is why immediate surgical repair is mandatory. You are not just fixing a look. You are preventing a structural failure of the entire row.
“A floor is only as good as the subfloor beneath it; deflection is the enemy of every joint.” – Master Flooring Axiom
The chemistry of wax pencils and filler resins
Successful laminate repair utilizes hard wax sticks or specialized acrylic putties that mimic the refractive index of the original wear layer. These materials must be applied at the correct temperature to ensure a chemical bond with the surrounding melamine without melting the decorative paper.
There are two professional ways to handle this. You have the soft wax method and the hard wax burn-in method. Soft wax is for people who do not care if the repair lasts through a deep cleaning. Hard wax is what the pros use. It requires a battery operated melting tool. You have to understand color theory. You never use just one color. You look at the grain of the oak or walnut. You see the highlights and the lowlights. You melt a bit of the dark, then a bit of the light, and you swirl them in the chip like a painter. The goal is to recreate the visual depth of the wood grain. If you just slap a blob of brown putty in there, it will look like a blob of brown putty. It will catch the light differently. It will scream at you every time you walk past it. I once spent four hours on a single plank in a high end gallery because the light hit it at a perfect forty five degree angle. If the texture is not right, the repair is a failure.
| Repair Material | Durability Level | Moisture Resistance | Complexity |
|---|---|---|---|
| Soft Wax Kit | Low | Moderate | Beginner |
| Hard Wax Burn-in | High | Excellent | Advanced |
| Acrylic Filler | Medium | High | Intermediate |
| Wood Putty | None | Low | Do Not Use |
The thermal expansion trap that causes the chip
Thermal expansion and contraction cycles place immense stress on laminate locking mechanisms, often leading to brittle edges that chip under minimal impact. Maintaining a consistent indoor environment between sixty and eighty degrees Fahrenheit minimizes the risk of structural compromise in the core material.
The physics of the room matter. Laminate expands and contracts based on temperature and humidity. If you do not have a proper expansion gap at the perimeter, the floor has nowhere to go. It builds up internal tension. When that tension reaches a breaking point, the edges of the planks become brittle. A tiny tap that would normally bounce off will suddenly shear off a piece of the wear layer. This is why I always check the baseboards first. If the floor is tight against the drywall, the chip is just a symptom of a larger disease. You can fix the chip, but if the floor is still under tension, a new one will appear three feet away next week. I tell my clients that a floor needs to float like a boat. If you anchor it with heavy furniture or tight moldings, you are asking for the material to shatter.
A step by step guide to the surgical repair
Restoring a laminate plank involves cleaning the site with denatured alcohol, selecting a multi-tonal filler, applying the material with a non-marring tool, and buffing the surface to match the surrounding sheen. This process ensures the repair is flush with the wear layer.
- Clean the chip with a lint-free cloth and denatured alcohol to remove all floor wax and oils.
- Select three colors of repair wax: a base tone, a dark grain tone, and a highlight tone.
- Use a heating tool to melt the base tone into the hole, slightly overfilling the void.
- Introduce the darker tones in thin streaks to mimic the natural wood grain pattern.
- Allow the wax to cool for sixty seconds until it is firm but not brittle.
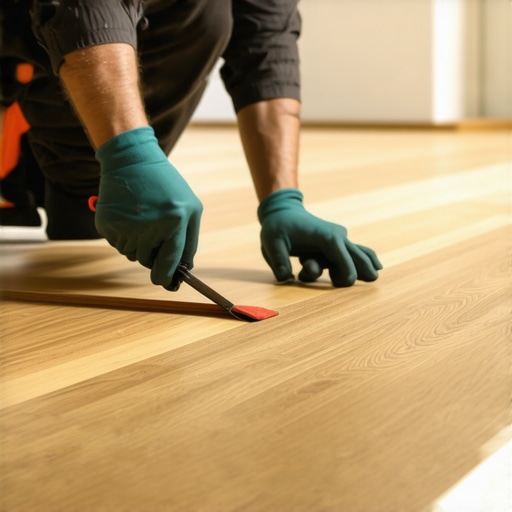
- Level the wax using a plastic leveling tool, scraping in a single direction to avoid scratching the wear layer.
- Buff the area with a scotch-brite pad or a clean cloth to match the matte or gloss finish of the plank.
Precision is everything here. If you use a metal putty knife, you will scratch the surrounding aluminum oxide layer. Now you have a chip and a dozen scratches. Use plastic. Always use plastic. And do not use water to clean the area before you start. You do not want to trap moisture under your repair material. That is a recipe for a rot bubble. I have seen guys try to use wood filler. Wood filler is for baseboards and nail holes. It is porous. It shrinks. It will fall out within a month of foot traffic. You need a resin based solution that hardens into a plastic-like state.
The ghost in the expansion gap
Proper perimeter spacing is the most ignored factor in laminate longevity and chip prevention. A quarter inch gap around the entire room allows the floor to move as a single unit, reducing the vertical shear forces that lead to surface delamination and edge chipping.
I remember a job in Phoenix where the dry heat had shrunk the planks so much that the gaps were showing. The homeowner tried to fill the gaps with caulk. That was a disaster. When the monsoon season hit and the humidity spiked, the floor expanded and had nowhere to go. The planks started jumping out of their tracks. The edges chipped and sheared because the force was so great. You have to respect the material. Laminate is not tile. It is not static. It is a living, moving system. If you ignore the subfloor levelness, you get deflection. Deflection leads to clicking. Clicking leads to the locking joints rubbing against each other. Eventually, the friction wears down the HDF and the surface chips. Most guys skip the leveling compound. They think the underlayment will hide the dip. It will not. I spent three days grinding concrete on a job last month just so the floor would not click like a castanet. If the floor is flat, the chip repair will stay. If the floor is bouncing, your repair will pop out in a week.
“A floor is only as good as the subfloor beneath it; deflection is the enemy of every joint.” – Master Flooring Axiom
Why your subfloor is lying to you
Subfloor irregularities exceeding three sixteenths of an inch over a ten foot span create hollow spots that cause laminate planks to flex. This flexing stresses the top melamine layer, making it significantly more susceptible to impact chipping and joint separation over time.
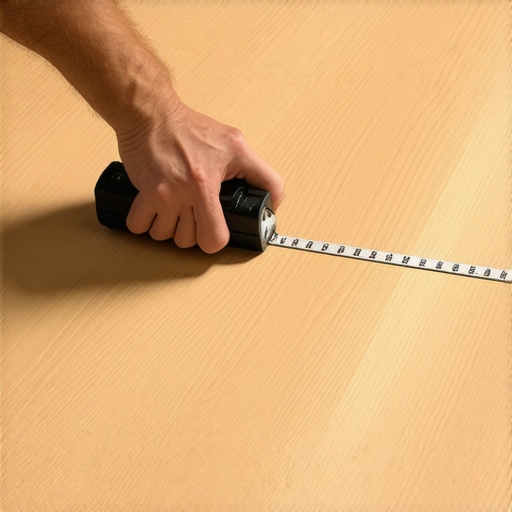
You walk on a floor and you hear that hollow thud. That is the sound of a failure in progress. Every time that plank bends, the wear layer is being stretched. It becomes thin and brittle at the joints. You drop a penny, and the floor chips. You think it was the penny, but it was actually the subfloor. I use a ten foot straight edge on every job. If I see a gap, I fill it with self-leveling underlayment. I do not care if the builder says it is fine. Builders care about speed. I care about the thirty year warranty. If you are repairing a chip in the middle of a room, check the floor for bounce. If it bounces, you might need to inject a specialized floor stabilizer resin through a small hole to fill the void beneath the plank before you fix the surface chip. Otherwise, you are just putting a band-aid on a broken leg.
The one eighth inch that ruins everything
Maintaining a height deviation of less than one eighth of an inch across the repair site is mandatory for a professional finish. Any protrusion will catch on footwear or vacuum cleaners, eventually shearing the repair material away from the laminate core.
When you are leveling your wax or acrylic, you have to be obsessive. Run your fingers over it. If you can feel a ridge, it is too high. A vacuum cleaner with a beater bar will catch that ridge and rip the repair right out. This is why the leveling tool is your best friend. You want that repair to be perfectly flush. If it is a large chip, you might need to do two passes. The first pass fills the bulk of the hole. The second pass handles the fine details and the levelness. It is like bodywork on a car. You do not just slap bondo on and call it a day. You sand, you prep, and you finish. In the world of flooring, your finishing tool is often a piece of denim or a buffing pad. You have to match the sheen. If the floor is a satin finish and your repair is glossy, it will stand out like a sore thumb. I keep a bottle of matte finish sealer in my kit just for this reason. A quick wipe and the repair disappears into the rest of the floor.