Stop Your Carpet Seams from Fraying in High Traffic Hallways
I once walked into a luxury penthouse where a six thousand dollar wool carpet was unraveling at the hallway junction like a cheap sweater because the installer thought a standard iron pass was enough. He ignored the subfloor prep. He ignored the seam sealer. He ignored the physics of lateral shear. I spent three days pulling up the perimeter and re-stretching the entire floor just so the homeowner would not trip on a frayed edge. Most guys skip the leveling compound. They think the underlayment will hide the dip. It won’t. I spent years with sawdust under my nails and the smell of WD-40 on my clothes learning that a floor is only as good as the invisible prep work beneath it. In high traffic hallways, the carpet is not just sitting there. It is under constant attack from the pivot of a foot and the weight of a body. If that seam is not chemically and mechanically locked, it will fail. This is the reality of floor installation that big box retailers never mention.
The structural anatomy of a failed hallway joint
Carpet seams in high traffic areas fail because of lateral shear forces and insufficient adhesive penetration into the primary backing. To prevent fraying, installers must use a thermoplastic seam sealer or a latex-based edge bond to encapsulate the individual yarns. Without this, the friction of foot traffic pulls the fibers out of the latex puddle that holds the carpet together. The hallway is a wind tunnel of movement. Every step creates a micro-shift. If the seam is not perfectly aligned and sealed, those micro-shifts turn into visible gaps and eventually frayed edges. You cannot rely on the heat-bond tape alone. The tape holds the backing, but it does not hold the yarns. You need a chemical bridge between the two pieces of carpet to ensure that the pile remains intact under the pressure of a thousand footsteps. This is where the chemistry of the bond meets the physics of the walk.
Why your subfloor is lying to you
Floor leveling is the most overlooked phase of a carpet install because people assume the pad will cushion any imperfections. A subfloor that is not flat within 3/16 of an inch over 10 feet will cause the carpet to flex unevenly at the seam. This constant flexing acts like a hinge. Eventually, that hinge breaks the adhesive bond of the seam tape. I have seen concrete slabs that looked flat but had a 1/4 inch dip right where the hallway met the bedroom. The installer threw down the carpet, and six months later, the seam was peaking. Peaking happens when the carpet is stretched over a high spot or forced into a low spot. It creates a ridge that the vacuum cleaner eats for breakfast. You must use a high-compression floor leveling compound to create a monolithic surface. If you are working over wood, you need to check for deflection. A bouncy subfloor is a death sentence for any floor covering, including laminate and carpet. You want a surface that is as still as a grave before you even think about rolling out the goods.
“A floor is only as good as the subfloor beneath it; deflection is the enemy of every joint.” – Master Flooring Axiom
The chemistry of the thermoplastic bond
The science of the heat-bond tape is actually quite complex when you look at the polymer chains involved. Most installers use a standard low-melt tape, but for high-traffic hallways, you need a premium tape with a higher concentration of adhesive. The adhesive must reach a specific viscosity to flow into the primary and secondary backing of the carpet. If the iron is too hot, you smoke the adhesive and turn it brittle. If it is too cool, it stays on the surface of the tape and never grabs the carpet. It is a delicate balance of temperature and speed. You are looking for a cohesive failure point where the adhesive is stronger than the carpet itself. When you add a bead of seam sealer to the edge, you are creating a secondary layer of protection. This liquid sealer coats the cut ends of the yarns. It prevents the denier of the yarn from untwisting. Once that yarn untwists, the carpet is gone. You cannot fix it. You can only patch it.
The myth of the waterproof barrier
People love to talk about waterproof laminate or vinyl, but in a hallway that leads to showers or bathrooms, the real issue is moisture migration through the subfloor. If you have a damp crawlspace, that moisture is rising through your plywood and hitting the back of your carpet. It softens the latex that holds the fibers in place. This is why seams in hallways often fray near the bathroom door. The humidity is higher, and the carpet is weaker. You need a moisture barrier even under carpet in these zones. I always recommend a 6-mil poly film if you are over concrete or a specialized breathable underlayment if you are over wood. You have to think about the vapor drive. If you trap moisture under the carpet, the seam sealer will emulsify and the whole thing will fall apart. It is not just about the water you can see. It is about the water you cannot see.
The 1/8 inch that ruins everything
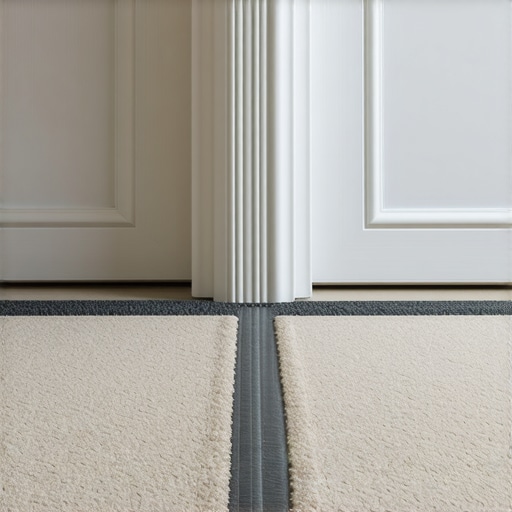
In the world of professional flooring, 1/8 of an inch is a mile. This is especially true at transitions. When a hallway carpet meets a hard surface like laminate or tile in a bathroom, the transition strip must be rock solid. If there is any movement in that transition, the carpet will pull away from the tack strip. This is where the fraying starts. I prefer a Z-bar transition for a clean, professional look. It allows the carpet to be tucked and hammered down, hiding the cut edge completely. Most installers use a cheap silver or gold metal strip with teeth. Those teeth eventually bend, and the carpet pops out. Then you have a raw edge exposed to the world. It looks like garbage and it feels like needles under your feet. Do it right the first time. Use a transition that protects the edge and keeps the tension even across the entire width of the hallway.
| Feature | Standard Install | Architectural Grade |
|---|---|---|
| Seam Tape | Low-melt paper tape | Premium fiberglass reinforced |
| Seam Sealer | Often skipped | Mandatory edge-bond polymer |
| Subfloor Prep | Sweep only | Self-leveling compound used |
| Stretching | Knee kicker only | Power stretcher required |
| Transitions | Metal crimp strips | Z-bar or integrated flush-mount |
The ghost in the expansion gap
Expansion gaps are the lungs of a floor. Even though carpet is flexible, the subfloor and the walls move. If you have laminate in the adjacent room, that floor needs a 1/4 inch gap to breathe. If you bridge that gap with a carpet transition that is nailed into the laminate, you are going to have a bad time. The laminate will buckle, and it will pull the carpet seam right along with it. I have seen entire hallways ruined because the installer did not understand the concept of independent movement. You have to treat every room as its own ecosystem. The hallway is the bridge between these ecosystems. It bears the brunt of the expansion and contraction from the rest of the house. If you do not account for this, the seams will be the first thing to snap.
The power stretcher vs the knee kicker
If an installer shows up to your house with only a knee kicker, send them home. A knee kicker is for positioning carpet. A power stretcher is for installing it. To prevent seams from fraying, the carpet must be under a specific amount of tension. The NWFA and other industry bodies are very clear about this. You need to stretch the carpet 1% to 1.5% in both directions. In a long hallway, that means you are pulling several inches of slack out. If the carpet is loose, it moves when you walk on it. That movement creates friction at the seam. Friction creates heat. Heat breaks down the adhesive. It is a vicious cycle. A power-stretched carpet sits flat and stays put. The seam is under constant, even tension, which actually helps hold it together. It is like the difference between a loose bandage and a surgical stitch.
“Power stretching is not an option; it is a requirement for any carpet installation that is expected to last beyond the warranty period.” – Flooring Industry Standards
The physics of the hallway pivot
Think about how you walk. When you turn a corner in a hallway, you pivot on the ball of your foot. That pivot exerts a massive amount of torque on the carpet fibers. If that pivot point happens to be on or near a seam, you are essentially trying to twist the seam apart. This is why I never put a seam in a doorway or at a T-junction if I can avoid it. You want the seams in the low-impact areas. If the hallway is wider than the 12-foot or 15-foot roll, you have to be strategic. You plan the layout so the heavy traffic stays in the center of the piece, not on the edge. It is like a game of chess with 100-pound rolls of nylon. You have to be three moves ahead of the homeowner’s feet.
Carpet Seam Preservation Checklist
- Verify subfloor flatness with a 10-foot straightedge before starting.
- Apply a consistent bead of latex seam sealer to both cut edges.
- Use a premium heat-bond tape with a high adhesive weight.
- Maintain a consistent iron temperature to ensure deep penetration.
- Use a carpet tractor to press the backing into the molten adhesive.
- Stretch the hallway using a power stretcher to 1% tension.
- Ensure all transitions to laminate or showers are mechanically fastened.
- Avoid placing seams in high-pivot areas or transition points.
The final word on edge integrity
You can buy the most expensive carpet in the world, but if the guy installing it does not understand the chemistry of the sealer and the physics of the stretch, it is a waste of money. I have spent 25 years watching floors fail because people wanted to save a few bucks on the prep. They skip the leveling. They skip the sealer. Then they wonder why their hallway looks like a disaster zone after two years. Flooring is a structural engineering challenge. It is the only part of your house that you are in constant physical contact with. Treat it with the respect it deserves. Seal your seams. Level your floors. Stretch it until it screams. That is how you build a floor that lasts a lifetime. Do not let a lack of prep ruin your home. The details are not just details. They are the floor. If you follow these steps, your seams will stay tight, your carpet will stay flat, and you will not be calling me in three years to fix a mess that could have been avoided with a ten dollar bottle of sealer and a little bit of pride in the work.
{“@context”:”https://schema.org”,”@type”:”HowTo”,”name”:”How to Prevent Carpet Seam Fraying”,”step”:[{“@type”:”HowToStep”,”text”:”Level the subfloor using a high-compression compound to prevent flexing.”},{“@type”:”HowToStep”,”text”:”Apply a bead of thermoplastic or latex seam sealer to the edges of the carpet.”},{“@type”:”HowToStep”,”text”:”Use a power stretcher to achieve 1% tension across the hallway width.”},{“@type”:”HowToStep”,”text”:”Use a Z-bar transition at all hard surface interfaces to protect cut edges.”}]}