How to Stop Carpet-to-Tile Transitions from Tripping Your Guests
The ghost in the expansion gap
Most guys skip the leveling compound. They think the underlayment will hide the dip. It won’t. I spent three days grinding concrete on a job last month just so the floor wouldn’t click like a castanet. That job was a nightmare because the previous contractor thought a little bit of extra padding would mask a half inch drop. It did not. Instead, it created a trampoline effect that eventually snapped the tongues off the adjacent planks. When you are dealing with a transition between a soft surface like carpet and a hard surface like tile, that dip becomes a weapon. You are not just laying down materials. You are managing a structural intersection where two different physics profiles meet. One side compresses. The other side resists. If the subfloor is not dead level, you are building a trip hazard that will eventually lead to a lawsuit or a broken hip.
“A floor is only as good as the subfloor beneath it; deflection is the enemy of every joint.” – Master Flooring Axiom
The hidden lip at the threshold
Vertical offsets are the primary cause of transition failure in residential settings where different flooring heights collide. When you install a thick porcelain tile over a 1/4 inch cement board, the finished height often sits 3/4 of an inch above the subfloor. If the carpet installer just pulls the carpet up to a standard tack strip, you end up with a steep cliff. Guests do not see this. They feel it when their toe catches the edge of the tile. This is why floor leveling is not optional. You must feather out the transition area over at least three feet to create a slope that the human eye cannot detect but the foot can navigate. I have seen beautiful showers ruined because the bathroom tile sat an inch higher than the bedroom carpet. It looks amateur and it feels worse. You need to use a high compression strength patching compound to bridge that gap. Do not use the cheap gypsum based stuff that cracks under the weight of a rolling suitcase.
Why metal Z bars fail in high traffic areas
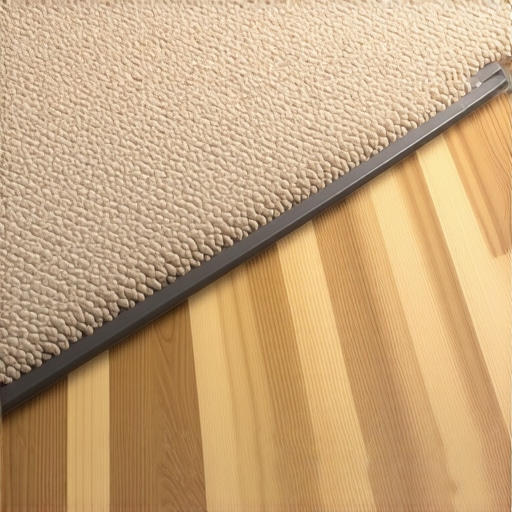
Standard metal Z bars are the industry default because they are cheap and fast to install during a standard carpet install project. However, they are a structural liability because they rely on a thin piece of aluminum to hold back the tension of a power stretched carpet. Over time, the metal fatigues. The teeth lose their grip. The carpet starts to pull away, leaving a gap where the subfloor is exposed. This gap is a magnet for dust and a trap for high heels. Instead of a Z bar, I always advocate for a transition strip that is mechanically fastened to the subfloor with concrete screws or ring shank nails. You want a transition that can withstand the lateral force of someone pivoting on their heel. The chemistry of the adhesive also matters here. If you are gluing down a transition to a slab, you need a moisture cured polyurethane. Anything less will fail the first time the humidity spikes in the summer.
The physics of the tack strip and the tuck
Tack strips are not just pieces of wood with nails; they are the anchors for the entire tensioned system of a room. When transitioning to tile, the distance between the edge of the tile and the tack strip should be exactly the thickness of the carpet when compressed. If the gap is too wide, the carpet will sag into a trench. If it is too narrow, you will never get the carpet to tuck properly. You want a clean, rolled edge that hides the cut fibers. This requires a professional carpet tucker or a wide bladed chisel. I have seen guys try to do this with a screwdriver and they always end up chipping the edge of the tile. Once the tile is chipped, the whole aesthetic is shot. You are looking for a mechanical lock where the carpet pile sits slightly higher than the tile edge to allow for natural compression when stepped upon.
“Success in any tile installation begins with a substrate that is flat within 1/8 inch over 10 feet.” – TCNA Handbook Standards
A technical comparison of transition methods
| Method | Height Tolerance | Durability | Required Tools |
|---|---|---|---|
| Z-Bar Tuck | Low | Medium | Stair Tool, Power Stretcher |
| Schluter-RENO | High | High | Wet Saw, Thin-set Trowel |
| Hardwood Reducer | High | Maximum | Miter Saw, Floor Adhesive |
| Shim and Ramp | Extreme | High | Self-Leveler, Straight Edge |
The 1/8 inch that ruins everything
Precision in flooring is measured in fractions of an inch that most homeowners ignore until they hear a squeak or feel a bump. If your tile thin-set bed is inconsistent, your tile will have lippage. Lippage at a transition is a disaster. If one tile sits 1/16 of an inch higher than its neighbor at the carpet line, that sharp edge will shred the carpet fibers over time. I always use a leveling system with clips and wedges even on small transition strips. It ensures the entire edge is a monolithic plane. When you are dealing with laminate or other floating floors, the problem is even more complex because you have to account for expansion gaps. You cannot simply butt laminate against tile. You need a T-molding or a reducer that allows the laminate to slide underneath. If you pin a floating floor at the transition, it will buckle in the middle of the room as soon as the heater turns on. I have fixed dozens of floors where the installer used a finishing nail to hold a transition strip through the laminate and into the subfloor. It is a rookie mistake that costs thousands in repairs.
The chemistry of modified thin set and bond strength
When you are setting the final row of tile that meets a carpeted area, the bond strength is paramount. This tile will take the most abuse. People step on it harder because it is a change in surface. I use a high polymer modified thin-set that has a high shear strength. This ensures that the tile does not de-bond from the subfloor when the carpet installer starts kicking their power stretcher against the transition. I have seen tiles pop right off the floor because the carpet guy was too aggressive and the tile guy used cheap, unmodified mud. You need a chemical bond that penetrates the pores of the concrete or the wood subfloor. This is why I always prime the subfloor before the thin-set goes down. It stops the subfloor from sucking the moisture out of the mortar too fast, which leads to a weak, brittle bond.
The professional transition checklist
- Verify subfloor flatness using a 10 foot straight edge.
- Apply floor leveling compound to eliminate vertical offsets.
- Choose a transition strip that matches the traffic load of the room.
- Check the moisture content of the subfloor with a pin meter.
- Use a power stretcher to ensure the carpet does not ripple over time.
- Seal the tile grout at the transition to prevent moisture from reaching the carpet pad.
- Install a moisture barrier if the transition is on a concrete slab.
The regional reality of humidity and expansion
In humid climates, the moisture vapor transmission through a concrete slab can be significant. This moisture often collects right at the transition point where the carpet pad meets the tile. If you do not have a proper vapor barrier, the carpet pad will act like a sponge. It will hold that moisture against the back of the carpet and eventually lead to mold or that funky basement smell. This is especially true near showers or laundry rooms. When I work in coastal areas, I always use a synthetic pad near transitions instead of a rubber or foam pad. Synthetic fibers do not rot. You also have to consider the expansion of the subfloor itself. Wood subfloors move with the seasons. If you are transitioning from a large tile area to a carpeted hallway, you need to ensure the subfloor is properly blocked from underneath to prevent the vertical movement that causes transitions to squeak. It is about building a system that can move without failing. This is not just flooring. This is engineering on a domestic scale.